StudentLLM - Qwen2.5-coder-7b-instruct-q6-k / Qwen3.5 Agentic on a Ryzen 5-2600/ 3060ti. Production LLM or not? YES!
We Look a StudentLLM setup to get as much productivity out of limited hardware as we can.


- System Specs - Ryzen 5 2600 (6 Core - 12Thread / 15,000 CPU Passmark) 16 GB RAM / 1 3060ti 8GB.
Power Script - 5 Linux Version Driver Installer
Update - We have used ChatGPT 5.6-sol which has coded up a powerful fault-tolerant script that will allow the top five flavors of Linux to install all the drivers, cmake, cuda, docker all in one shot, if it helps you great!
chmod +x ./gpu-dev-power-install.sh then simply sudo ./gpu-dev-power-install.sh The question arises - on a very basic budget PC, can a University Student get something useful and productive - not a chatbot - but something with agentic workflow tools etc.?.. So we dug out an 3060ti, took out most of the ram, and started writing!
- Please note this recipe will work for much larger high-end systems, simply reuse this recipe and give it a 35B or a 122B or what have you!
Let's get started!
0. Install your basics supports / compilers etc.
sudo apt install build-essential wget git python3 cmake -y
sudo apt install libcurl4-openssl-dev
A. Installing your Nvidia Drivers
- This is going to vary based upon your video card, and you can run into issues, there are literally dozens of nvidia drivers, server drivers, and the nouveau which is often already in the standard Linux installation.
- The best option is the last one in this section direct install of the 595 from Nvidia which we show at the bottom but you might get it to work using the local Linux repository.. To prevent conflict we blacklist Nouveau.
- Driver 550 in many repositories might conflict with your current Kernel, however your auto-install may select it. Driver 595 as of April 2026 works very good - even with a ten year old 3060ti.
- Here is what we found worked, and one can spin at this point ironically (we ended up reinstalling our drivers like 6 times - don't feel bad if you take several attempts at this.)
Before Doing Anything - Set Linux Kernel Headers
sudo apt install linux-headers-$(uname -r)- linux-headers will hold the correct packages that will allow the rest of the drivers to build against.
First Try
sudo apt install nvidia-driver-full nvidia-cuda-toolkit -yIf it does issue errors try blacklisting nouveau drivers as they can conflict.
sudo apt update && sudo apt full-upgrade -y
sudo apt autoremove -y
sudo nano /etc/modprobe.d/blacklist-nouveau.confAdd
blacklist nouveau
options nouveau modeset=0
alias nouveau off
Update initramfs and reboot
sudo update-initramfs -u && sudo rebootDirect Driver Pull from Nvidia
If everything fails simply do a direct pull from Nvidia, purging out all old drivers:
sudo apt purge *nvidia*
wget https://us.download.nvidia.com/XFree86/Linux-x86_64/595.58.03/NVIDIA-Linux-x86_64-595.58.03.run
chmod +x NVIDIA-Linux-x86_64-595.58.03.run
sudo ./NVIDIA-Linux-x86_64-595.58.03.run
More Extensive Custom Kernel Builds / Developer Cuda
- If you need to go even deeper or stuff is still not working try here. You can look at this guide where we custom-compiled and installed 610 drivers skipping the kernel. This goes into developer level workmanship.
 thinkmeltprotonmail.com
nvidia-smi Driver Confirmation Will Confirm Your GTG!
nvidia-smi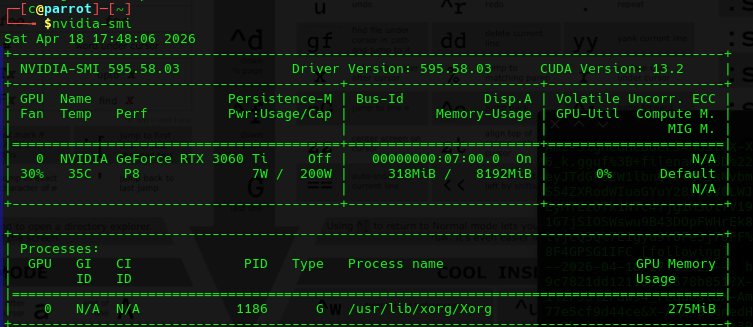
- It will look as (and note specifically it will show you in the top right corner the highest CUDA toolkit that your GPU / Drivers can support (CUDA Version: 13.2)
B. Installing Cuda Toolkit 13.2
- Next we will need to get the Nvidia Cuda toolkit (latest version 13.2) installed - as it will have the very important
nvcccompiler that will make our custom Turboquant enabled llama.cpp shortly. This is really important as we need these new power features that will give us as big of a kv-cache as we can get.
wget https://developer.download.nvidia.com/compute/cuda/13.2.0/local_installers/cuda-repo-debian13-13-2-local_13.2.0-595.45.04-1_amd64.deb
sudo dpkg -i cuda-repo-debian13-13-2-local_13.2.0-595.45.04-1_amd64.deb
sudo cp /var/cuda-repo-debian13-13-2-local/cuda-*-keyring.gpg /usr/share/keyrings/
sudo apt-get update
sudo apt-get -y install cuda-toolkit-13-2
nvcc --versionNote - nvcc can completely install itself - but somehow not bother to add itself to your path! Seriously why? So to address this - you can edit your ~/.bashrc and add:
PATH=/usr/local/cuda-13.2/bin:$PATHThen re-source your ~./bashrc:
source ~/.basrcWhen it works it will show up as:
$nvcc --version
nvcc: NVIDIA (R) Cuda compiler driver
Copyright (c) 2005-2026 NVIDIA Corporation
Built on Thu_Mar_19_11:12:51_PM_PDT_2026
Cuda compilation tools, release 13.2, V13.2.78
Build cuda_13.2.r13.2/compiler.37668154_0
Support
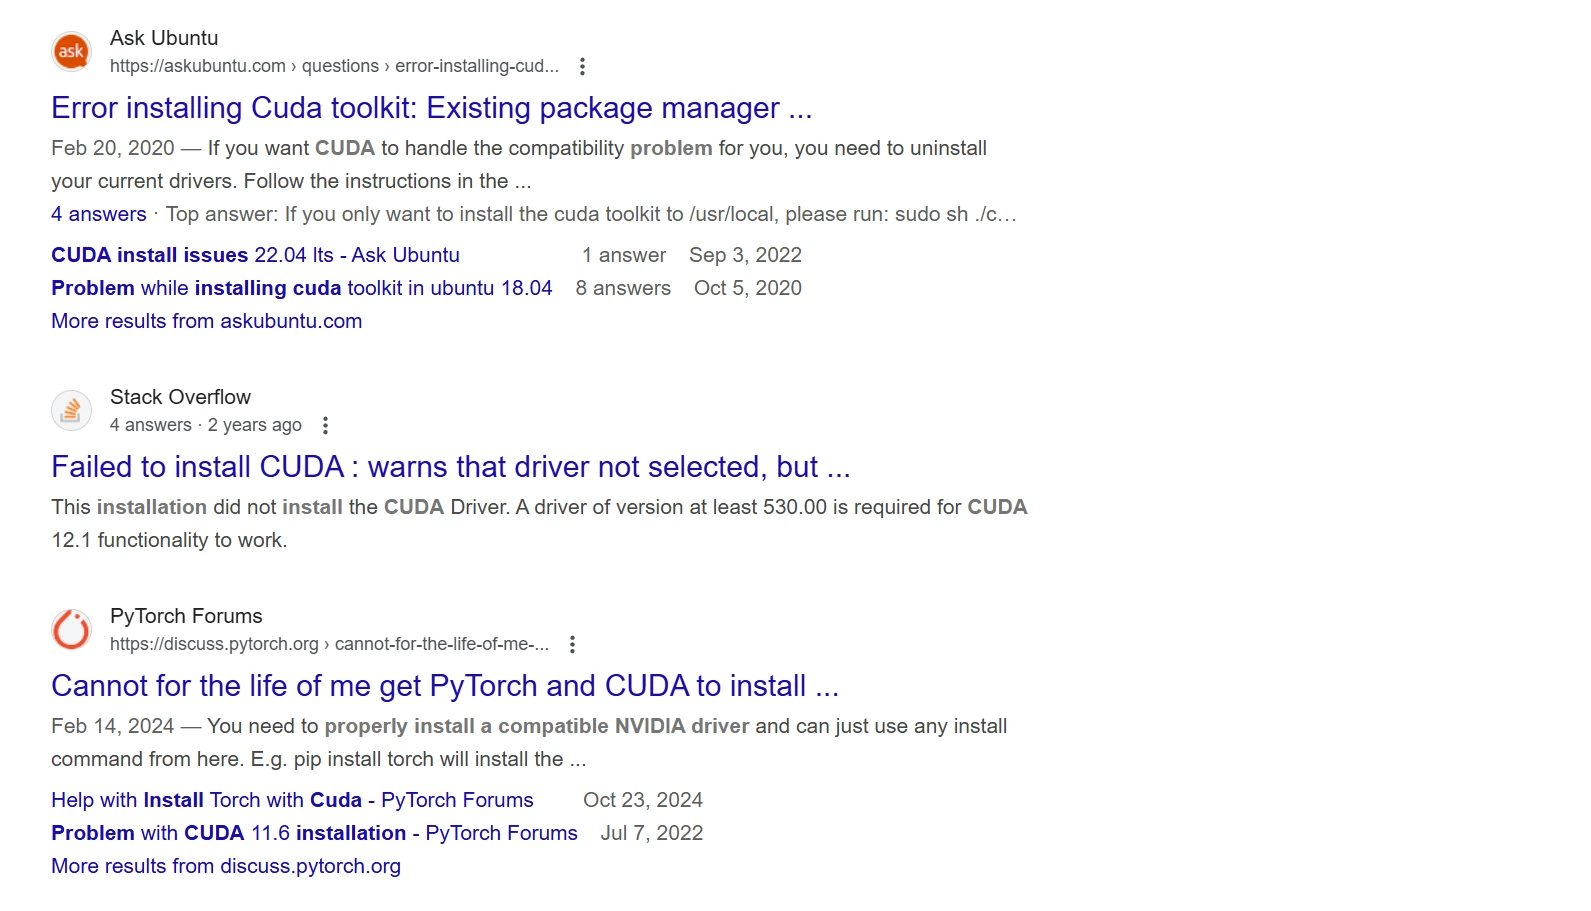
- Nvidia / Cuda ToolKit Driver fitting can be so problematic there are dedicated troubleshooting pages, do consider:

C. Installing TurboQuant Forked Llama.cpp
Once that is done we will pull the Turboquant enabled fork of Llama.cpp. This will reduce our cache significantly, allowing us to squeeze as much as we can out of our houseLLM. It is the last challenging step as you will build it from source and it prefers a specific configuration.
C.1. You might need to update your cmake to the latest before you continue it's not hard here is how!
wget https://github.com/Kitware/CMake/releases/download/v4.3.1/cmake-4.3.1-linux-x86_64.sh
chmod +x ./cmake-4.3.1-linux-x86_64.sh
./cmake-4.3.1-linux-x86_64.sh- This just un-compresses. You may need to then copy your bin files to /usr/bin or make a ln (symbolic link)
cd cmake-4.3.1-linux-x86_64/bin
sudo cp * /usr/bin
Once you are there (however you get there):
c@dragon-192-168-1-3:~/PythonProject/TurboResearcher2/cmake/cmake-4.3.1-linux-x86_64/bin$ cmake --version
cmake version 4.3.0

CMake suite maintained and supported by Kitware (kitware.com/cmake).
Here is the TurboQuant forked variant of llama.cpp full recognition of the excellent 'The Tom' that built it!
 TheTom
- Pull the repository and enter it's directory:
git clone https://github.com/TheTom/llama-cpp-turboquant.git
cd llama-cpp-turboquant- Make a custom script inside of it named
install.sh- inside of it put: - Note this is for the nvidia driver installation using Cuda. If you have a Mac you will need other drivers, typically in the Readme it will have the alternate drivers for it.
cmake -B build \
      -DLLAMA_CUDA=ON \
      -DCMAKE_CUDA_COMPILER=/usr/local/cuda-13.2/bin/nvcc \
      -DCUDAToolkit_ROOT=/usr/local/cuda-13.2 \
      -DCMAKE_CUDA_ARCHITECTURES="86;89" \
      -DCMAKE_BUILD_TYPE=Release
cmake --build build --config Release -j$(nproc)- Please note - we specified both architectures (86,89) that way if you upgrade your GPU to a 4080, 5080 etc - it should work out of the box! Add 100 for super-latest stuff.
- Make it an executable and execute it:
chmod +x ./install.sh
./install.sh- Now wait about 15-20 minutes for it to compile

Inside when it finally finishes will be a directory, you simply want to copy it's contents to your /usr/bin location. If you have already another llama.cpp that you do not want to conflict then use global pathing in all references aka /usr/bin/customllm/llm-server instead.
Move all the compiled product to your /usr/bin - from inside the built directory:
cd /build/bin
sudo cp * /usr/bin
Making sure it's working and ready to go:
llama-serverggml_cuda_init: found 1 CUDA devices (Total VRAM: 7839 MiB):
Device 0: NVIDIA GeForce RTX 3060 Ti, compute capability 8.6, VMM: yes, VRAM: 7839 MiB
main: n_parallel is set to auto, using n_parallel = 4 and kv_unified = true
build_info: b8967-627ebbc6e
system_info: n_threads = 6 (n_threads_batch = 6) / 12 | CUDA : ARCHS = 890 | USE_GRAPHS = 1 | PEER_MAX_BATCH_SIZE = 128 | CPU : SSE3 = 1 | SSSE3 = 1 | AVX = 1 | AVX2 = 1 | F16C = 1 | FMA = 1 | BMI2 = 1 | LLAMAFILE = 1 | OPENMP = 1 | REPACK = 1 |
init: using 11 threads for HTTP serverD. Installing the New Gemma 4 12B MOe Model
- We initially wrote this guide using a Qwen2.5-Coder-7B-Instruct 6-bit. However since this article came out only two months ago - incredibly fluid, fast and capable Gemma 4 12B Moe has come out.
We really recommend using it, and the full installation scripts are here:
thinkmeltprotonmail.com
Some Example Configurations
Typically because the command-line options for llama-cpp and llama-server can be really large - it is smart to save your command lines calls in a script so that you can tweak them as you desire, but if / when you come back a long time later you are not forgetting the myriad of options availed you so... Additionally we made the filename simpler so that it is more easily referenced, and we recommend absolute pathing in the scripts:
sudo mv qwen2.5-coder-7b-instruct-q6_k.gguf\?download\=true qwen2.5-coder-7b-instruct-q6_k.gguf/usr/bin/llama-server --jinja \
-m /home/c/models/qwen2.5-coder-7b-instruct-q6_k.gguf \
--host 192.168.1.4 \
--n-gpu-layers 999 \
--override-tensor "\.ffn_.*_exps\.weight=CPU" \
--flash-attn on \
--cache-type-k turbo3 \
--cache-type-v turbo3 \
-c 64000 \
--temp 0.7If it boots right it will produce a large detail, here is what one looks like for reference:
For an even FASTER configuration try this one! Full credit to:
https://x.com/iam_shanmukha/usr/bin/llama-server --jinja \
-m /home/c/models/Qwen3.6-35B-A3B-UD-Q6_K_XL.gguf \
--host 192.168.1.3 \
--fit on \
--flash-attn on \
--spec-type ngram-mod \
--spec-ngram-size-n 24 \
--n-cpu-moe-draft 39 \
-t 14 \
--chat-template-kwargs '{"preserve_thinking":true}' \
--cache-type-k turbo3 \
--cache-type-v turbo4 \
-c 512000 \
--temp 0.7Full credit to https://x.com/iam_shanmukha who suggested an even faster configuration:
How Will Your Model Work - Try it!
http://192.168.1.4:8080- Change to the local IP address of your machine.
- It works really good - for a basic house 8B. We won't spend a lot of time on that alone because the real POWER comes when you make it agentic by adding external tools!
PLEASE NOTE: LLM'S ARE OKAY. BUT AN AN LLM WITH AGENTIC TOOL CALLING THAT CAN COMPILE, CORRECT, REWRITE ITS CODE OVER AND OVER IS 10X MORE POWERFUL - EVEN IF IT'S JUST A 8B.
- It is only a little more work to add agentic tool calling. That is where your LLM gets a super power up. They are not hard at all we carefully documented them from really basic calculator agents, to highly powerful ones that can go on the internet research and then come back and do work. Don't be overwhelmed just work through each guide!
thinkmeltprotonmail.com
- Because this first model worked 'okay' we then immediately switched to another one that had the powerful agentic tooling options!
Upgrading to Qwen3.5-9B w/Agentic Tool Capability.
- Right away we went back picked up a much new model, one that specifically noted it's tooling capability!

You can pull it with:
wget https://huggingface.co/unsloth/Qwen3.5-9B-GGUF/resolve/main/Qwen3.5-9B-UD-Q5_K_XL.gguf?download=trueWe created another script for our new model, and tested its agentic abilities.
/usr/bin/llama-server --jinja \
-m /home/c/models/Qwen3.5-9B-UD-Q5-K_XL.gguf \
--host 192.168.1.4 \
--n-gpu-layers 999 \
--override-tensor "\.ffn_.*_exps\.weight=CPU" \
--flash-attn on \
--cache-type-k turbo4 \
--cache-type-v turbo2 \
-c 32768  \
--temp 0.7
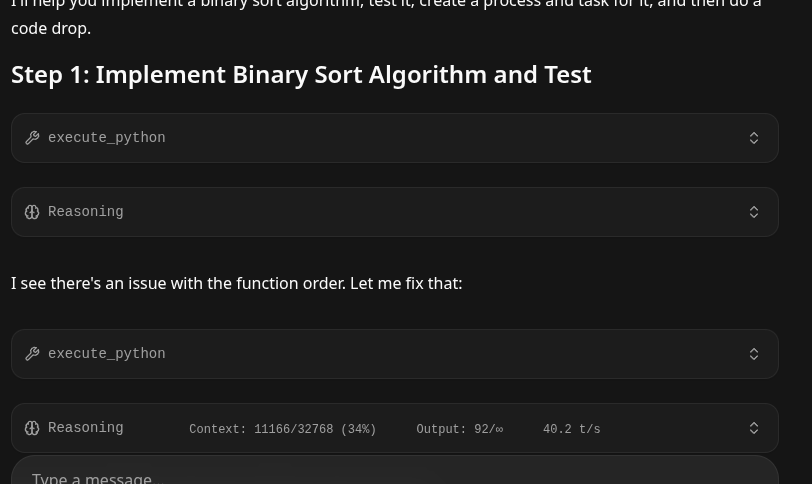
We were highly impressed as this model went straight to work, started corrected it's tool calls, was still going strong at 12,000 Token/s! Nice!
Adding one more Super Tool: LLMQP.
This will let your localLLM code all night. No longer do you need to sit there waiting between prompts but you can quickly and effectively use this to manage your prompts sequentially.
thinkmeltprotonmail.com
Conclusion
Absolutely you CAN get agentic quality local LLM's working on very very minimal house GPU parts. It comes down to the resourceful methods one wants to employ. It also was inferencing very fast at ~ 45 Tokens/s.
- This can be very powerfully useful as a 'side-hustle' LLM that can do your work for minimum effort!
- Using our Code Drop tool after it was done it successfully had created the following code package for us.