Understanding the Linux File System, MBRs, UEFI, ext4 - A Primer Guide
We go over the power of the Linux f ile system, how it works, how to configure it, how to activate partitions, setting up Volume Groups, setting up BIOS etc..


You might want to bookmark this page, because few Linux file system guides will explain it at this thorough and basic foundational level. But by doing this you can actually really understand what is occurring in a Linux system within its partitions.
To understand why things are as they are we need to look at the computer ecosystem itself.
- Older systems used MBR partitioning. It was limited to 4 partitions and 2 TB disk size. It does not utilize the UEFI (GPT) labelling such as 16E7FAC2-2F8C-45DB-AC18-25B255150A18.
- Linux is mad powerful. We are talking industrial grade RAID-10 right out of the box without extensive commercial licenses, all free, just learn how to use it!
- UEFI stands for Unified Extensible Firmware Interface.
- UUID stands for Universally Unique Identifier
- The Non-UEFI MBR partitioning scheme uses 32-bit addressing (hence 2 TB Limits)
- UEFI schemes use the GPT partition table system and uses 64-bit addressing. They can also support network booting.
- Typically today you enable UEFI in your bios. Newer systems support it adhoc and give you no other options.
- Linux will install a /boot/efi FAT32 partition typically 300MB as the first partition for UEFI compatibility, and add an optional linux-swap.
Part A: Basic Partitioning and UUID Understanding
Inside linux you can visually inspect your paritions with gparted:
sudo apt install gparted -y
sudo gparted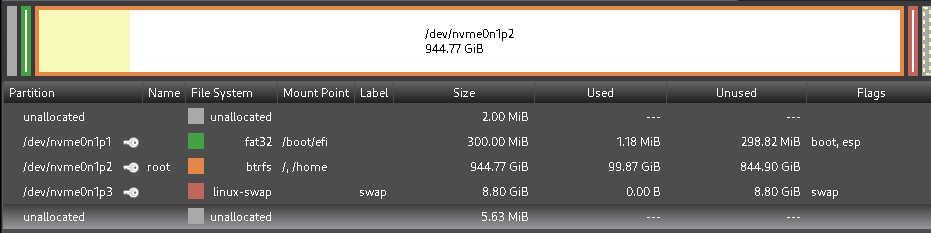
You will also be able to see this from the command line:
- lsblk means 'list bulk devices'
sudo lsblksda 8:0 0 931.5G 0 disk
├─sda1 8:1 0 922.7G 0 part
└─sda2 8:2 0 8.8G 0 part
sdb 8:16 0 119.2G 0 disk
├─sdb1 8:17 0 110.4G 0 part /home
│ /
└─sdb2 8:18 0 8.8G 0 part [SWAP]
- We can see all the physical drives, (sda, sdb) This is a system with two hard drives.
- The partitions are listed underneath namely (sda1, sda2 .. etc)
- '/' is your 'root' parition or 'root frame-of-reference' everything is mounted under that.
- We can inspect the physical drives with bkid;
sudo blkid --probe /dev/sdaWe will see:
c@parrot 192.168.1.4 [~] $ sudo blkid --probe /dev/sda
/dev/sda: PTUUID="74794bd6" PTTYPE="dos"
- /dev/sda, PTUUID (Partition Table Unique ID) is 74794bd6. PTTYPE (Partition Table Type) is "dos"
- This is important making a DOS compatible partition table will make your hard drive compatible with pre-UEFI systems.
We can then inspect the partitions inside, note:
- Even thought sda1 is shown as a 'sub-fork' of sda, you reference it as '/dev/sda1' NOT '/dev/sda/sda1' This is a common mistake.
Looking at /dev/sdb:
sudo bulkid --probe /dev/sdbc@parrot 192.168.1.4 [~] $ sudo blkid --probe /dev/sdb
/dev/sdb: PTUUID="5fbe8a2e" PTTYPE="dos"
- We look at /dev/sdb1 as it holds the root mount point : '/'
sudo blkid --probe /dev/sdb1We will see:
c@parrot 192.168.1.4 [~] $ sudo blkid --probe /dev/sdb1
/dev/sdb1: UUID="f36d35d6-a57c-4e5d-90c3-3c955d6a1691" UUID_SUB="b4221676-fe66-4452-953a-c1f1013222dc" BLOCK_SIZE="4096" TYPE="btrfs" USAGE="filesystem" PART_ENTRY_SCHEME="dos" PART_ENTRY_UUID="5fbe8a2e-01" PART_ENTRY_TYPE="0x83" PART_ENTRY_FLAGS="0x80" PART_ENTRY_NUMBER="1" PART_ENTRY_OFFSET="2048" PART_ENTRY_SIZE="231610804" PART_ENTRY_DISK="8:16"- We can see that - PART_ENTRY_UUID is a subset of the PTTYPE from above '5fbe8a2e-01'
How the system specifies mount points at boot time is kept in a record at /etc/fstab. If you 'cat' it (dump to screen) it's contents you will see:
sudo cat /etc/fstabYou will see:
# <file system> <mount point> <type> <options> <dump> <pass>
UUID=f36d35d6-a57c-4e5d-90c3-3c955d6a1691 / btrfs subvol=/@,defaults,noatime,autodefrag,compress=zstd,discard,compress=lzo 0 0
UUID=f36d35d6-a57c-4e5d-90c3-3c955d6a1691 /home btrfs subvol=/@home,defaults,noatime,autodefrag,compress=zstd,discard,compress=lzo 0 0
UUID=709be9a5-223c-464c-94b4-a20c2506fe37 swap swap defaults,noatime,discard 0 0
tmpfs /tmp tmpfs defaults,noatime,mode=1777 0 0
- We can see that they match, namely 'f36d35d6..' matches the blkid --probe /dev/sdb1.
- btrfs stands for 'B-Tree FileSystem' an advanced filesystem that can support native compression etc.
Part B: Understand Linux Partitioning Power and Configurability.
- Recall that we used a 'dos' type partitioning table to maintain compatibility with non-UEFI, and windows systems:
/dev/sdb: PTUUID="5fbe8a2e" PTTYPE="dos"- However after this point Linux's true power can come out. Consider the following partial lsblk dump:
sdc 8:32 0 111.8G 0 disk
It has no partitions! However what gets interesting is partitions are optional! We can fully do this:
c@parrot 192.168.1.4 [~] $ sudo mkfs.ext4 /dev/sdc
mke2fs 1.47.2 (1-Jan-2025)
/dev/sdc contains a ext4 file system
last mounted on Mon Dec 22 11:55:49 2025
Proceed anyway? (y,N) Y
Discarding device blocks: done
Creating filesystem with 29305206 4k blocks and 7331840 inodes
Filesystem UUID: 970602c5-720a-4963-af49-72ed58fa959d
Superblock backups stored on blocks:
32768, 98304, 163840, 229376, 294912, 819200, 884736, 1605632, 2654208,
4096000, 7962624, 11239424, 20480000, 23887872
Allocating group tables: done
Writing inode tables: done
Creating journal (131072 blocks): done
Writing superblocks and filesystem accounting information: done
c@parrot 192.168.1.4 [~] $ - We have just formatted the raw physical platter and completely skipped the partition table!
- mkfs (make filesystem) .ext4 (extended 4 filesystem)
When we examine this inside fdisk (linux partition manager) we will see the partition dump as:
Device does not contain a recognized partition table.
Created a new DOS (MBR) disklabel with disk identifier 0x43e663b3.
Command (m for help): p
Disk /dev/sdc: 111.79 GiB, 120034123776 bytes, 234441648 sectors
Disk model: YongzhenWeiye
Units: sectors of 1 * 512 = 512 bytes
Sector size (logical/physical): 512 bytes / 4096 bytes
I/O size (minimum/optimal): 4096 bytes / 4096 bytes
Disklabel type: dos
Disk identifier: 0x43e663b3
We can now add a GPT partition when we access the help:
Create a new label
g create a new empty GPT partition table
G create a new empty SGI (IRIX) partition table
o create a new empty MBR (DOS) partition table
s create a new empty Sun partition table
Command (m for help): g
Created a new GPT disklabel (GUID: 833C493A-B89D-284C-81B1-BA4BD36BDEDD).
The device contains 'ext4' signature and it will be removed by a write command. See fdisk(8) man page and --wipe option for more details.
Command (m for help): w
The partition table has been altered.
Calling ioctl() to re-read partition table.
Syncing disks.
- Once we have setup a partition table to a disk we pretty much must used fdisk to make partitions inside of it:
- If one types 'n' and hits enter a few times you will get a default Linux partition:
Command (m for help): n
Partition number (1-128, default 1): 1
First sector (2048-234441614, default 2048):
Last sector, +/-sectors or +/-size{K,M,G,T,P} (2048-234441614, default 234440703):
Created a new partition 1 of type 'Linux filesystem' and of size 111.8 GiB.
- Remember to type 'w' to save this:
- We can now see it in the lsblk table:
NAME MAJ:MIN RM SIZE RO TYPE MOUNTPOINTS
sda      8:0    0 931.5G  0 disk
├─sda1   8:1    0 922.7G  0 part
└─sda2   8:2    0   8.8G  0 part
sdb      8:16   0 119.2G  0 disk
├─sdb1   8:17   0 110.4G  0 part /home
│                                /
└─sdb2   8:18   0   8.8G  0 part [SWAP]
sdc 8:32 0 111.8G 0 disk
└─sdc1 8:33 0 111.8G 0 part
sdd 8:48 0 931.5G 0 disk
├─sdd1 8:49 0 512M 0 part
└─sdd2 8:50 0 931G 0 part
sr0 11:0 1 1024M 0 rom
- We used fdisk to remove the partitions / partition tables.
Please note: /dev/sdc1 is not formatted. You will still need to do:
sudo mkfs.ext4 /dev/sdc1You will see:
c@parrot 192.168.1.4 [~] $ sudo mkfs.ext4 /dev/sdc1
mke2fs 1.47.2 (1-Jan-2025)
Discarding device blocks: done
Creating filesystem with 29304832 4k blocks and 7331840 inodes
Filesystem UUID: ede3fe7f-7382-4d99-99ed-ecc06e402eae
Superblock backups stored on blocks:
	32768, 98304, 163840, 229376, 294912, 819200, 884736, 1605632, 2654208,
	4096000, 7962624, 11239424, 20480000, 23887872

Allocating group tables: done
Writing inode tables: done
Creating journal (131072 blocks): done
Writing superblocks and filesystem accounting information: done
Part C: Mounting Partitions
- Linux is not constrained to 'C:' and a physical drive (/dev/sda) or it's parititon (/dev/sda1) can be mounted anywhere it is not already mounted:
- Consider the following mounting example:
mount -t auto /dev/sdc1 sdc1
We can now see on our lsblk it's mount points:
sda      8:0    0 931.5G  0 disk
├─sda1   8:1    0 922.7G  0 part
└─sda2   8:2    0   8.8G  0 part
sdb      8:16   0 119.2G  0 disk
├─sdb1   8:17   0 110.4G  0 part /home
│                                /
└─sdb2   8:18   0   8.8G  0 part [SWAP]
sdc      8:32   0 111.8G  0 disk
└─sdc1   8:33   0 111.8G  0 part /home/c/sdc1
sdd      8:48   0 931.5G  0 disk
├─sdd1   8:49   0   512M  0 part
└─sdd2   8:50   0   931G  0 part
sr0     11:0    1  1024M  0 rom
And we can then umount it with:
sudo umount /dev/sdc1     # or
sudo umount /home/c/sdc1 - You can specify the mount point (/home/c/sdc1) or the device (/dev/sdc1)
Part D. Ownership Permissions
If you looked at the drive before and after mouting you will see some interesting things.
Before mounting:
c c (User 'c' / Group 'c') for simplicity sake.drwxr-xr-x 1 c c 0 Dec 22 11:36 sda1
drwxr-xr-x 1 c c 0 Dec 22 11:08 sdc
drwxr-xr-x 1 c c 0 Dec 22 14:06 sdc1
drwx------ 1 c c 22 Jul 2 10:46 Templates
After mounting:
drwxr-xr-x 1 c    c       0 Nov 28 19:22 Public
drwxr-xr-x 1 c    c       0 Dec 22 11:36 sda1
drwxr-xr-x 1 c    c       0 Dec 22 11:08 sdc
drwxr-xr-x 3 root root 4096 Dec 22 14:07 sdc1
drwx------ 1 c    c      22 Jul  2 10:46 Templates
- Ownership has changed to 'root'
Changing ownership of the entire mounted point becomes:
sudo chown -R c:c sdc1
sudo umount /dev/sdc1
sudo mount -t auto /dev/sdc1 sdc1- This is persistent, it will come back at the remount point.
It should be understood that we have effectivelly 'mounted a filesystem inside a filesystem'
- When we called mkfs.ext4 it automatcally gave ownership to 'root' and once we changed it with 'chown' Change Ownership -R (recursive) to user 'c' group 'c' it was permanent.
Part E: 'chkdsk' and Disk Health Management in Linux
Once you get the hang of partitions, disks/ their block and partition references, it is always a good idea to scan the disk and mark off any bad sectors.
- SATA Disks typically use a manual process to mark off bad sectors.
- SSD / NVMe disks automatically will mark off back sectors of a disk from their firmware and this is not recommended.
lsblk -o NAME,TYPE,SIZE,MODEL,TRAN- Explanation of output columns:
- NAME: Device name (e.g., sda, nvme0n1).
- TRAN: Transport type (this is the key column):
- sata → SATA drive (HDD or SSD).
- nvme → NVMe drive.
- usb → USB-attached drive.
- ata → Also SATA (some older systems may show this instead of sata).
- MODEL: Drive model name.
Example output:
[sudo] password for c:
NAME   TYPE   SIZE MODEL                     TRAN
sda    disk 931.5G HGST HTS721010A9E630      sata
├─sda1 part 922.7G
└─sda2 part   8.8G
sdb    disk 119.2G TOSHIBA THNSNJ128G8NU     sata
├─sdb1 part 110.4G
└─sdb2 part   8.8G
sdc    disk 111.8G Samsung SSD 840 EVO 120GB usb
└─sdc1 part 111.8G
sdd    disk 931.5G ST1000LM024 HN-M101MBB    usb
├─sdd1 part   512M
└─sdd2 part   931G
sr0    rom   1024M HL-DT-ST DVDRAM GUB0N     sata
- Naturally you can google the device to get it's characteristics
We can then use smartctl and badblocks to handle SATA management (make sure it is not mounted)
sudo smartctl -H /dev/sdbWill produce an output as:
c@parrot 192.168.1.4 [~] $ sudo smartctl -H /dev/sdb
smartctl 7.4 2023-08-01 r5530 [x86_64-linux-6.12.32-amd64] (local build)
Copyright (C) 2002-23, Bruce Allen, Christian Franke, www.smartmontools.org

=== START OF READ SMART DATA SECTION ===
SMART overall-health self-assessment test result: PASSED
Please note the following marginal Attributes:
ID# ATTRIBUTE_NAME          FLAG     VALUE WORST THRESH TYPE      UPDATED  WHEN_FAILED RAW_VALUE
194 Temperature_Celsius     0x0023   063   018   020    Pre-fail  Always   In_the_past 37 (Min/Max -11/82)
And we can scan / repair it with -n
- Note if you use -w that is a destructive test. (destroyes existing data on disk)
- Note if you use -n that is a non-destructive test. (keeps existing data on disk)
sudo badblocks -n -s /dev/sdc
Part F: LVM (Logical Volume Management)
Above all disk management we now look at a the LVM framework. It is installed with:
sudo apt install lvm2 -y- It is the power that allows you to make striped, RAID5, RAID 1,0, RAID 10 type builds in a system.
- Only Logical Volumes are listed in your /etc/fstab.
There are three levels to understand:
- PV : Physical Volumes LEVEL 1 (base layer - built off of /dev/sdc or /dev/sdc1 partitions)
- Cannot be mounted (at all) it is a frame-of-reference only for Volume Groups.
- You cannot make multiple PV's to a single partition. If you need multiple PV's make multiple partitions under it. aka make /dev/sda1, /dev/sda2.. etc
- You can force an entire disk to a physical volume and wipe it's partition table out directly mapping /dev/sda ..
- Can be defined to either the entire disk /dev/sda or a partition inside of it /dev/sda1..
- VG: Volume Group LEVEL 2 (One or MORE Physical Volumes)
- Cannot be mounted (at all) it is a frame-of-reference that allows Logical Volumes to be defined.
- LV: Logical Volume LEVEL 3 (Only ONE Volume Group can be referenced by a Logical Volume)
- Multiple LV (Logical Volumes) can be defined. Forinstance if your Volume Group has 4 PV's (Physical Volumes) you can define two RAID 10's to the same VG!
- Logical Volumes are listed in your /etc/fstab. ONLY LV's are listed in fstab.
Before one gets started it requires some planning and thought. Pretend you wanted to make an 'artificial RAID5' that requires 3 PV's (Physical Volumes) but only have a single disk, and want to make a 'pseudo-RAID5' - it can be done, but then it is upon you to use fdisk to make 3 partitions beneath it first! Then those 3 partitions become 3 PV's, and those 3PV's become 1 VG (Volume Group) and the LV (Logical Volume) will check to see that the VG has 3 members!
Part G(a): LVM Construction WalkThrough:
We will start with the following lsblk example:
sda      8:0    0 931.5G  0 disk
sdb      8:16   0 119.2G  0 disk
├─sdb1   8:17   0 110.4G  0 part /home
│                                /
└─sdb2   8:18   0   8.8G  0 part [SWAP]
sdc      8:32   0 111.8G  0 disk
sdd      8:48   0 931.5G  0 disk
sr0     11:0    1  1024M  0 rom
We want to use /dev/sda and /dev/sdc and make a basic LVM. (2 TB from 1 TB)
sudo pvcreate /dev/sda
sudo pvcreate /dev/sdd
It should be noted that the 'dos signature' or 'dos boot record' is wiped because we are working with the root whole disks
c@parrot 192.168.1.4 [~] $ sudo pvcreate /dev/sda
WARNING: dos signature detected on /dev/sda at offset 510. Wipe it? [y/n]: y
  Wiping dos signature on /dev/sda.
  Physical volume "/dev/sda" successfully created.
It should be noted that 'fragments' of a partition table can exist, and you may have to wipe it at a higher level as in:
sudo wipefs -a /dev/sddc@parrot 192.168.1.4 [~] $ sudo wipefs -a /dev/sdd
/dev/sdd: 8 bytes were erased at offset 0x00000200 (gpt): 45 46 49 20 50 41 52 54
/dev/sdd: 8 bytes were erased at offset 0xe8e0db5e00 (gpt): 45 46 49 20 50 41 52 54
/dev/sdd: 2 bytes were erased at offset 0x000001fe (PMBR): 55 aa
/dev/sdd: calling ioctl to re-read partition table: Success
After this point it should finally create the physical volume:
c@parrot 192.168.1.4 [~] $ sudo pvcreate /dev/sdd
  Physical volume "/dev/sdd" successfully created.
Viewing the Physical volumes:
sudo pvsc@parrot 192.168.1.4 [~] $ sudo pvs
PV VG Fmt Attr PSize PFree
/dev/sda lvm2 --- 931.51g 931.51g
/dev/sdd lvm2 --- 931.51g 931.51g
Part G(b): Making the Volume Groups.
- We can now start making the volume groups:
sudo vgcreate vg_a /dev/sda /dev/sddWhich can be view with:
sudo vgsWill show up as:
c@parrot 192.168.1.4 [~] $ sudo vgs
  VG   #PV #LV #SN Attr   VSize  VFree
  vg_a   2   0   0 wz--n- <1.82t <1.82t
Or we can obtain higher details with:
sudo vgdisplay vg_ac@parrot 192.168.1.4 [~] $ sudo vgdisplay vg_a
--- Volume group ---
VG Name vg_a
System ID
Format lvm2
Metadata Areas 2
Metadata Sequence No 1
VG Access read/write
VG Status resizable
MAX LV 0
Cur LV 0
Open LV 0
Max PV 0
Cur PV 2
Act PV 2
VG Size <1.82 TiB
PE Size 4.00 MiB
Total PE 476934
Alloc PE / Size 0 / 0
Free PE / Size 476934 / <1.82 TiB
VG UUID cNgHFC-5WCc-0AQh-eLfc-cTBI-jEYh-a5gyb9
Part G(c): Extending a Volume Group
- Extending a volume group is pretty straightforward. In our case we went up and added another 1 TB disk to the group.
sudo vgextend vg_a /dev/sdfPart G(d): Creating Various Logical Volumes (Stripped, Mirror, RAID 0, 1, 4, 6, 10)
In the Logical Volume Manager (LVM) framework on Linux systems, the lvcreate command facilitates the creation of logical volumes with various segment types, including those that emulate RAID configurations. These types leverage physical volumes within a volume group to provide features such as striping, mirroring, and parity-based redundancy. The types that can be implemented using up to five drives (physical volumes) encompass linear, striped, mirror, raid0, raid1, raid4, raid5, raid6, and raid10, as each requires a minimum number of drives that does not exceed five. Below is a comprehensive list of these types, including their minimum drive requirements and a code example for creation. Each example assumes an existing volume group named vg_example with sufficient free space and the requisite number of physical volumes. Commands must be executed with administrative privileges (e.g., prefixed with sudo).
Linear: The default type, which concatenates storage sequentially across drives without redundancy or striping. Minimum drives: 1.
Example: lvcreate -L 10G -n linear_lv vg_example
Striped: Distributes data across multiple drives for improved performance, similar to RAID 0. Minimum drives: 2.
Example: lvcreate --type striped -L 10G -i 2 -I 64k -n striped_lv vg_example
Mirror: Provides redundancy by mirroring data across drives, similar to RAID 1. Minimum drives: 2.
Example: lvcreate --type mirror -L 10G -m 1 -n mirror_lv vg_example
Raid0: Implements striping for performance without redundancy. Minimum drives: 2.
Example: lvcreate --type raid0 -L 10G -i 2 -n raid0_lv vg_example
Raid1: Offers mirroring for fault tolerance. Minimum drives: 2.
Example: lvcreate --type raid1 -L 10G -m 1 -n raid1_lv vg_example
Raid4: Employs striping with a dedicated parity drive for single-drive failure tolerance. Minimum drives: 3.
Example: lvcreate --type raid4 -L 10G -i 2 -n raid4_lv vg_example
Raid5: Utilizes striping with distributed parity for single-drive failure tolerance. Minimum drives: 3.
Example: lvcreate --type raid5 -L 10G -i 2 -n raid5_lv vg_example
Raid6: Applies striping with dual distributed parity for tolerance of up to two drive failures. Minimum drives: 4.
Example: lvcreate --type raid6 -L 10G -i 3 -n raid6_lv vg_example
Raid10: Combines mirroring and striping for enhanced performance and redundancy, tolerating multiple failures depending on configuration. Minimum drives: 4 (even number recommended).
Example: lvcreate --type raid10 -L 10G -i 2 -m 1 -n raid10_lv vg_example
Once your LV (Logical Volume) is created - you will need to initialize it, as it will show up in your lsblk.
sudo mkfs.ext4 /dev/vg_a/lv_5c@parrot 192.168.1.4 [~] sudo mkfs.ext4 /dev/vg_a/lv_5
mke2fs 1.47.2 (1-Jan-2025)Creating filesystem with 117964800 4k blocks and 29491200 inodesFilesystem UUID: 819ab40f-ac26-4137-a5e8-ab69a1a5d1e5
Superblock backups stored on blocks:32768, 98304, 163840, 229376, 294912, 819200, 884736, 1605632, 2654208,4096000, 7962624, 11239424, 20480000, 23887872, 71663616, 78675968,102400000
Allocating group tables: done
Writing inode tables: done
Creating journal (262144 blocks): done
Writing superblocks and filesystem accounting information: done
Part G(f) Adding your LV to your /etc/fstab
We can see what the UUID is of this device with:
sudo bulkid /dev/vg_a/lv_5The absence of the newly created logical volume in the /etc/fstab file is expected behavior within the Logical Volume Manager (LVM) framework on Linux systems. The /etc/fstab file serves as a static configuration that specifies filesystems to be mounted automatically during system boot or via commands such as mount -a. Creating a logical volume using lvcreate does not automatically modify this file, as LVM operations focus solely on storage allocation and do not interact with mount configurations. Instead, administrators must manually edit /etc/fstab to include persistent mount entries for the logical volume.
To incorporate the logical volume into /etc/fstab for automatic mounting, follow these steps:
Format the Logical Volume: Ensure the logical volume is formatted with a suitable filesystem if not already done. For example, using ext4:
sudo mkfs.ext4 /dev/<volume_group_name>/<logical_volume_name>
Replace <volume_group_name> and <logical_volume_name> with your specific identifiers (e.g., /dev/my_vg/my_lv).
Obtain the UUID: Retrieve the universally unique identifier (UUID) of the logical volume for reliable referencing in /etc/fstab, as device paths may vary:
sudo blkid /dev/<volume_group_name>/<logical_volume_name>
This command outputs the UUID, which provides robustness against changes in device enumeration.
Edit /etc/fstab: Open the file in a text editor with administrative privileges (e.g., sudo nano /etc/fstab or sudo vim /etc/fstab). Append a new line in the following format:
UUID=<uuid_value> /mount/point <filesystem_type> defaults 0 2
<uuid_value>: The UUID obtained from the previous step./mount/point: The desired directory for mounting (e.g.,/mnt/data); create it first withsudo mkdir /mount/pointif it does not exist.<filesystem_type>: The type used during formatting (e.g.,ext4).defaults: Standard mount options; adjust as needed (e.g., addnoatimefor performance).0 2: Dump and filesystem check (fsck) parameters;0disables dumping, and2sets the check order for non-root filesystems.
Verify and Test: Validate the updated /etc/fstab for syntax errors:
sudo mount -a -f
If no errors occur, mount the logical volume manually to test:
sudo mount /dev/<volume_group_name>/<logical_volume_name> /mount/point
Upon reboot, the entry will ensure automatic mounting.
Exercise caution when editing /etc/fstab, as incorrect entries may prevent the system from booting properly. Always maintain a backup of the file (e.g., sudo cp /etc/fstab /etc/fstab.bak) before modifications. If the logical volume is intended for temporary use, manual mounting via the mount command suffices without altering /etc/fstab. Should you encounter specific errors during these steps, provide additional details for further guidance.
Part G(h) Removing a Logical Volume:
- This works best by referencing the /dev/vg_a/lv_name as in:
suod lvremove --force /dev/vg_a/lv_namePart G(i) Increasing, Decreasing and Modifying Logical Volumes
- Examples of lvextend and lvreduce Commands
The following examples illustrate various uses of the lvextend and lvreduce commands in Logical Volume Manager (LVM) on Linux systems. These commands modify the size of logical volumes (LVs) within a volume group (VG). Always ensure sufficient free space in the VG before extending, and back up data before reducing, as lvreduce can lead to data loss if not preceded by filesystem resizing. Assume root privileges or use sudo where necessary.
Basic extension by a fixed size: Extend the logical volume /dev/myvg/mylv by 100 MiB.lvextend -L +100M /dev/myvg/mylv
Extension to a specific total size: Set the logical volume /dev/myvg/mylv to exactly 500 GiB.lvextend -L 500G /dev/myvg/mylv
Extension using all free space in the VG: Extend /dev/myvg/mylv to consume all available free extents in the volume group.lvextend -l +100%FREE /dev/myvg/mylv
Extension with resize of filesystem: Extend /dev/myvg/mylv by 200 MiB and automatically resize the ext4 filesystem.lvextend -L +200M -r /dev/myvg/mylv
Extension from specific physical volumes: Extend /dev/myvg/mylv by 50 extents, allocating from physical volumes /dev/sdb and /dev/sdc.lvextend -l +50 /dev/myvg/mylv /dev/sdb /dev/sdc
Basic reduction by a fixed size: Reduce the logical volume /dev/myvg/mylv by 100 MiB (ensure filesystem is resized first with resize2fs).lvreduce -L -100M /dev/myvg/mylv
Reduction to a specific total size: Set /dev/myvg/mylv to exactly 200 GiB (filesystem resize required beforehand).lvreduce -L 200G /dev/myvg/mylv
Reduction with automatic filesystem resize: Reduce /dev/myvg/mylv by 50 MiB and resize the ext4 filesystem accordingly.lvreduce -L -50M -r /dev/myvg/mylv
Reduction using percentage of free space: Reduce /dev/myvg/mylv by 20% of its current free space (after filesystem adjustment).lvreduce -l -20%FREE /dev/myvg/mylv
Force reduction without prompts: Reduce /dev/myvg/mylv to 100 GiB without confirmation prompts (use with caution after filesystem resize).lvreduce -L 100G --force /dev/myvg/mylv
Part G(j) Logical Volume Conversion Examples
- Examples of lvconvert Commands for Logical Volumes
The lvconvert command in Logical Volume Manager (LVM) on Linux systems is utilized to modify the attributes of logical volumes (LVs), such as converting between types (e.g., linear to striped), adding or removing mirrors, or adjusting RAID configurations. These operations require sufficient free space in the volume group (VG) and may involve risks, including potential data loss; therefore, backups are recommended prior to execution. Assume root privileges or use sudo where applicable. The examples below demonstrate various applications.
Convert a linear LV to a striped LV: Transform the logical volume /dev/myvg/mylv into a striped configuration using 2 stripes.lvconvert --type striped --stripes 2 /dev/myvg/mylv
Add a mirror to an existing LV: Add one mirror to the logical volume /dev/myvg/mylv, creating a mirrored (RAID1) setup.lvconvert -m1 /dev/myvg/mylv
Remove a mirror from a mirrored LV: Reduce the number of mirrors on /dev/myvg/mylv to zero, converting it back to a non-mirrored LV.lvconvert -m0 /dev/myvg/mylv
Convert to a RAID5 LV: Change /dev/myvg/mylv to a RAID5 configuration with 3 stripes.lvconvert --type raid5 --stripes 3 /dev/myvg/mylv
Repair a faulty mirror: Repair the mirrored logical volume /dev/myvg/mylv by replacing failed devices.lvconvert --repair /dev/myvg/mylv
Split a mirrored LV into two separate LVs: Split the mirror of /dev/myvg/mylv, creating a new LV named splitlv.lvconvert --splitmirrors 1 --name splitlv /dev/myvg/mylv
Merge a snapshot back into the origin LV: Merge the snapshot LV /dev/myvg/snaplv into its origin /dev/myvg/mylv.lvconvert --merge /dev/myvg/snaplv
Convert a thin LV to a thick LV: Convert the thin-provisioned LV /dev/myvg/thinlv to a traditional (thick) provisioned LV.lvconvert --type linear /dev/myvg/thinlv
Change the allocation policy: Set the allocation policy for /dev/myvg/mylv to contiguous, ensuring extents are allocated consecutively.lvconvert --alloc contiguous /dev/myvg/mylv
Convert to a cache LV: Attach a cache pool /dev/myvg/cachepool to the origin LV /dev/myvg/mylv to create a cached LV.lvconvert --type cache --cachepool /dev/myvg/cachepool /dev/myvg/mylv
Summary
Linux provides unfathomable power and performance, if you just take the time to learn it! This can take some real time and commitment! We were able to get RAID 0, 1, 5, 10 type LV (Logical Volumes) overtop of VG (Volume Groups) overtop of PV (Physical Volumes)
Power come from heavily documenting your process and coming back to look these things up as you need them. Once ou have that powerful frame of reference and documentation you can manage much larger groups.
