CLion Support for Step-Debugging w/ Raspberry Pi-Pico
In this guide we get stepper-debugging to work for the Raspberry Pi Pico with a $25 CMSIS probe!


Music of the Day: Chill Step Music for Programming Coding
Finally after endless attempts (and!) endless configurations step- debugging is working!
- It has been my experience that coding productivity with a stepping-debugger is about 500% higher. In other words if you cannot get step-debugging working you might as well not do the project.
- It means one could spin for weeks to get it - but once you have it - you have it.
- We are using an off-the-shelf Raspberry Debug Probe $25
- Most give up and usually end up with a SEGGER J-TAG device etc. Since they are can cost $700 - $4000 and higher, we try [not] to buy one.

Test that your OpenOCD debug probe is working if you need a couple guides they are here:
- You should be able to flash .elf up to the device etc.
 thinkmeltprotonmail.com
 thinkmeltprotonmail.com
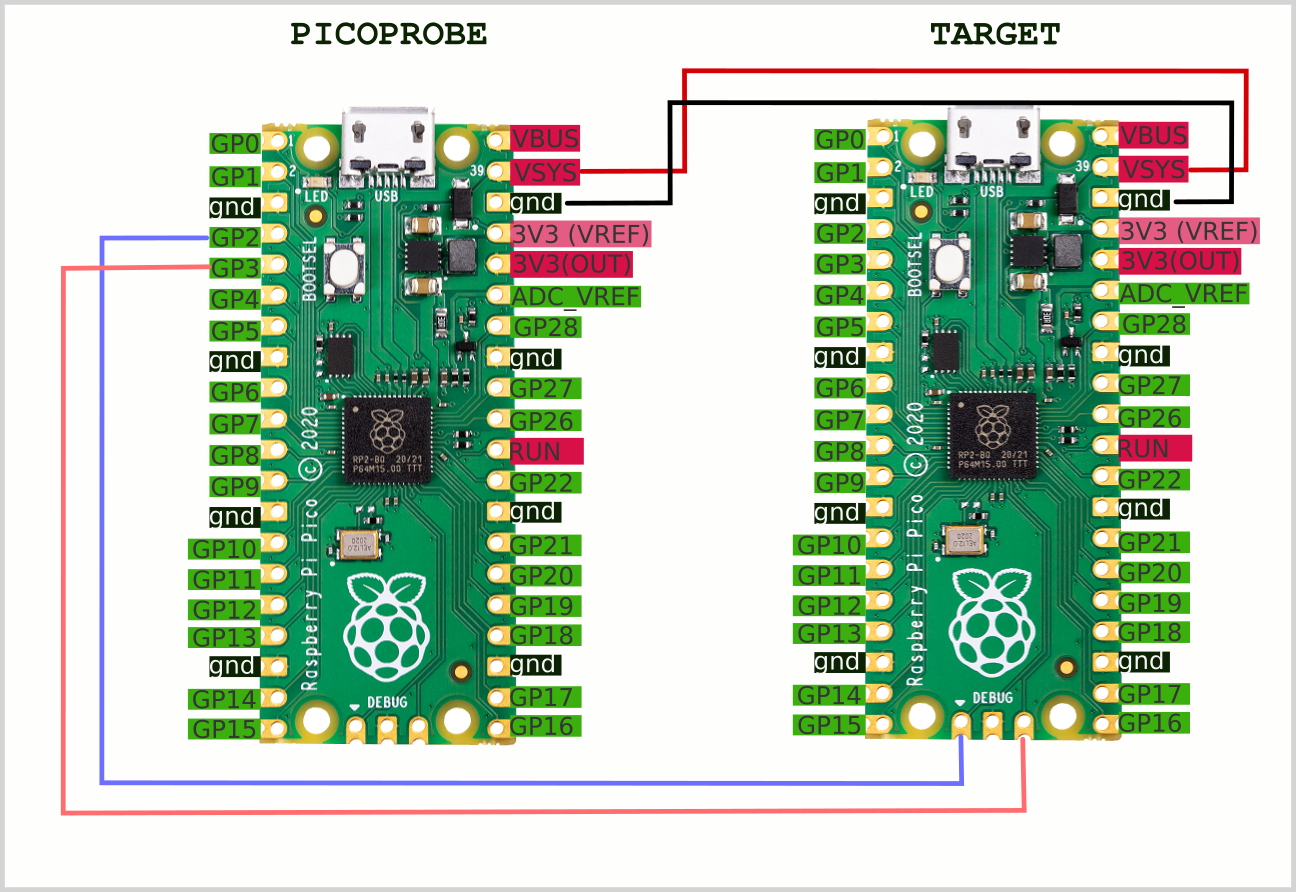
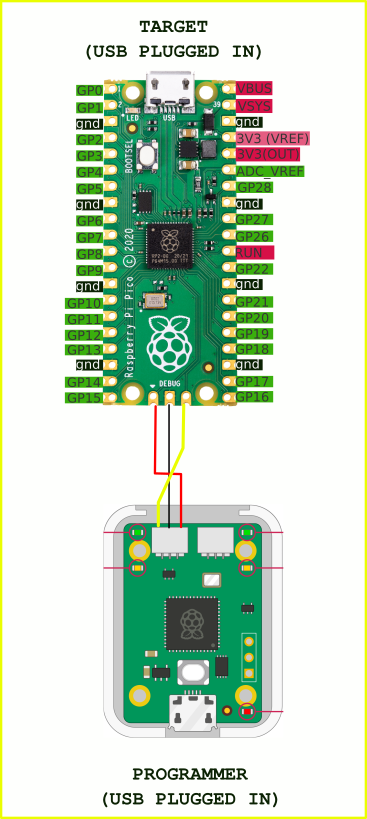
If you have the above GeekPi all your wiring diagram needs to be this simple (You do not need the UART)
Setting up CLion for Stepper Debugging.
- You will need GDB-MultiArch
sudo apt-get -y install gdb-multiarchStart a new project with your CMakeLists.txt as:
cmake_minimum_required(VERSION 3.13)

include(/home/c/coding/pico-sdk/pico_sdk_init.cmake)
project(test C CXX ASM)
pico_sdk_init()
add_executable(hello_world hello_world.c)
target_link_libraries(hello_world pico_stdlib)
pico_add_extra_outputs(hello_world)
pico_enable_stdio_usb(hello_world 1)
pico_enable_stdio_uart(hello_world 0)
- Note change /home/c/coding/pico-sdk to where you have put your pico-sdk..
 raspberrypi
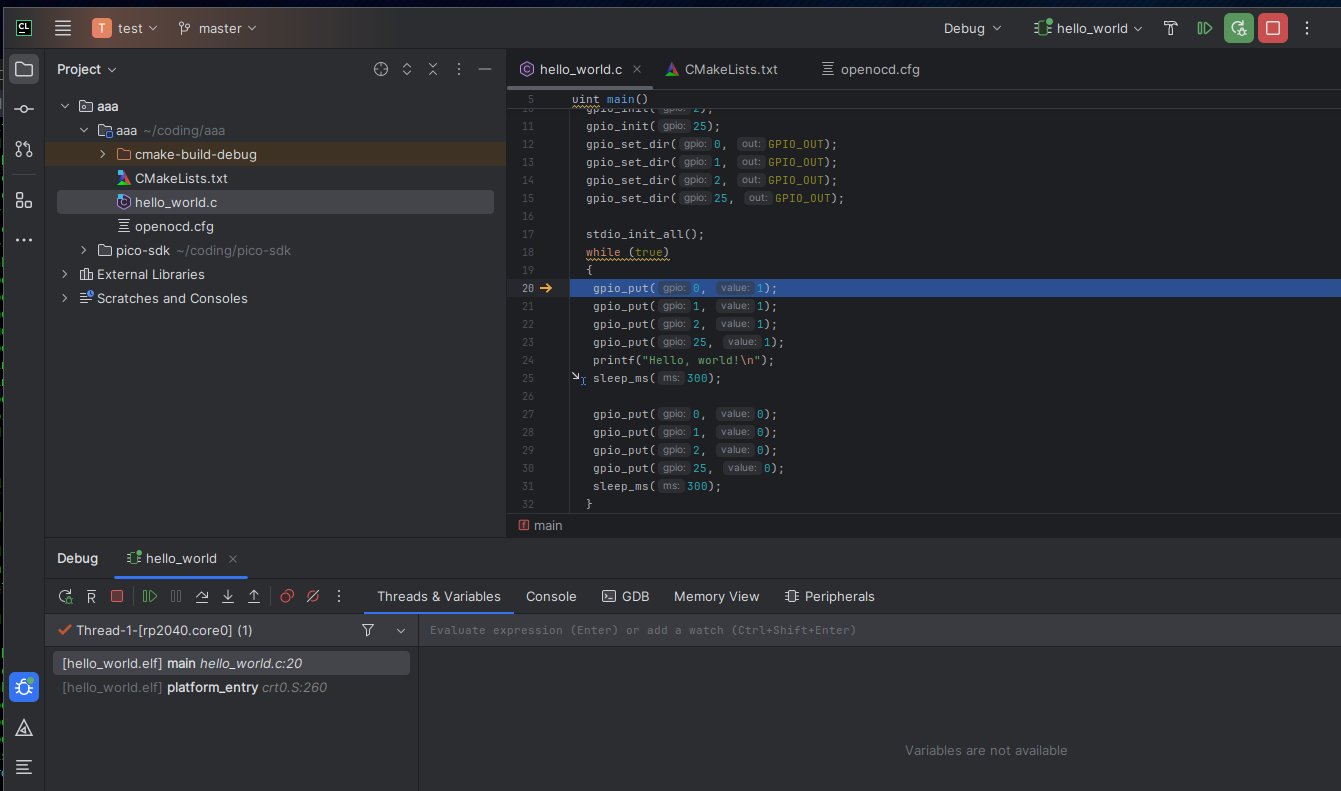
And add your hello_world.c (We have put a bunch of bit-banging in this including the LED - pin 25)
#include <stdio.h>
#include "pico/stdlib.h"
#include "hardware/gpio.h"

uint main()
{
  const uint apin = 0;
  gpio_init(0);
  gpio_init(1);
  gpio_init(2);
  gpio_init(25);
  gpio_set_dir(0, GPIO_OUT);
  gpio_set_dir(1, GPIO_OUT);
  gpio_set_dir(2, GPIO_OUT);
  gpio_set_dir(25, GPIO_OUT);

  stdio_init_all();
  while (true)
  {
   gpio_put(0, 1);
   gpio_put(1, 1);
   gpio_put(2, 1);
   gpio_put(25, 1);
   printf("Hello, world!\n");
   sleep_ms(300);

   gpio_put(0, 0);
   gpio_put(1, 0);
   gpio_put(2, 0);
   gpio_put(25, 0);
   sleep_ms(300);
  }
  return 0;
}
You may need to:
cmake . && make -j 4Now your configuration.
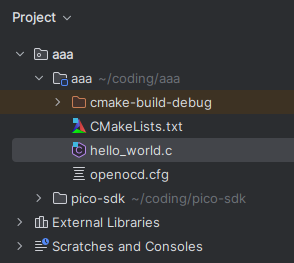
- Create a file in your project directory that is named openocd.cfg and put the following in it.
- Note cmsis-dap.cfg works over other boards and recommendations from the guide
source [find interface/cmsis-dap.cfg]
transport select swd
adapter speed 5000

source [find target/rp2040.cfg]
Your directory structure should look as:
We have a run configuration that is setup as:
- OpenOCD Download & Run
- Debugger: Bundled GDB
- Board Config File (The file we just made)
- GDB Port 3333
- Telnet Port 4444
- You may need to activate the openocd device with the following prior to calling this (just leave open so it's listening)
openocd -f interface/cmsis-dap.cfg -f target/rp2040.cfg -s tcl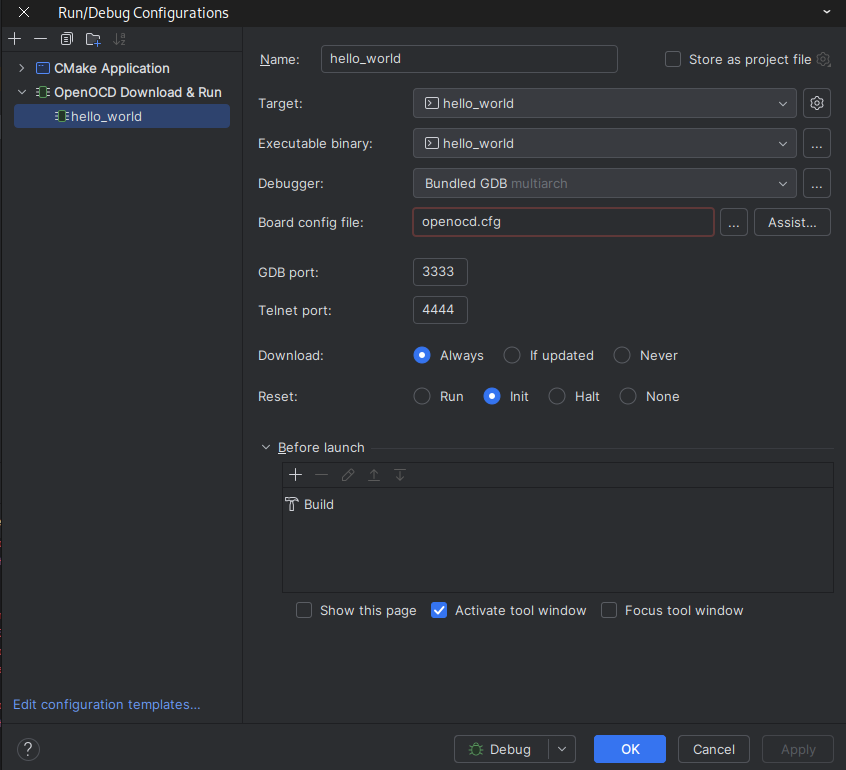
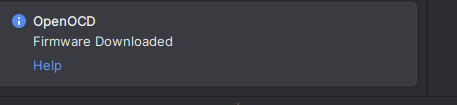
- It was also noticed that CLion in the background was updating and seemed to assist by getting a different Firmware.
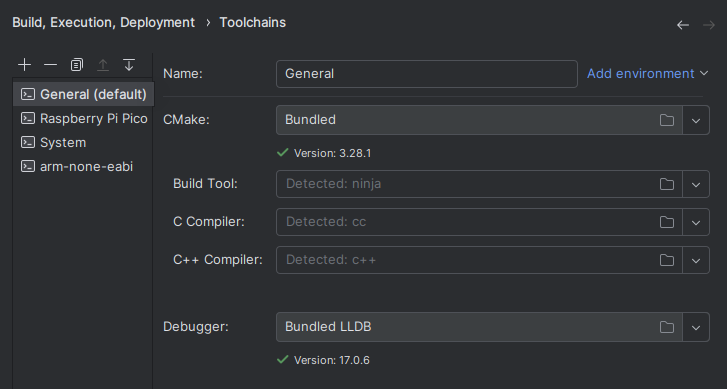
Toolchain for reference is as follows:
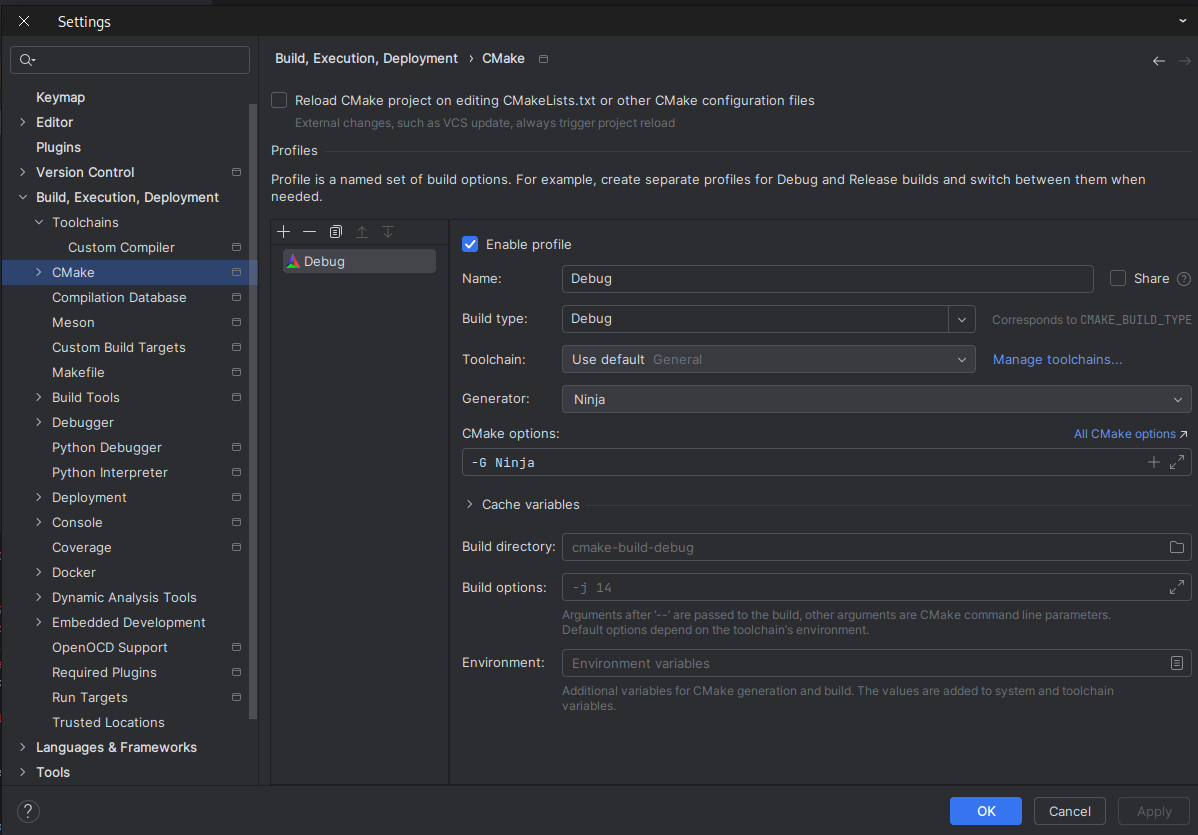
CMake is setup as:
What a step-debugging session will look like:
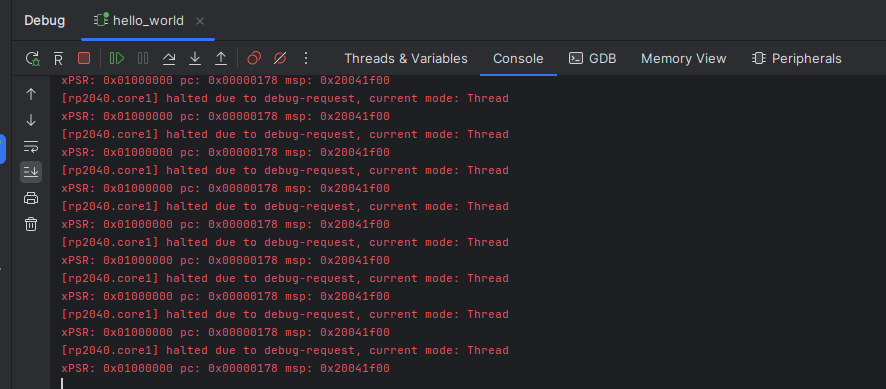
The console will look like:
Summary:
We have seen literally dozens of attempts at this - yes Visio Studio in Windows does it - but Linux is another entirety. Different authors will get to different levels but there are an enormous number of moving parts (and pitfalls) to get this to work.
Some suggestions:
- If you cannot get OpenOCD to work suggest the following:
sudo apt install openocd- And whatever libraries it may request.
Or build it from scratch:
>> This << verions of OpenOCD albeit does not seem particularly special is the one that does seem to work with it.
raspberrypiThe build is pretty simple and one does not need to modify
./bootstrap
./configure
# May need to do it this way.
./configure  --enable-cmsis-dap
# You can see all the options with ./configure --help
make -j 8 && sudo make install
- The basic idea is if you can get your OpenOCD programmer writing images then chances are all you needed was the board configuration file above.
- Since this author has spun for about two weeks on getting this in the journey their may have been small details or libraries that are needed and now forgotten. But at this point it is working!
You may need to get a very up to date CMake (ours is 3.28) You can get one from here:
