Build Your Own Protocol Decoder Starting With a 1838 IR Remote.
In this part 1 Article we crack into the 1838 IR remote and discover this thing with the right code can decode *any* remote control.. We write a quick piece of statistical software to automatically analyze the pulse durations.


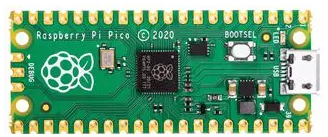
The 1838 IR remote is literally the bedrock of a typical remote control project. If you can roll your own protocol for this it is an easy extension to write your own protocol to intercept all TV remotes, all kinds of things! We will utilize the Raspberry Pi Pico as the pin decoder:
Once you have mastered the basics of the Rpi2040, and became comfortable with getting CLion to play nice with the development ecosystem - one can look at doing some real production level coding.
- If this is too heavy you can just access a pre-canned micropython library example from here
- However we are looking past this. Being able to 'roll-your-own' protocol driver is real power, especially if we can set it up in a multi-tasking type environment because once we can decode this simple protocol we can decode pretty much anything.
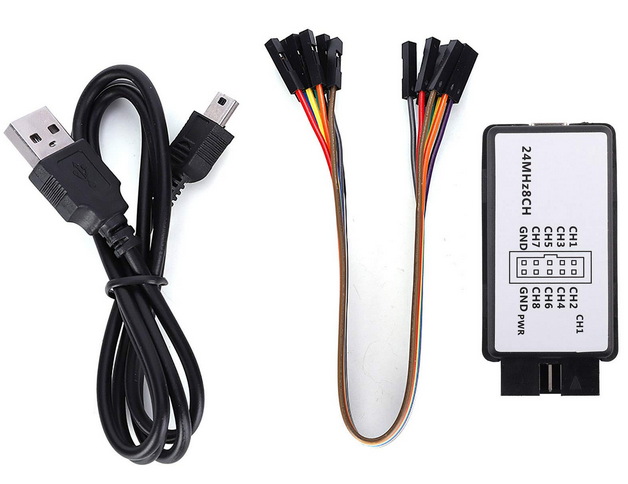
You are going to need at least a starter analyzer, they are for sale at the $15 dollar mark. Not a a big investment for industrial level protocol development:
The pin out for the 1838 cannot be simpler and is usually 5V tolerant.

If your 1838 is connected properly to your sigrok, the blue indicator will flash on the left as:

Sigrok OpenSource analyzer can be downloaded from here, and to activate it is simply:
sudo ./PulseView-0.4.2-x86_64.AppImage We need this logic analyzer to see that the 1838 IR is pulsing. Once you run it sampling the signal (pressing some remote buttons) it will appear as:
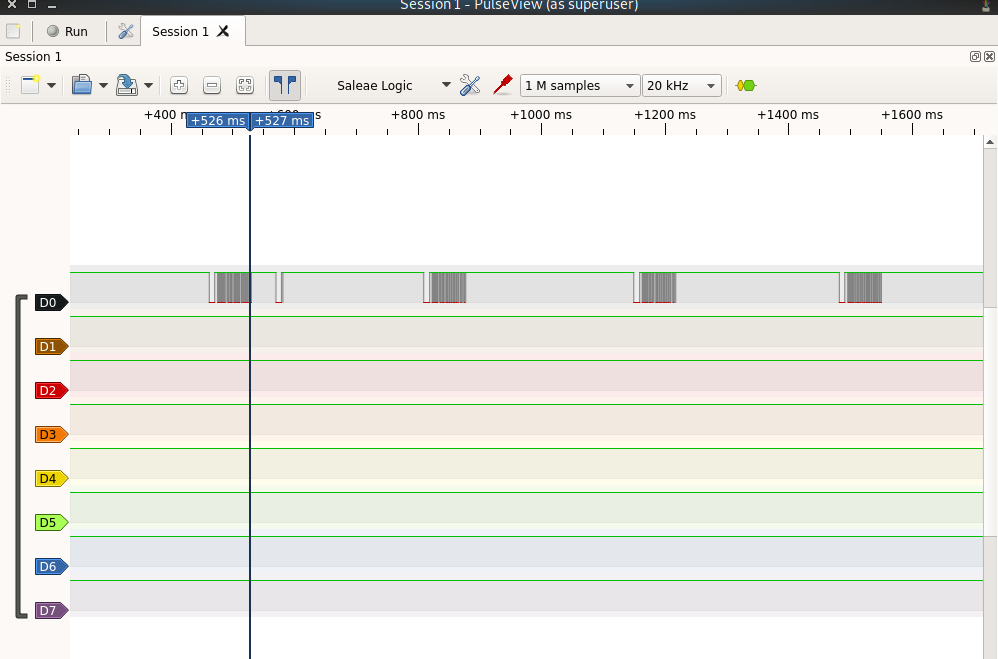
What is also fun already is you can already sample other remotes like a Roku for example - the 1838 is remote agnostic! As soon as you realize this you have opened yourself to an entire world of possibilities.

An example sample from a Roku Remote showing the double-signalling protocol.

Now the fun part, building a software protocol that can decipher these bits.
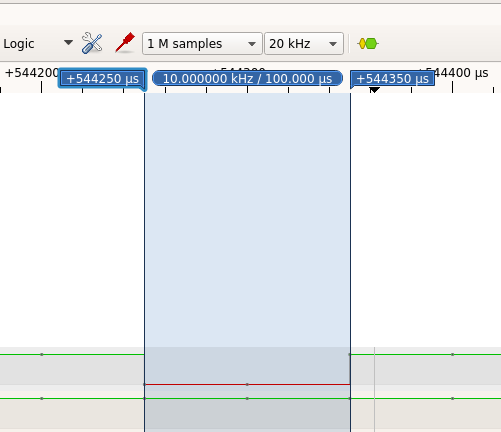
- The remotes typically signal at 38.4 Khz but we will make a robust protocol that can work with any packet. This can be the foundation for protocol decoding for GPS or any device.
- The Raspberry Pico works at 125 Mhz. Examining a single pulse even at it's highest frequency shows it works at a measly 10Khz. That is a ratio of 12,500:1 showing that the Pico can be doing a lot of other stuff instead of tied up polling for a pin change.
- We want this GPIO Interrupt enabled so it can multitask with other stuff while the packet is coming in.
- The Christmas List feature is to have it automatically learn and decode a signal on-the-fly.
Remember to get Clion to work with the pico environment requires both the pico-sdk and the pico-examples (Guide)
Example CMakeList.txt
add_executable(blink2 blink.c)

# pull in common dependencies
target_link_libraries(blink2 pico_stdlib)

# create map/bin/hex file etc.
pico_add_extra_outputs(blink2)

# add url via pico_set_program_url
example_auto_set_url(blink2)

pico_enable_stdio_usb(blink2 1)
pico_enable_stdio_uart(blink2 0)
Example blink.c repurposed for remote signalling:
#include <stdio.h>
#include "pico/stdlib.h"
#include "hardware/gpio.h"

void gpio_callback(uint gpio, uint32_t events)
{
  const uint LED_PIN = PICO_DEFAULT_LED_PIN;
  uint32_t time_now;
  if (gpio==0)
  {
    time_now = time_us_32();
    printf("GPIO:0 Activated: %d\n", time_now);
  }
  if (gpio==1)
  {
    printf("GPIO:1 Activated at clock\n");

  }
}

int main()
{
    stdio_init_all();
    printf("Startup!\n");
    const uint LED_PIN = PICO_DEFAULT_LED_PIN;
    gpio_init(LED_PIN);
    gpio_set_dir(LED_PIN, GPIO_OUT);

    gpio_init(0);
    gpio_set_dir(0, GPIO_IN);
    gpio_init(1);
    gpio_set_dir(1, GPIO_IN);

    gpio_set_irq_enabled_with_callback(0, GPIO_IRQ_EDGE_RISE | GPIO_IRQ_EDGE_FALL, true, &gpio_callback);
    gpio_set_irq_enabled(1, GPIO_IRQ_EDGE_RISE | GPIO_IRQ_EDGE_FALL, true);
    //gpio_set_irq_enabled_with_callback(1, GPIO_IRQ_EDGE_RISE | GPIO_IRQ_EDGE_FALL, true, &gpio_callback);
    while (true)
    {
        sleep_ms(250);
        printf("Test push\n");
    }
}- The above code sets a gpio_set_irq_enabled_with_callback function that on a rising edge, and falling edge it will call a interrupt function named gpio_callback.
- gpio_callback will output the systick timer offset.
- We will capture the /dev/ttyACM0 and log it to the disk.
- Compile and get running the example code. If you get hooked up go back and go over the basics (1, 2)
sudo cat /dev/ttyACM0 >> button00.txtOnce we do this what was the pulses such as:

Will now be microsecond offsets:
Test push

Test push

Test push

GPIO:0 Activated: 77652992

GPIO:0 Activated: 77662001

GPIO:0 Activated: 77666493

GPIO:0 Activated: 77667050

GPIO:0 Activated: 77667626

GPIO:0 Activated: 77668177

GPIO:0 Activated: 77668752

GPIO:0 Activated: 77669306

GPIO:0 Activated: 77669884
- This should be timing independent of the clock speed of the rpi2040 as the time_us_32() attempts to be clock speed independent and measure things in elapsed microseconds.
"Mom! MOM! Do I HAVE to type in all those GPIO microsecond offsets??!"
"Of course not Johnny. If you know how to split them off in Python you can quickly process them down to their pulse widths.."
clean_list = []
pulse_list = []
with open('00_ch-.txt', 'r') as g:
    data = g.read()
    data = data.split('Test push')
    for item in data:
        if 'GPIO' in item:
            item = item.split('GPIO:0')
            if len(item) > 20:   # only accept full pulses
                for sub_item in item:
                    try:
                        if 'Activated' in sub_item:
                            sub_item = sub_item.replace('\n\n','')
                            sub_item = sub_item.replace(' Activated: ', '')
                            intval = int(sub_item)
                            clean_list.append(intval)
                    except Exception as e:
                        print(f"Error on {e}")

                    if len(clean_list) >= 10:
                        min_value = 999999999
                        c = 0
                        while c < len(clean_list) - 1:
                            a = clean_list[c]
                            b = clean_list[c+1]
                            differential = b - a
                            if differential < min_value:
                                min_value = differential
                            c += 1

                        print(f"Smalled pulse duration: {min_value}uS")
                        pulse_list.append(min_value)
                        clean_list = []

                total = 0
                total_count = len(pulse_list)
                max_value = 0
                min_value = 9999999999999
                for item in pulse_list:
                    total += item
                    if item > max_value:
                        max_value = item
                    if item < min_value:
                        min_value = item

                mean_value = total / total_count
                print(f"Mean: {mean_value} uS, Minimum: {min_value} uS, Maximum: {max_value}")
Running this against real data for our one typical remote outputs:
Mean: 545.6153846153846 uS, Minimum: 528 uS, Maximum: 551
Smalled pulse duration: 554uS
Smalled pulse duration: 531uS
Smalled pulse duration: 552uS
Smalled pulse duration: 573uS
Smalled pulse duration: 530uS
Smalled pulse duration: 550uS
Smalled pulse duration: 552uS
Mean: 546.75 uS, Minimum: 528 uS, Maximum: 573
Smalled pulse duration: 530uS
Smalled pulse duration: 531uS
Smalled pulse duration: 530uS
Smalled pulse duration: 550uS
Smalled pulse duration: 549uS
Smalled pulse duration: 549uS
Smalled pulse duration: 528uS
Mean: 544.5185185185185 uS, Minimum: 528 uS, Maximum: 573
It looks like a lot of 'pulse slop' but it's about 3%

Coming Part II shortly: AutoDecoder.
