Setting up a pico-sdk ToolChain
We go over setting up the environment for a raspberry Pi Pico, and running a test project!

You can never have enough guides to do this so, here is another..
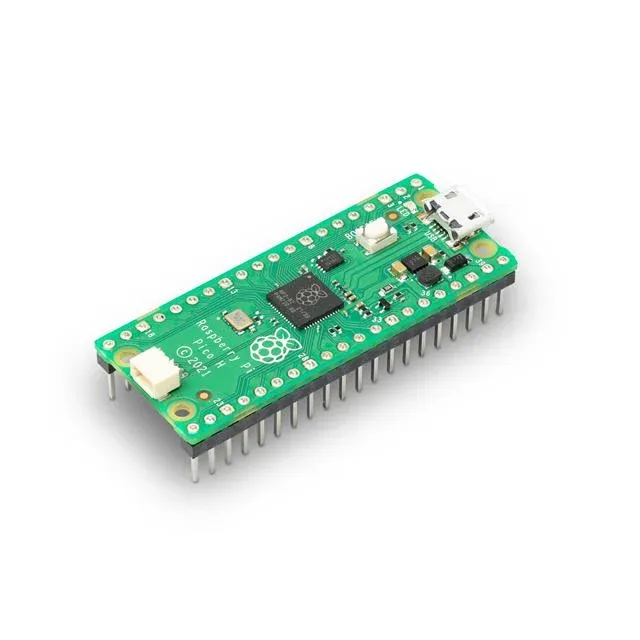
- We are setting up a toolchain specifcially for compiling for the Raspberry Pi Pico, a 2-core 144Mhz amazing little gumstick of a puter.
- Once you have this setup you will be able to make your own .UF2/.EFI files which are effectively C/ASM type programs.
- The bootloader AFAIK is part of the ROM. Holding BOOTSEL while plugging the device in turn it into a USB drive - drag-n-drop your uf2 file and then simply repower it or reset it.
- You can do this for pennies. We did this entire guide on a $20 Raspberry Pi Zero Single-Core w/512MB of ram that ran off a $4 16 GB SSD dollar-store card. Seriously.
- This article was coauthored with free Nemotron 32b from openrouter.ai. It was human verified that it works, it's not AI slop, and without AI gouging.
Installing the pre-requisites
sudo apt install cmake gcc-arm-none-eabi libnewlib-arm-none-eabi build-essential libstdc++-arm-none-eabi-newlib
Once that is done you will need the pico-sdk, and make certain to add it's path.
# 1. Clone the SDK (into your home dir, or wherever you prefer)
cd ~
git clone https://github.com/raspberrypi/pico-sdk.git
cd pico-sdkgit submodule update --init

# 2. Set PICO_SDK_PATH (add to ~/.bashrc for permanence)
echo 'export PICO_SDK_PATH=$HOME/pico-sdk' >> ~/.bashrc
source ~/.bashrc  # Or restart terminal

# 3. Verify
ls $PICO_SDK_PATH/external/pico_sdk_import.cmake  # Should exist
You will need the sub-modules, from inside the pico-sdk directory:
git submodule update --initNext up you will need to make an example project.
Here is an example project:
Solution Overview
The program runs on a Raspberry Pi Pico (RP2040) and:
- Initializes the USB CDC (virtual COM port) stack so the host can send characters over USB.
- Sets GPIO 1 as an output and keeps it high by default.
- In the main loop it checks for any received byte:
- If the byte is
'r'it pulls GPIO 1 low for exactly 1 second, then returns it high. - Any other byte is ignored.
The code uses the official Pico SDK (which bundles TinyUSB for USB CDC).
rp2040_usb_key/
├─ CMakeLists.txt
└─ src
   └─ main.c
</details>

---

### 📄 `CMakeLists.txt`

```cmake
📂 File structure
CMakeLists.txt
cmake_minimum_required(VERSION 3.13)

# Initialize the Pico SDK
pico_sdk_init()

# Project name
project(rp2040_usb_key C CXX ASM)

# -------------------------------------------------
# Source files
# -------------------------------------------------
add_executable(${PROJECT_NAME} main.c)

# -------------------------------------------------
# Pull in Pico SDK and TinyUSB (USB CDC) support
# -------------------------------------------------
target_link_libraries(${PROJECT_NAME}
    pico_stdlib
    hardware_uart
    tinyusb_device
)

# Enable USB CDC (serial over USB) and set the USB device description
pico_enable_stdio_usb(${PROJECT_NAME} 1)   # redirects stdio to USB CDC
pico_set_stdio_uart(${PROJECT_NAME} 0)    # disable UART0 stdio (we use USB only)

# -------------------------------------------------
# Build options
# -------------------------------------------------
pico_set_program_name(${PROJECT_NAME} "rp2040_usb_key")
pico_add_extra_outputs(${PROJECT_NAME})
📄 src/main.c
/**
 * rp2040_usb_key
 *
 * Listens on the USB CDC virtual COM port for the character 'r'.
 * When received, drives GPIO1 low for 1 second, then returns it high.
 * GPIO1 is kept high at all other times.
 */

#include <stdio.h>
#include "pico/stdlib.h"
#include "hardware/gpio.h"

// GPIO used for the output
#define OUTPUT_GPIO 1

int main() {
    // stdio over USB CDC is enabled by pico_enable_stdio_usb in CMakeLists.txt
    stdio_init_all();   // initializes USB CDC (and any other stdio)

    // Configure GPIO1 as a push‑pull output, start high
    gpio_init(OUTPUT_GPIO);
    gpio_set_dir(OUTPUT_GPIO, GPIO_OUT);
    gpio_put(OUTPUT_GPIO, 1);   // high

    printf("USB CDC ready. Send 'r' to pulse GPIO%d low for 1s.\n", OUTPUT_GPIO);

    while (true) {
        // Check if a byte is available on the USB CDC receive buffer
        if (stdio_usb_connected() && usb_cdc_getc_timeout(0) >= 0) {
            int ch = getchar();   // blocks only if data is present (we already checked)
            if (ch == 'r' || ch == 'R') {
                printf("Received '%c' – pulsing GPIO%d low for 1s.\n", ch, OUTPUT_GPIO);
                gpio_put(OUTPUT_GPIO, 0);   // drive low                sleep_ms(1000);             // hold low for 1 second
                gpio_put(OUTPUT_GPIO, 1);   // return high
                printf("GPIO%d returned high.\n", OUTPUT_GPIO);
            } else {
                // Ignore any other characters
                // Optional: uncomment to debug
                // printf("Ignored character: %c (0x%02x)\n", ch, (unsigned char)ch);
            }
        }
        // Small delay to avoid busy‑waiting; the USB stack still runs in the background
        sleep_ms(10);
    }
}
Explanation of key parts
| Section | What it does |
|---|---|
stdio_init_all() |
Initializes all standard I/O, including the USB CDC virtual COM port (enabled by pico_enable_stdio_usb). |
gpio_init(OUTPUT_GPIO); … gpio_put(OUTPUT_GPIO, 1); |
Sets GPIO 1 as an output and drives it high (the idle state). |
stdio_usb_connected() && usb_cdc_getc_timeout(0) >= 0 |
Checks whether the USB CDC host is connected and whether a byte is waiting (non‑blocking). |
getchar() |
Retrieves the byte; we only act on 'r' (case‑insensitive). |
gpio_put(OUTPUT_GPIO, 0); → sleep_ms(1000); → gpio_put(OUTPUT_GPIO, 1); |
Drives the pin low for exactly one second, then restores the high idle level. |
sleep_ms(10); in the loop |
Gives the CPU a short break while still reacting quickly to incoming characters. |
🛠️ Compilation & Flashing Instructions🔧 Step‑by‑step guide (click to expand)
Create a build folder and run CMake:
mkdir -p build
cd build
cmake ..
Build the firmware:
make -j4 # adjust -j to your core count
After a successful build you will find rp2040_usb_key.uf2 in the build directory.
Flash the UF2 file to the Pico:
Hold the BOOTSEL button while plugging the Pico into USB → it appears as a mass‑storage device → drag‑and‑drop the .uf2 file onto it.
The Pico will reboot and run the program automatically.
Test
Open a serial terminal (e.g., minicom, PuTTY, or the Arduino Serial Monitor) pointed at the CDC port that appears (usually /dev/ttyACM0 on Linux or COM3 on Windows).
Type r (or R) and observe that the pin connected to GPIO 1 goes low for one second (you can monitor it with an oscilloscope, logic analyzer, or an LED with a resistor).
📌 Notes
- The default USB CDC descriptor uses single‑interface, no‑string‑descriptor mode; the host sees it as a generic “USB Serial Device”.
- If you need a different GPIO, change the
OUTPUT_GPIOmacro at the top ofmain.c. - The program deliberately avoids blocking on
getchar(); it only reads when a byte is present, keeping the USB stack responsive.
That’s it! You now have a complete, compilable example that listens for an 'r' over USB and pulses GPIO 1 low for one second while keeping it high otherwise. Happy hacking!
Compiling it:
- Compiling generally makes .uf2 or .elf files
cmake . && make VERBOSE=1- Will look like the following:
PICO_SDK_PATH is /home/c/pico-sdk
Target board (PICO_BOARD) is 'pico'.
Using board configuration from /home/c/pico-sdk/src/boards/include/boards/pico.h
Pico Platform (PICO_PLATFORM) is 'rp2040'.
Build type is Release
TinyUSB available at /home/c/pico-sdk/lib/tinyusb/hw/bsp/rp2040; enabling build support for USB.
BTstack available at /home/c/pico-sdk/lib/btstack
cyw43-driver available at /home/c/pico-sdk/lib/cyw43-driver
mbedtls available at /home/c/pico-sdk/lib/mbedtls
lwIP available at /home/c/pico-sdk/lib/lwip
CMake Warning at /home/c/pico-sdk/tools/Findpicotool.cmake:30 (message):
  No installed picotool with version 2.1.1 found - building from source

  It is recommended to build and install picotool separately, or to set
  PICOTOOL_FETCH_FROM_GIT_PATH to a common directory for all your SDK
  projects
Call Stack (most recent call first):
  /home/c/pico-sdk/tools/CMakeLists.txt:168 (find_package)
  /home/c/pico-sdk/tools/CMakeLists.txt:688 (pico_init_picotool)
  /home/c/pico-sdk/src/cmake/on_device.cmake:81 (picotool_postprocess_binary)
  CMakeLists.txt:34 (pico_add_extra_outputs)


Downloading Picotool
Using picotool from /home/c/c_software/22_rpi2040_RP/_deps/picotool/picotool
-- Configuring done (18.2s)
-- Generating done (3.8s)
-- Build files have been written to: /home/c/c_software/22_rpi2040_RP
We did as suggested from the pico-sdk, because we were clearly missing submodules.
git submodule update --init