Installing and Learning Raspberry Pi (Linux)
In this basic introductory guide we go over configuration and setup for a static-IP Raspberry Pi!


This guide is written as a very basic introduction to getting a Raspberry Pi up and running (in Linux). Now that they support fast Quad-core cpu sets, they have become serious contenders in the SBC (Single Board Computer) Industry. They are easy to setup and work with, but use Linux which is powerful and now quite friendly.
- Download and burn a ISO image to a SD card using rpi-imager (Windows) For linux it is easily installed with:
sudo apt search rasp | grep rasp
Once you get the name of it - install it simply with:
sudo apt install rpi-imager -yAnd it can be activated with:
rpi-imager
- You want to select the image that matches the raspberry pi you have purchased as in:
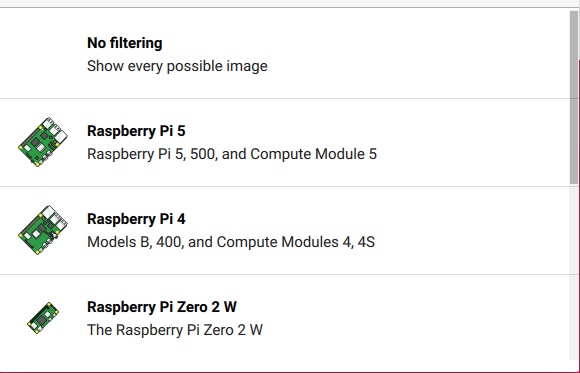
- Typically the 64-bit OS is preferable.
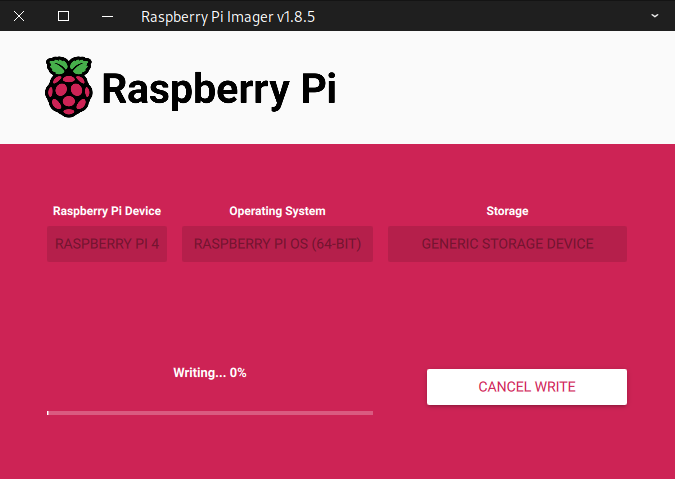
It will burn (and verify) the image to the SD Card. You simply connect this SD card which will now function as a 'hard drive' of sorts - it works amazingly well:
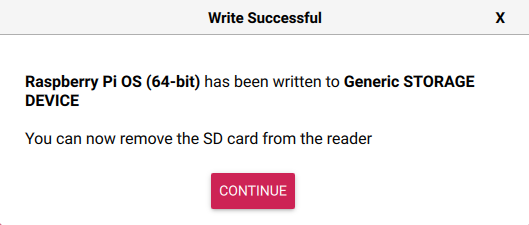
Once its done it will message you:
Once you get it done you simply pop the SD card in the back, hook it up to a monitor, with its power, and power it up:

Once you open the boot the main machine typically if you are hooked up to a 4K monitor - it will actually drive it - but barely.
- It has been my experience that these little machines are great little machines but don't tax them too hard, they are far more responsive with a smaller resolution like 1280x1024. You will have way less hangups and freezes.
- Screen configuration and turn down.
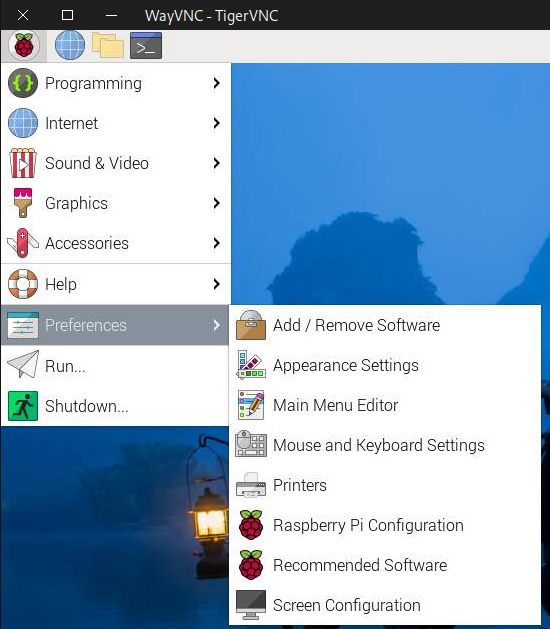
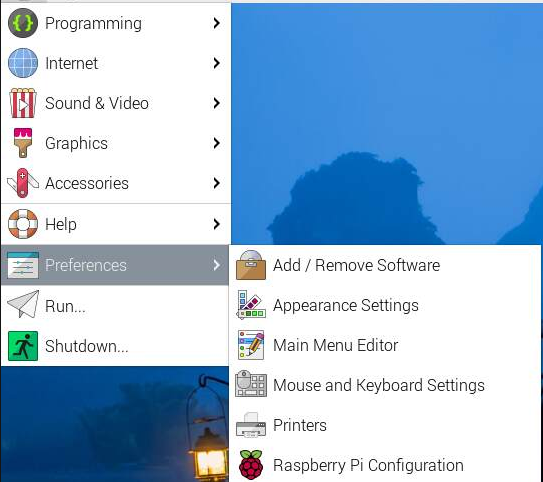
Go into Raspberry Pi Configuration:
Turn on ssh as in:
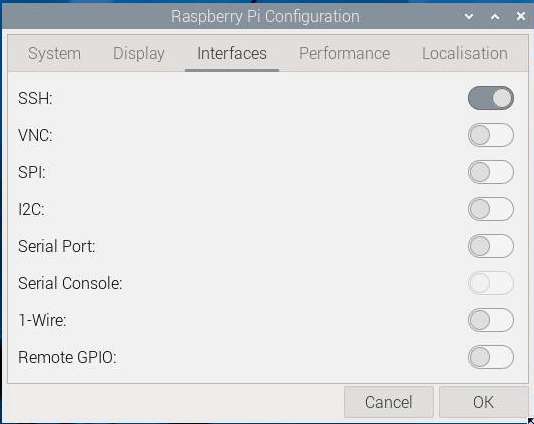

Warning: If you have OFS (Overlay File System) enabled in raspi-config you can do all of this guide, and upon reboot none of the edits will persist! This is not very apparent to the user - I found out the hard way!
If you ever want to see how loaded your raspberry pi is - open a console and type:
htopIt will give you very good diagnostic information, and even better you can install btop an even more powerful diagnostic tool with:
sudo apt install btop -y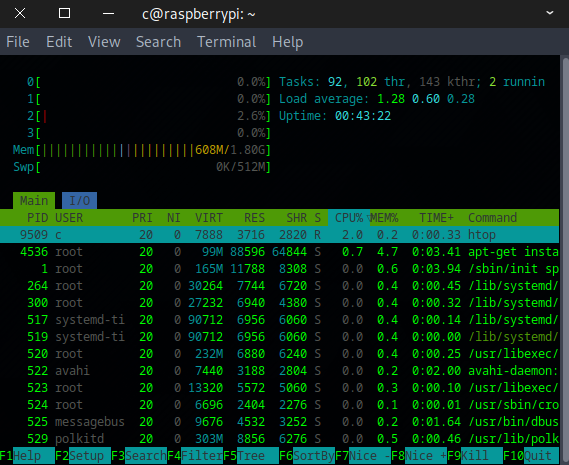
Setting a Static IP:
For the more advanced guides that follow this you will want to hard code the ip address. You can see what the current address of all devices are by opening a console terminal and typing
ip addr
You should see something like:
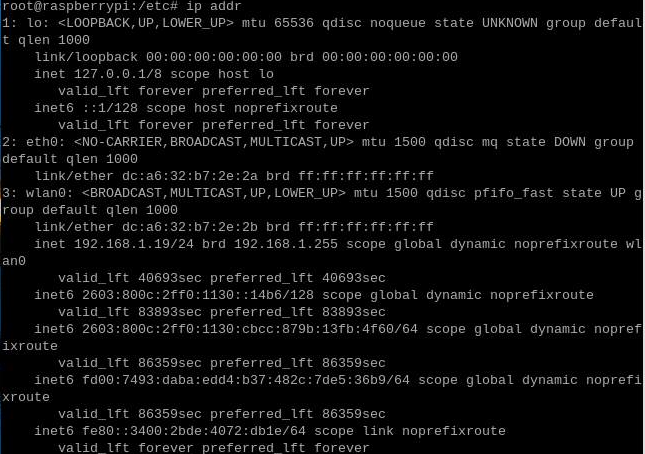
- lo : loopback interface. This is your local loopback interface, it is effectively a small packet routing circle to test if you have any network stack at all.
- eth0: ethernet0. This would have an IP address assigned to it if you were to physically connect a RJ-45 cable to it.
- wlan0: wireless lan 0. This is the wireless lan address. We can see here it has a current 192.168.1.19. Typically because it is using DHCP this address will not change, but we would like to make it static so it never moves. This is the ipv4 addresses
- inet6 : These are the IPV6 addresses.
Understand - there are many historical networking configuration tools, and these vary from Linux distribution from one to another. We tried to be very comprehensive on setups that work. Because Raspberry Pi is trying to be very user friendly - it is best advised to just use the gui interface - but even then we found they may not work, your mileage may vary.
A. Setting Wifi Static IP from Raspberry Pi Desktop:
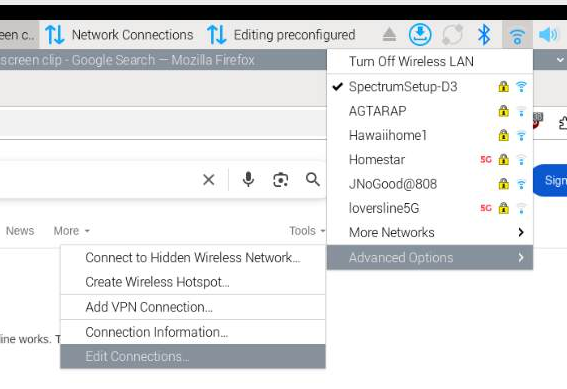
Then.
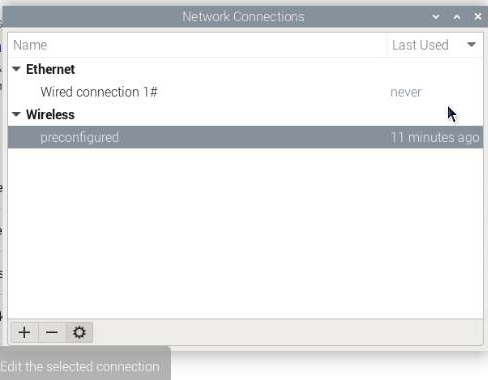
Select the config in the bottom.
Note: Because of the router memory it may still think it is the old IP address that it initially assigned it. You will need to disconnect and reconnect back to the wireless lan.
You can do it from the command line with
sudo ifdown wlan0 && sudo ifup wlan0- sudo execute as root the power user.
- ifdown wlan0 - Take down the interface wlan0
- && - If the first command is successful execute the second command
- sudo ifup wlan - Bring up the wlan 0
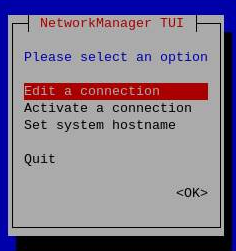
B. Setting the static IP from the command-line interface
nmtuiWill open your network monitoring text user interface.

And.
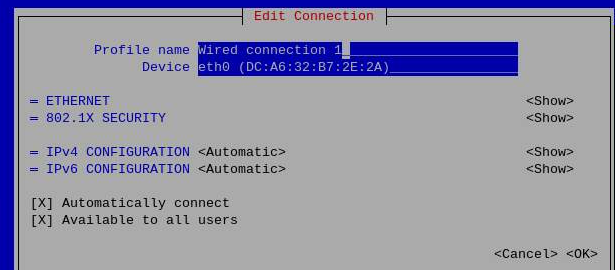
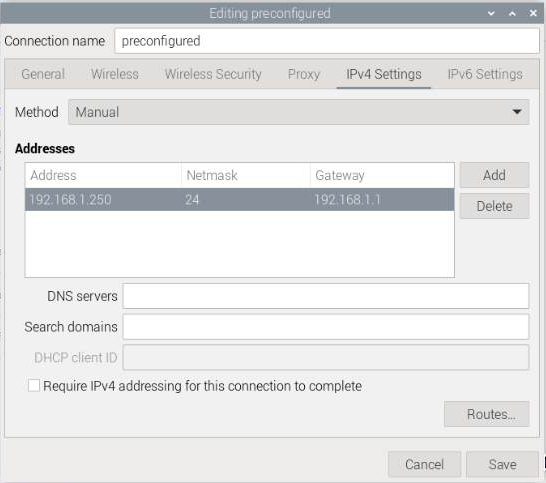
We want to set the IPv4 Configuration:

We want to typically set it up as:
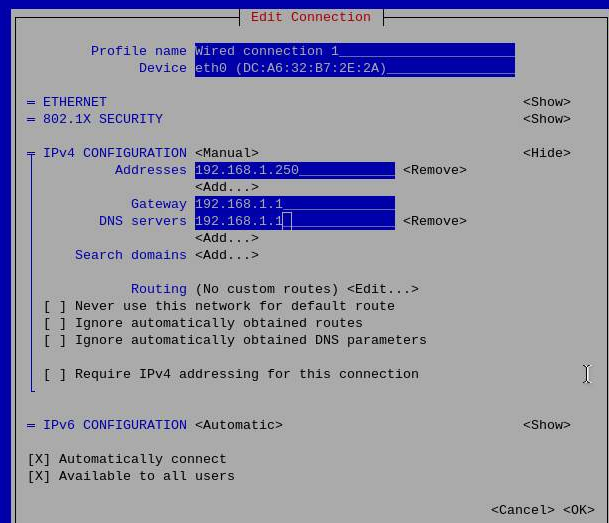
Your home router typically is 192.168.0.1 or 192.168.1.1 - it can also function in most cases as your DNS. If not then put 8.8.8.8 which is a root DNS.
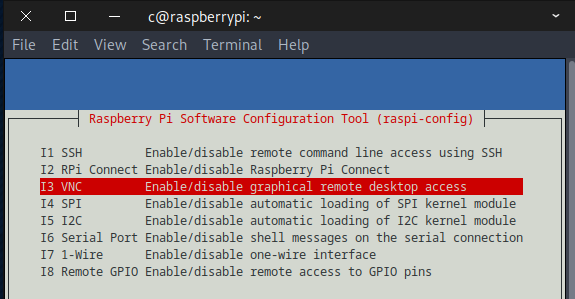
C. Setting up a VNC connection to your Raspberry Pi.
- This is very handy as it will allow you to pull the desktop into another computer.
- Do not do this on a device that is internet facing as it can be insecure as encryption is not enabled by default. You are probably fine for your home internet and you did give it different passwords from your main equipment right?
sudo raspi-config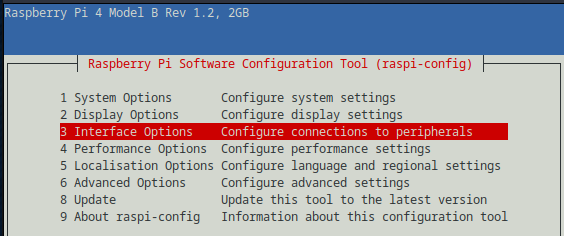
then set:
Once you have it working you can now easily access it from your now static IP from a console with:
sudo apt search vncviewer | grep vncviwer
We can install xtightvncviewer:
sudo apt install xtightvncviewer -y Once it is installed we can call it with:
vncviewer 192.168.1.250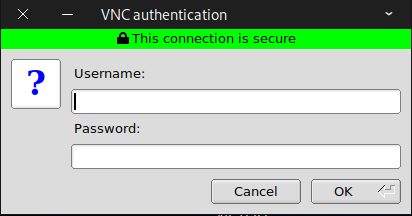
Enter your credentials (note! root typically is not configured for access you need to login as a normal user - then open a console and sudo what you want to do as root - it is a security feature.
Your desktop can now be pulled from anywhere
- This is also suggested why it is good to turn down the resolution on the raspberry pi so that these types of connections do not hang up or are problematic:
D. Understanding SSH to a Raspberry Pi
- A very good guide is referenced here
E. If all that fails, you can also add a second IP address to a device with:
sudo ip addr add dev wlan0 192.168.1.250- This may not hold on reboot.
F. Final method (adding a crontab script)
- as root call your crontab scheduler and add a line to run at reboot:
crontab -e@reboot /root/runscript.sh
Inside your runscript.sh put:
sudo ip addr add dev wlan0 192.168.1.250/24