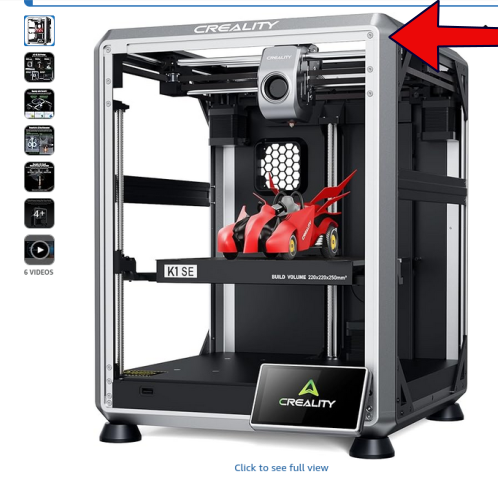
Honest Deep Review: The Creality K1 SE 3D Core Align Printer ($249).
We do a deep dive into the Creality K1 SE. It has phenomenal value.


For a lowly $249.00 US for a 500mm/s Core-Align XY 3D printer with remote management - this is a deal! Considering the remote phone interface software that came with it - it has shown itself as a very reliable widget printer. Adding in its remote management capabilities, quick print speeds, it has been extremely easy to setup, and to print with.
An honest review. I was not compensated for this review nor have any affiliation with Creality.
- If you have an older Creality K1 these are not really even in the same class of a machine. Expect not a 2x increase in productivity but 10x. Because this printer is also a core-align expect very good results. You won't need an extra raspberry pi and octoprint for remote management now - its all built in. In other words it prints 10x faster but is 10x less setup. Just print.
- You plug these in, and with next to no effort you can do all your slicing, model adjusting etc from any standard smart phone.
- You can add the remote camera very easily as the bracket point and connector cord is already on the printer - it is so easy it is a 'no-brainer' to add as this will enable your remote monitoring of your print.
- This plans to be one of the best reviews you will find on the internet. Bookmark it and share it!
- Unboxing. Delivery from Amazon was about 5-6 days.

- Lots of packing.
- Fresh out of the box.
- The only part you need to affix is the touch screen, it has a simple click cord and lock pin press, it was very easy to attach, and didn't have a real solid click so one was a little guessing when you hook it up.. If you break it - it's $128 to replace (here.)
- This printer would not power on (oh oh!), in this instance the power supply was left in the international 220v position. Unplugging the printer for obvious safety reasons - then moving the power slot position the printer then came right up. It was a little resistive and kind of buried, but that was it.
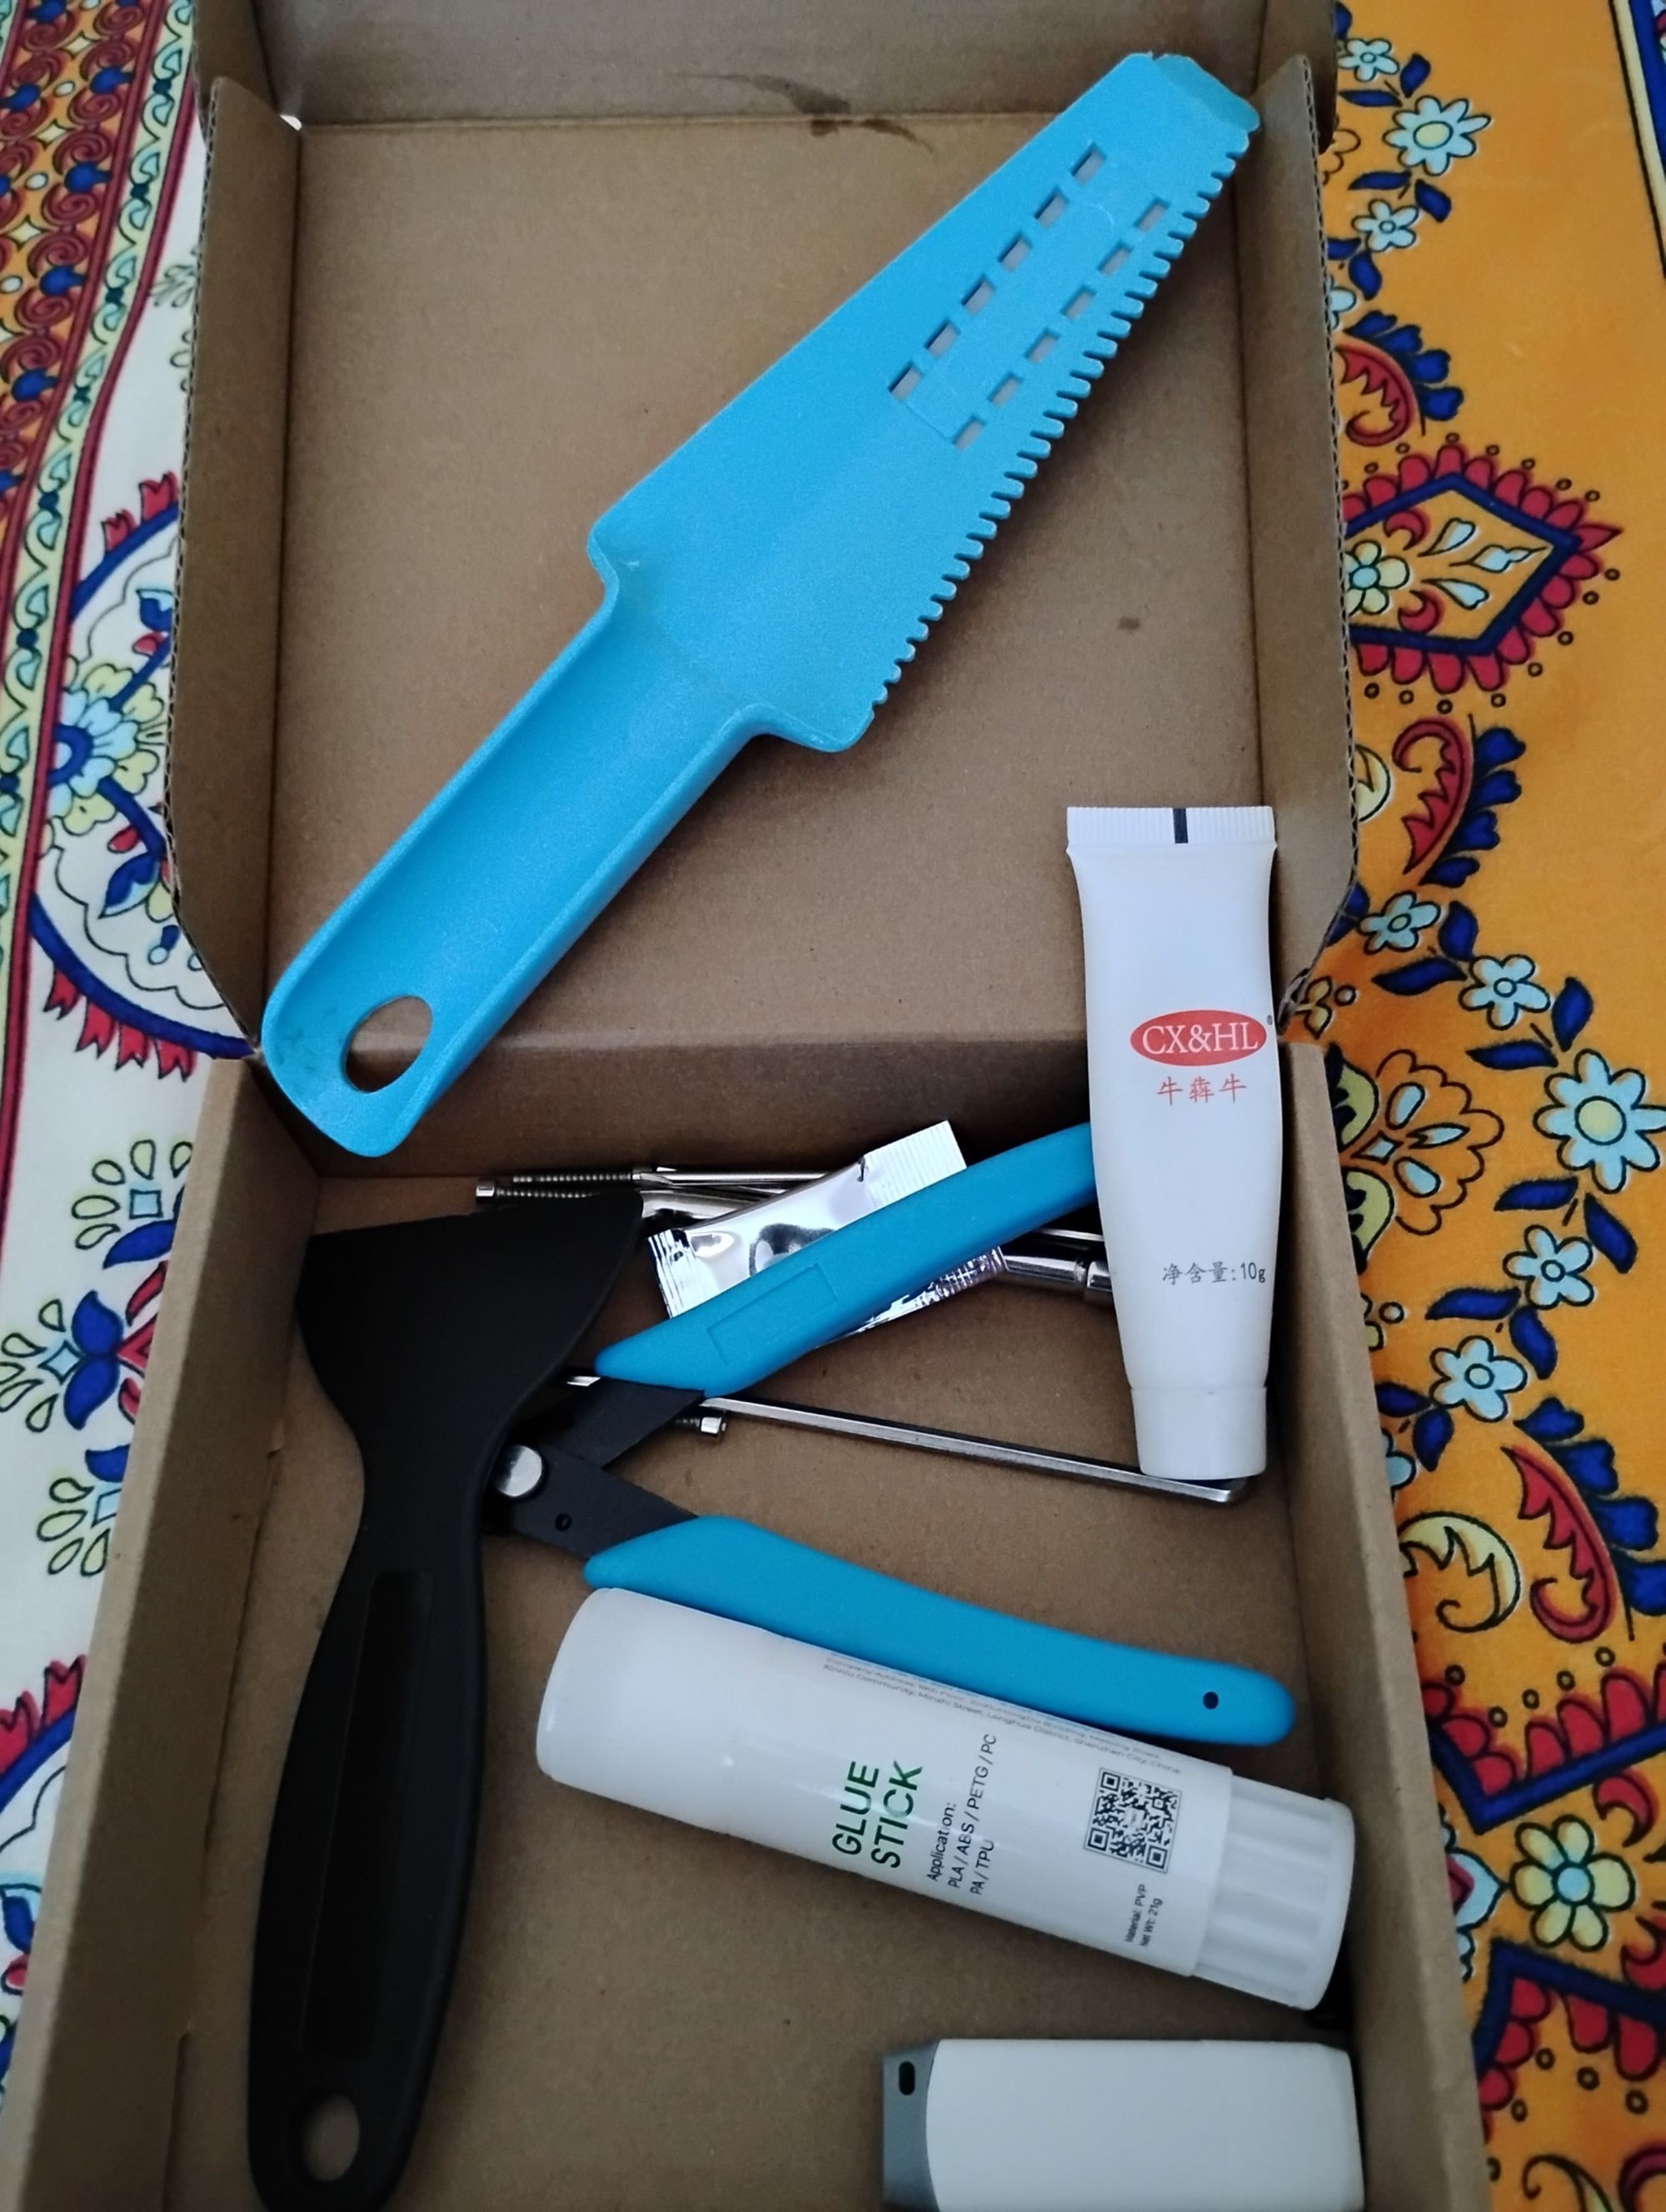
- There are only 3 allen key screws you need to take out, and the accompanying kit provides you with a whole tool kit to pretty much service it.
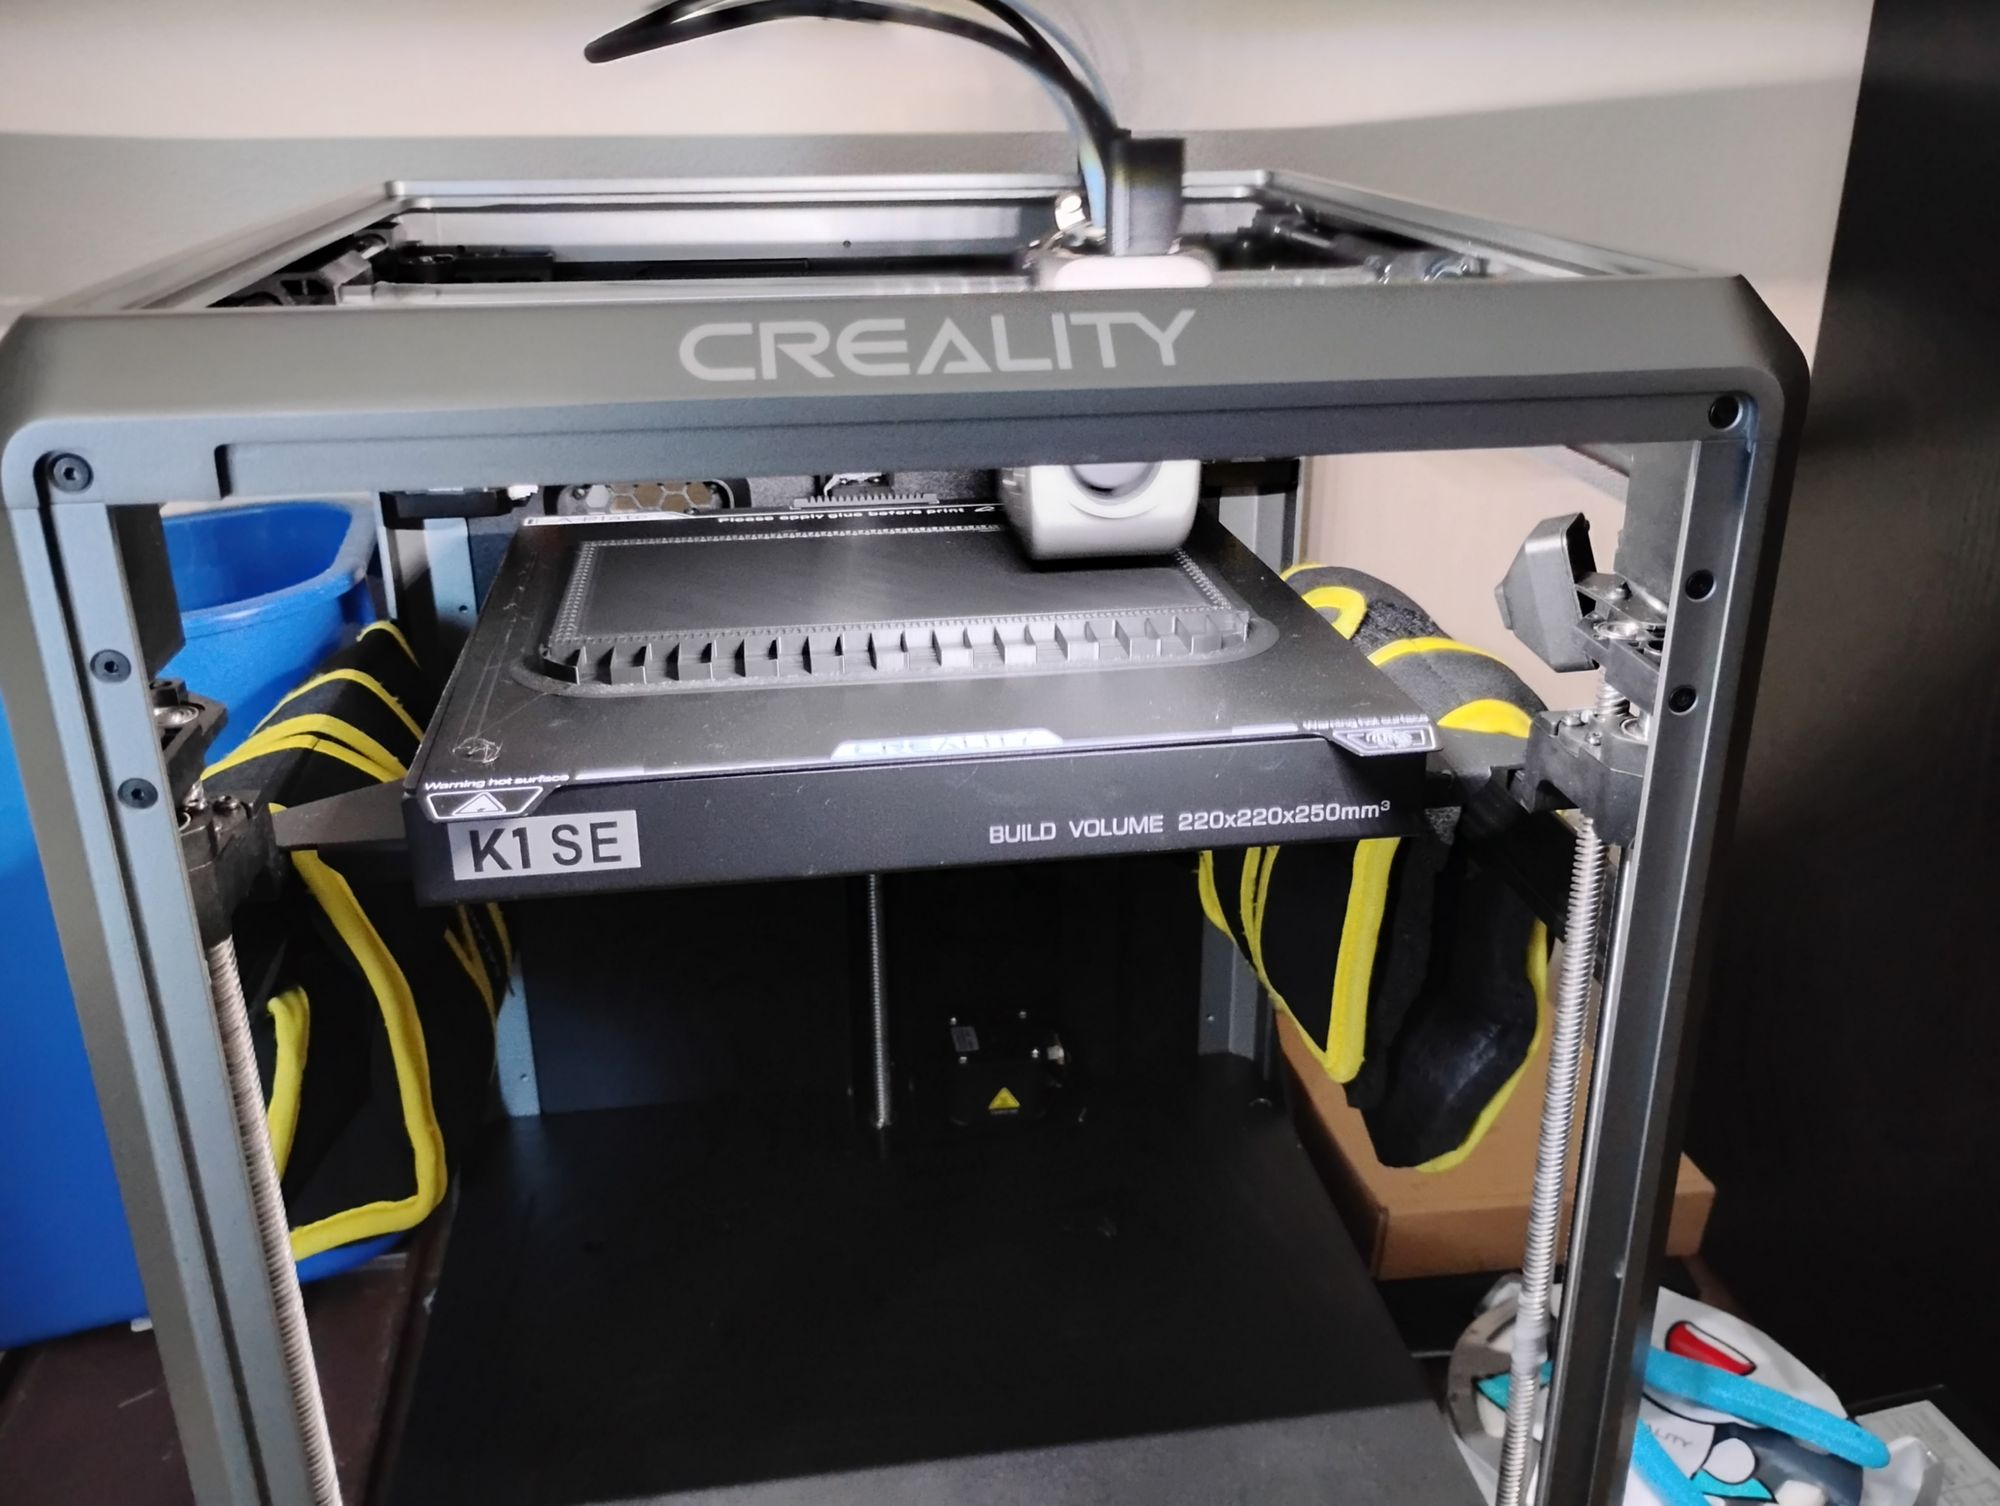
- Under the main bed is a foam cushion. I left it there for a few days but I guess you can remove it, it doesn't seem to interfere.
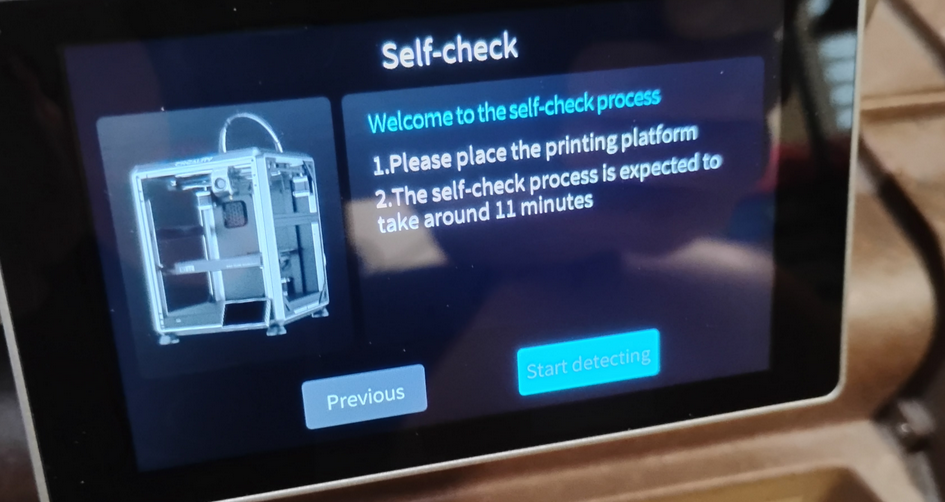
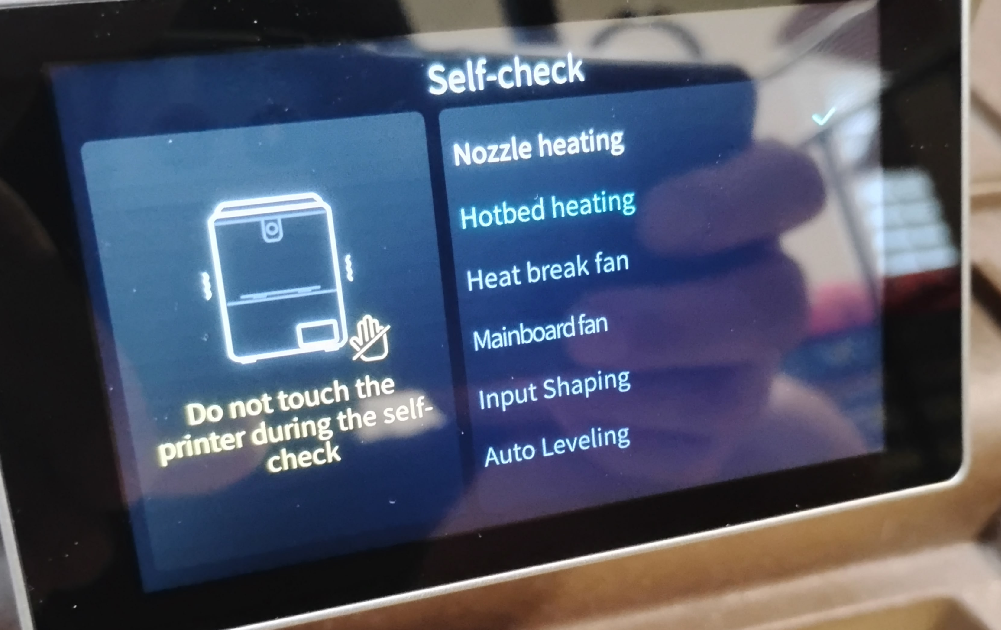
- On first power up it does a very good long diagnostic of about 11 minutes. I did not have filament loaded and it didn't seem to affect these tests.
- Connecting it to your wifi was very simple. That's pretty intuitive so not really covered here.
Loading Filament.
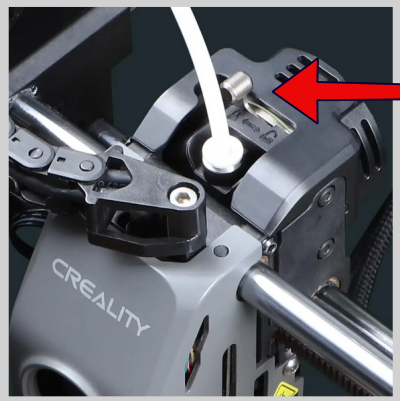
- Loading the filament will look as such, you simply slide it through the sensor which is the device with the arrow in the picture below.
- Note! - The filament if it even has a slight bend will 'bump' the inside of the sensor. It was found by firmly holding the filament and rotating it - it then went right in. I thought I did something wrong. It's just a tight tolerance fitting.
The Extruder / Hot End Assembly
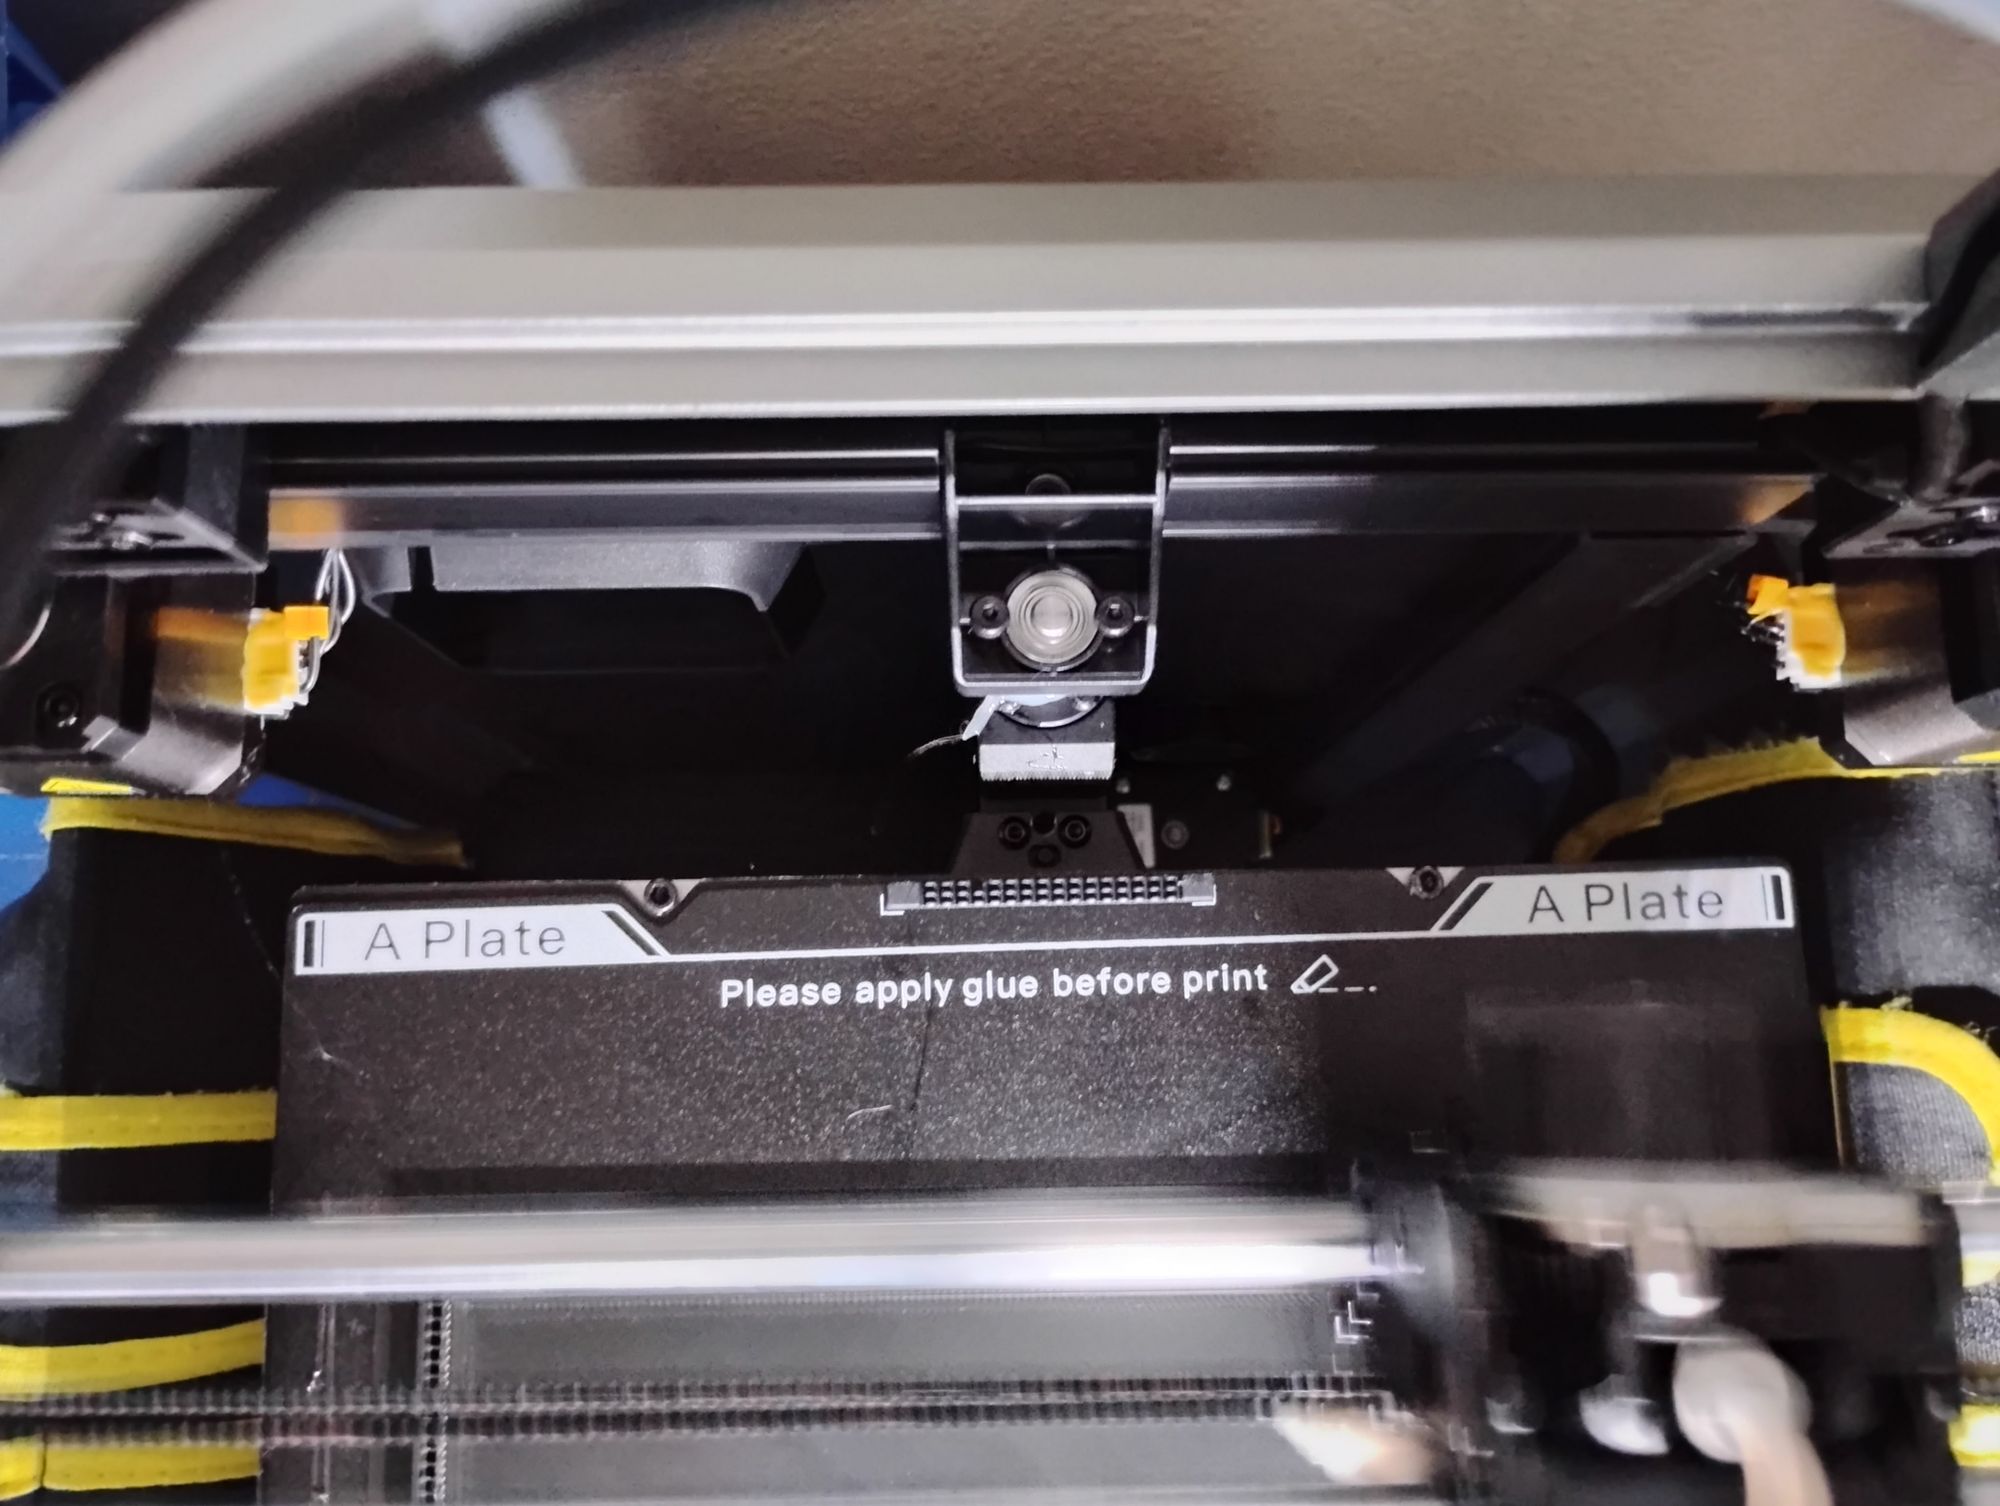
- You hand push the filament in until it firmly is seated in the extruder / hot end assembly.
- Note the tensioner which on older models was intuitive. On this new model was more buried and the casing cover doesn't really show it. This printer came in the 'unlocked position' the tab in the below photo shows it in the 'locked position' Without locking this it does not set tension and I was wondering why this wasn't extruding even though I was calling for it from the menu.
Test Printing
- There are extruder settings under the config and it is pretty graceful in that obviously your hotend needs to be clearly on, it has this forgiving logic. If you call for extruder it also has the sense to turn on your hot end - all accessible from the little menu.
- It is common for the hotend to run at 230 Celcius which is a little hotter than older models (190-210 C.) Because it is moving way faster than the older models I presume that is the correct setting for this machine. I have never adjusted or even toyed with its settings. If their engineers have spent five years tuning these its probably wise to go with what they give you.
- The volume capacity of these machines looks to be about 40 cubic mm/s which is significantly faster than the older 8 cubic mm/s on the older Creality.

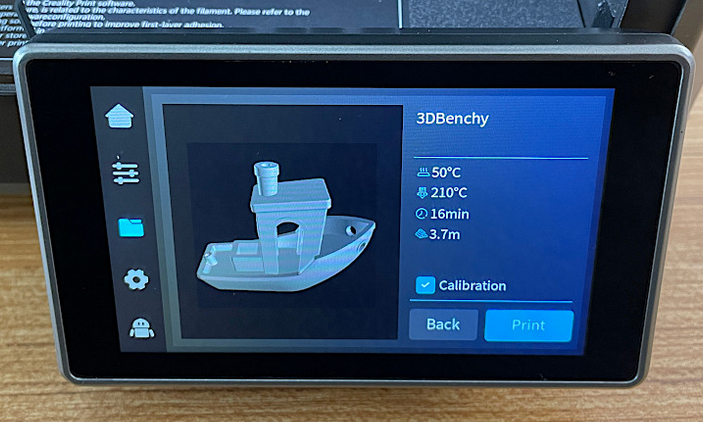
- Benchie printed in about 16 minutes and it BLASTED out.. I suspect that STL file was highly tuned..
- I noticed that the benchie was tuned for 500mm/s but your typical print might be 300mm/s. Considering that I was very used to barely getting 50mm/s out of the older Creality I'm not that concerned that I neeed even more speed.
- How the benchie came out:

Bed Leveling
- Bed Leveling was just part of the printer where before it was long elaborate processes of modifying your existing printer with add-in's and extra settings on your Octoprint. This is already built-in!
- It does an automatic bed levelling check every time you print.
Brush Cleaning
- This printer also has an automatic tip cleaning cycle which is does by heating the tip up to about 205, then wiping it on the brush in the photo below.
The Cycle:
- 205 Celcius, Brush Clean.
- Temperature drops back while bed is still climbing to 60.
- Bed Levelling. It looks to check roughly 12-16 points on the bed.
- Temperature climbs to 230 C, before doing the 'left side bum wipe' where the tip extrudes a bit off the left side.
- Start printing (it moves shakingly fast if you are from the older printers it seems almost violent in its sudden movements.)
- Print speeds on external brims are slower, and internal it flies. Smart. So you external has a very nice finish and it moves fast on the internal which you never see.
Glue Stick ?
- On the older printers I was pasting on layer after layer, I've never once needed to add glue while using this machine - as long as I gave my models a good solid brim and kept the bed at 60 degrees, it came out solid.
- Removing the flexible bed sheet there has only been one time I could not get the model to easily pop off. I used my flush cuts to pince-prick the model off.
Adding the Camera
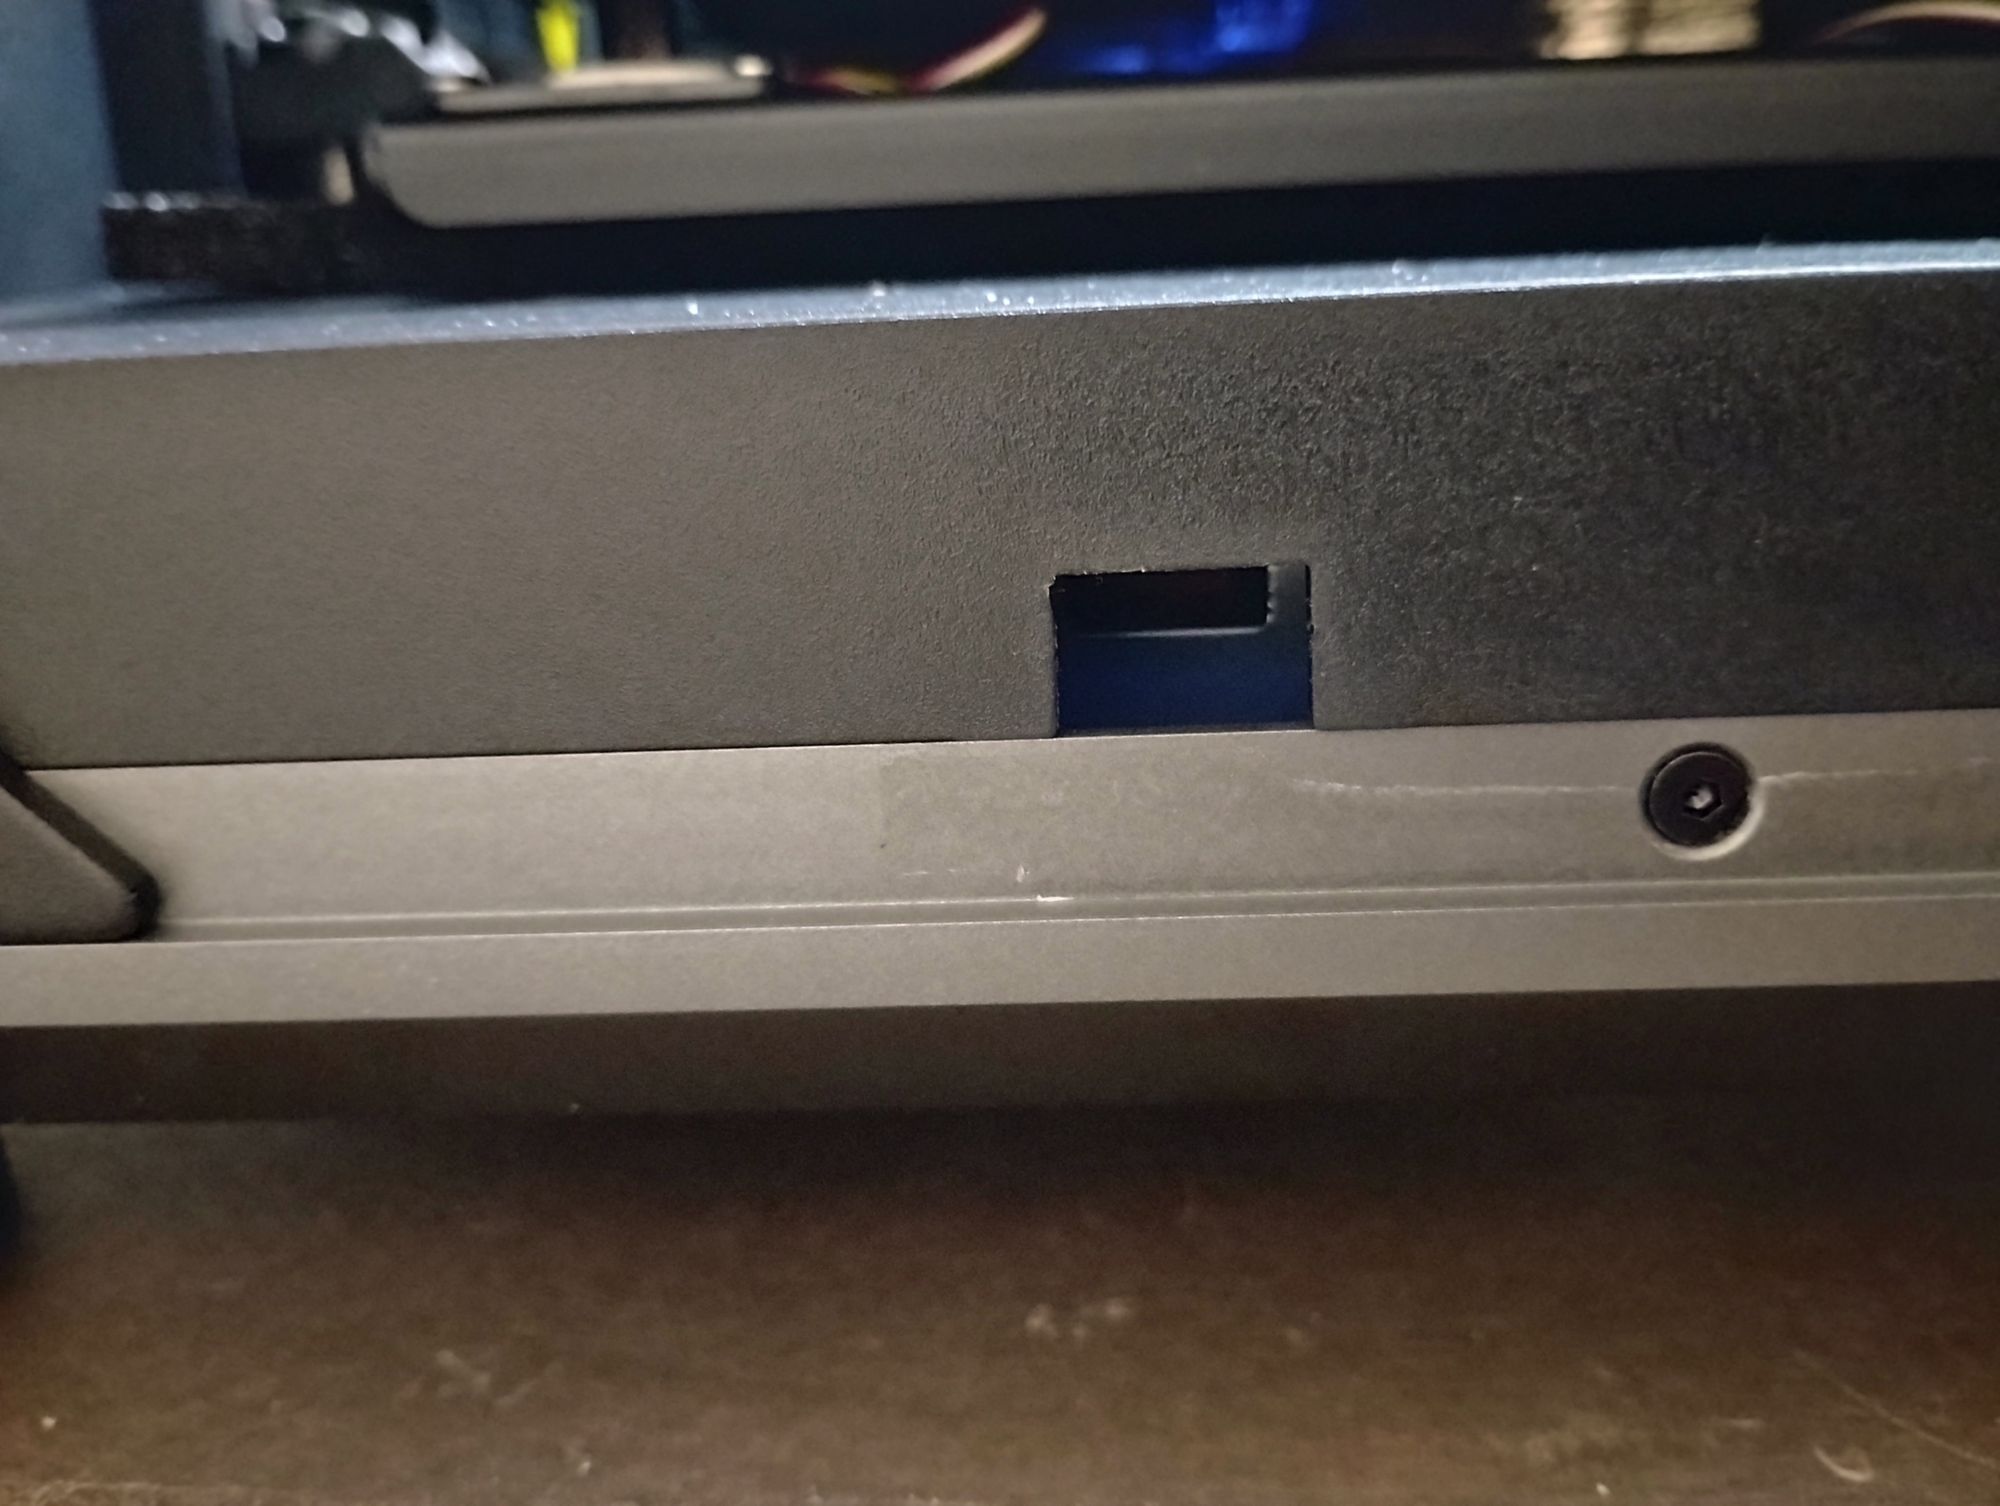
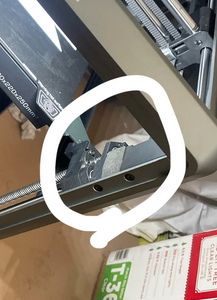
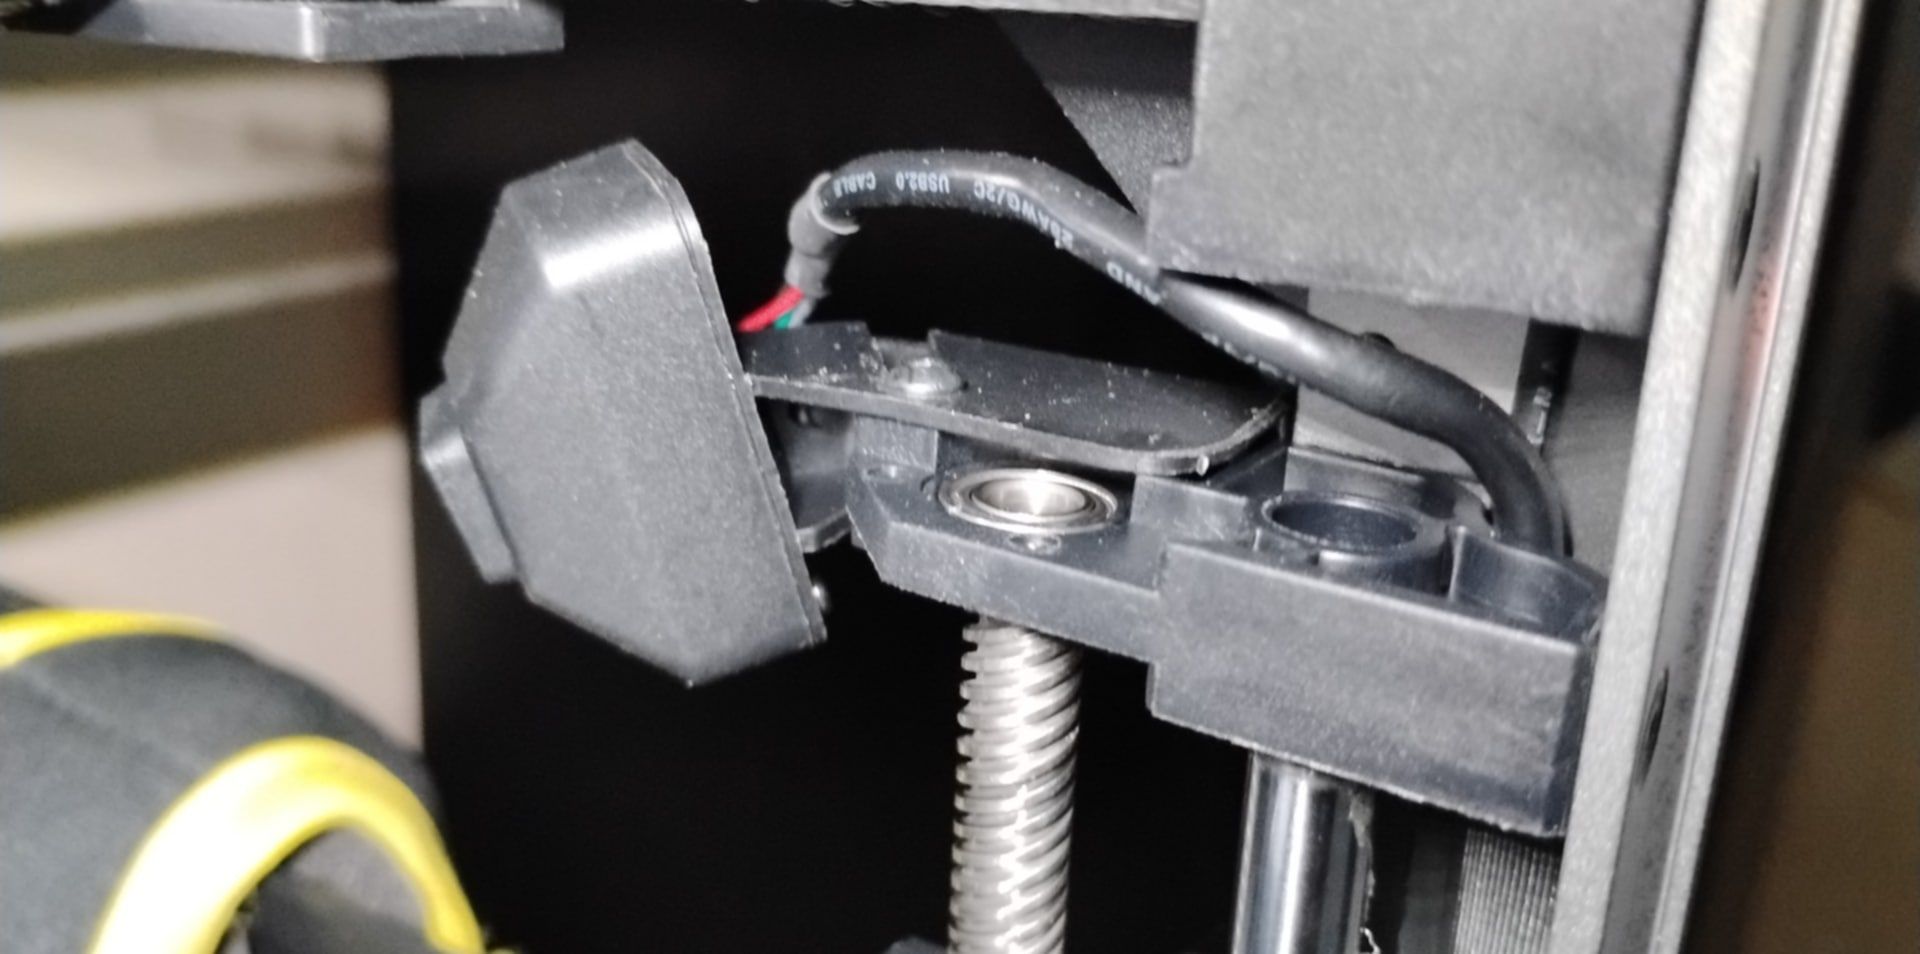
- Just inside the printer where the arrow points will be a small foam plug, pull that out and you will see a little connector. A bit of internet search shows the point a little better
- The driver support etc was already built in. Power up your machine and it automatically supports it.
- The bracket was a janky feeling when I put mine on.. I fuddled around for some time, but this is how I aligned mine.
Service Kit
- The flush cuts are very handy for cutting filament. The one item I need which is probably perfect for removing the filament print hairs is a standard toothbrush.
- Don't forget to use the grease tube they give you for your steel rollers!
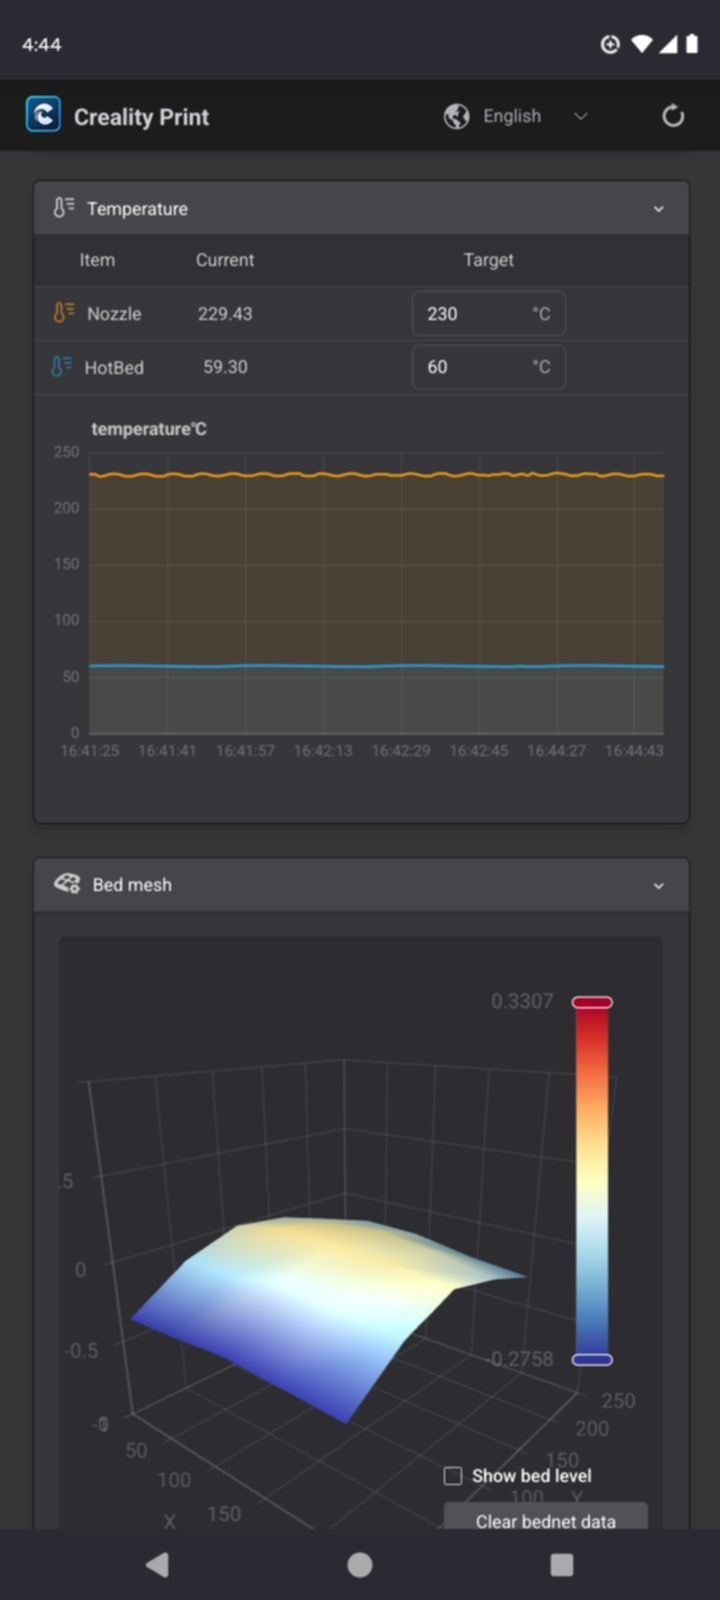
Creality Web Interface
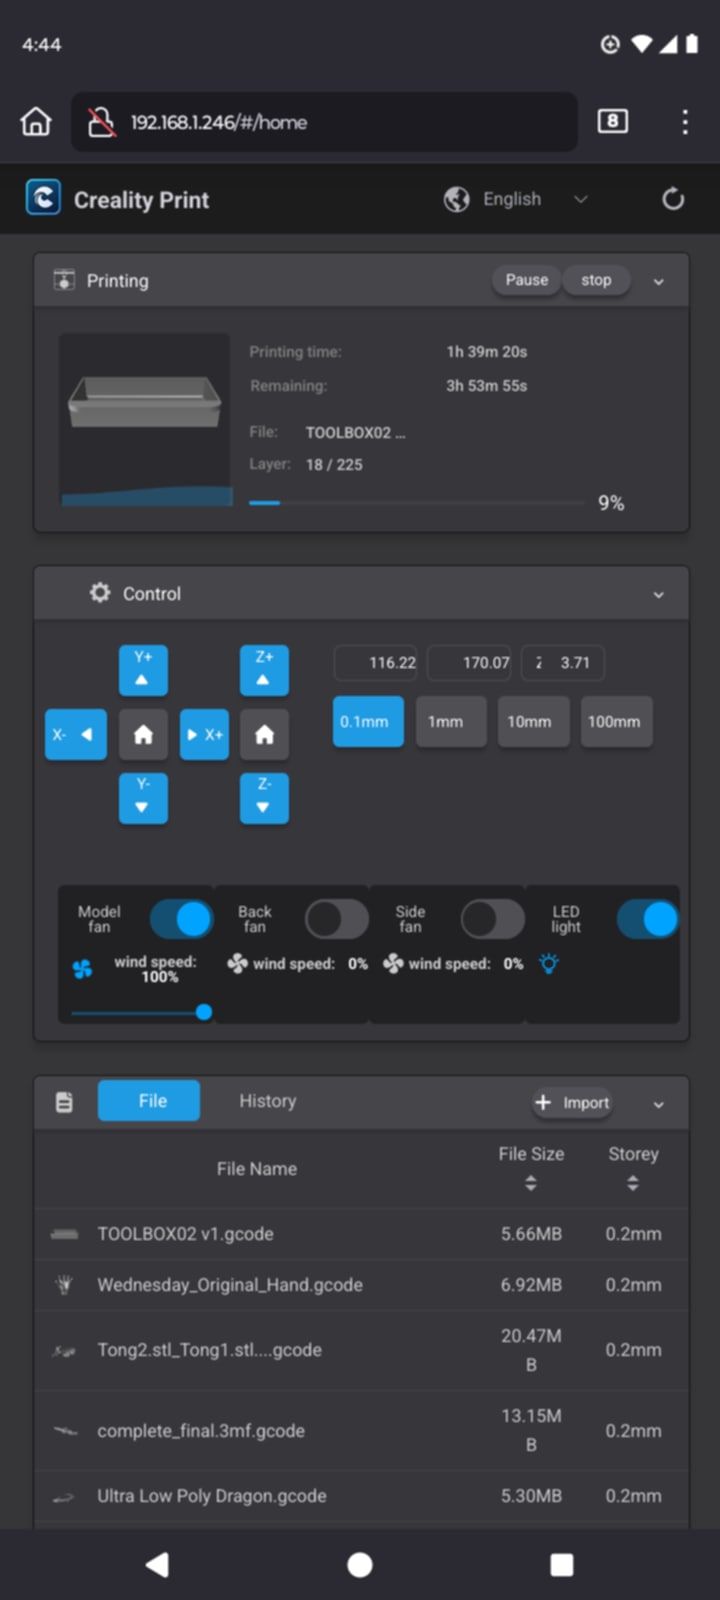
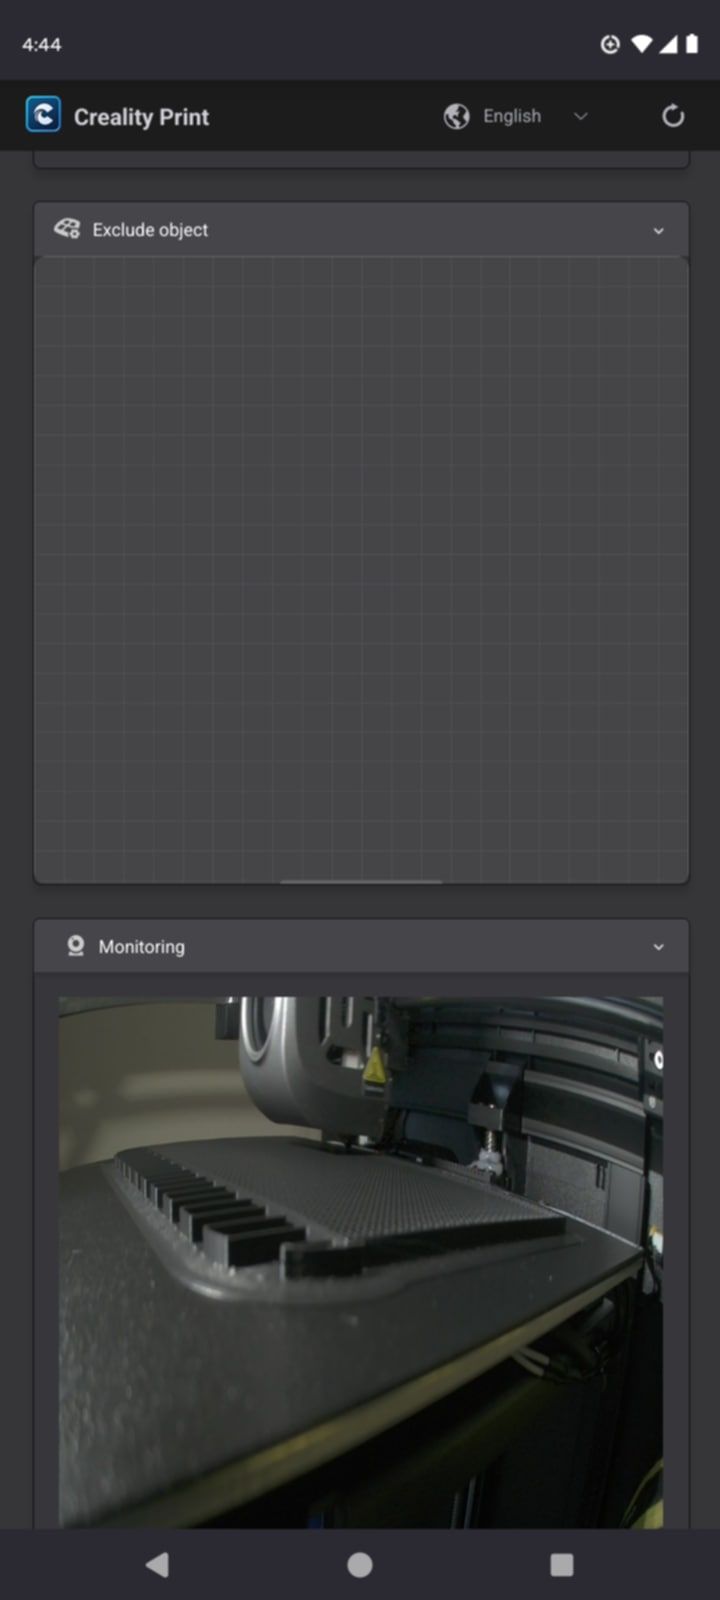
- The Creality K1 SE if you look at it's configuration will grab a spare IP address off your home router. For our instance we found it at 192.168.1.246. Which can be viewed from your phone and here are some screen shots of what it looks like:
- This is just really nice, and it doesn't give you a plethora of Octoprint type settings, but just lets you watch your print in real time.
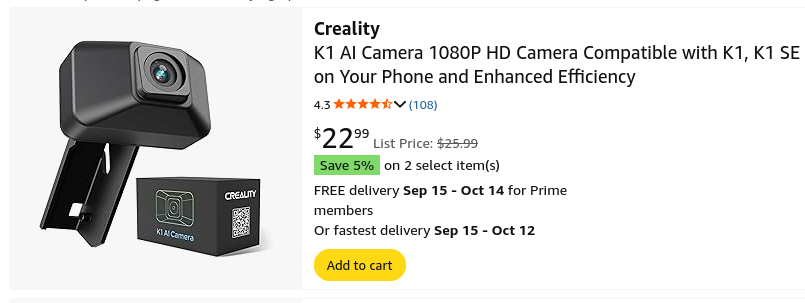
- This is a no-brainer, spend the extra $20 and get the camera for it.
Creality Phone App
- Creality has a very nice phone application. Once you have loaded the application and setup your account (which we did completely free) it will have a QR code scanner which you scan off the touch screen of the printer. That's it. Once you have added your printer to the application you can send prints to it from anywhere in the world, and see it's progress.
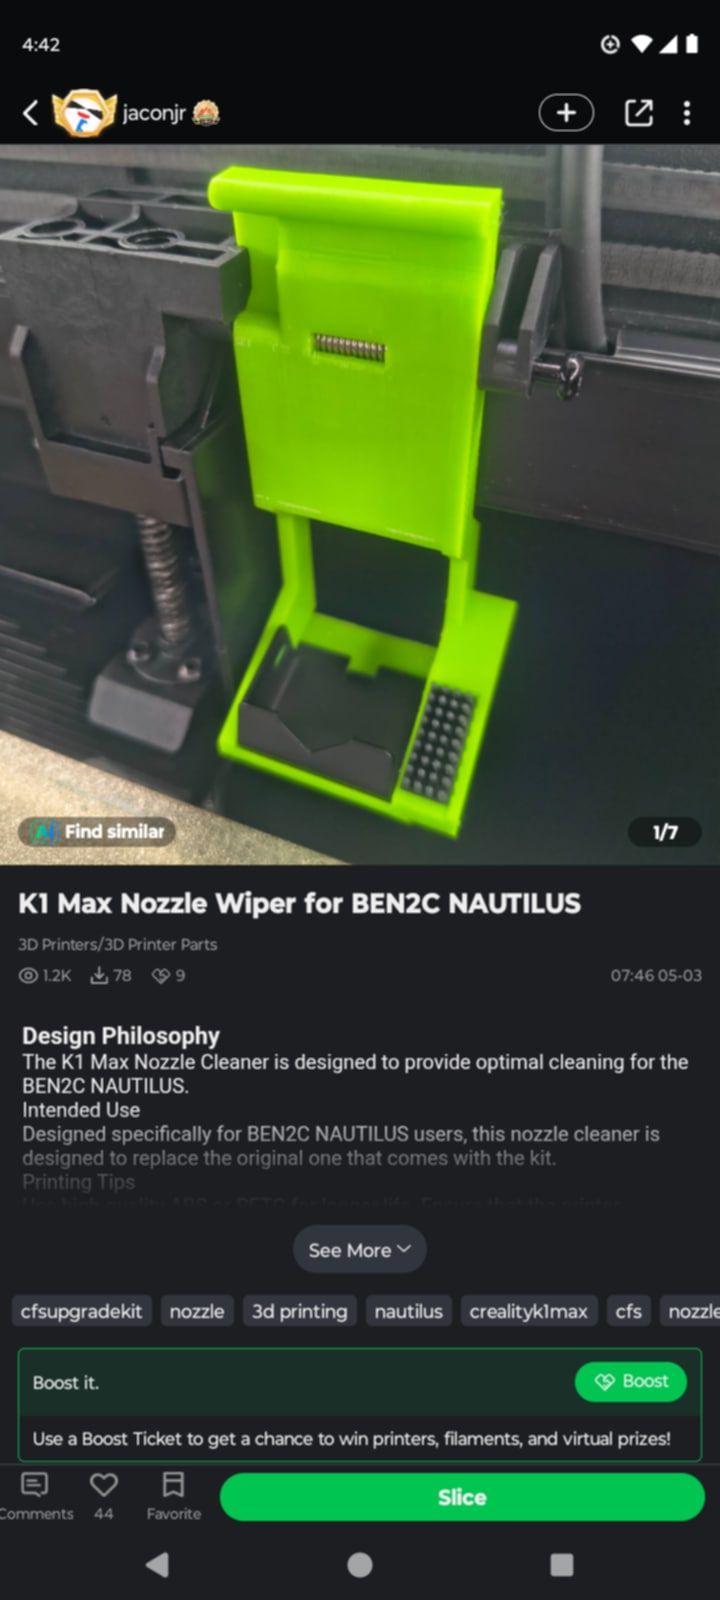
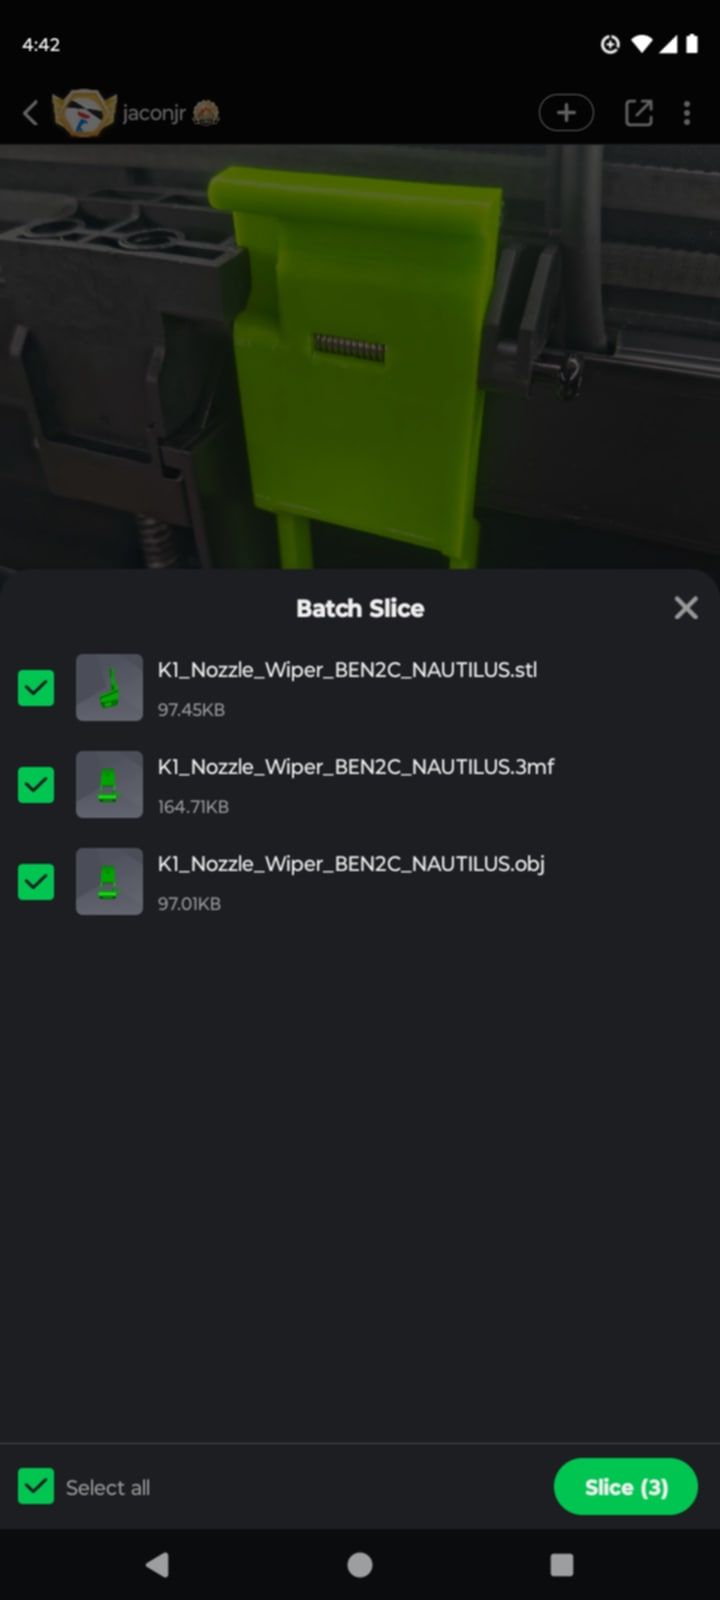
- In this instance we picked out a part which you can then send to the slicer by simply hitting the 'slice' button.
- One you pick your item you can select a single sub part or layout multiple parts on your bed at the same time.
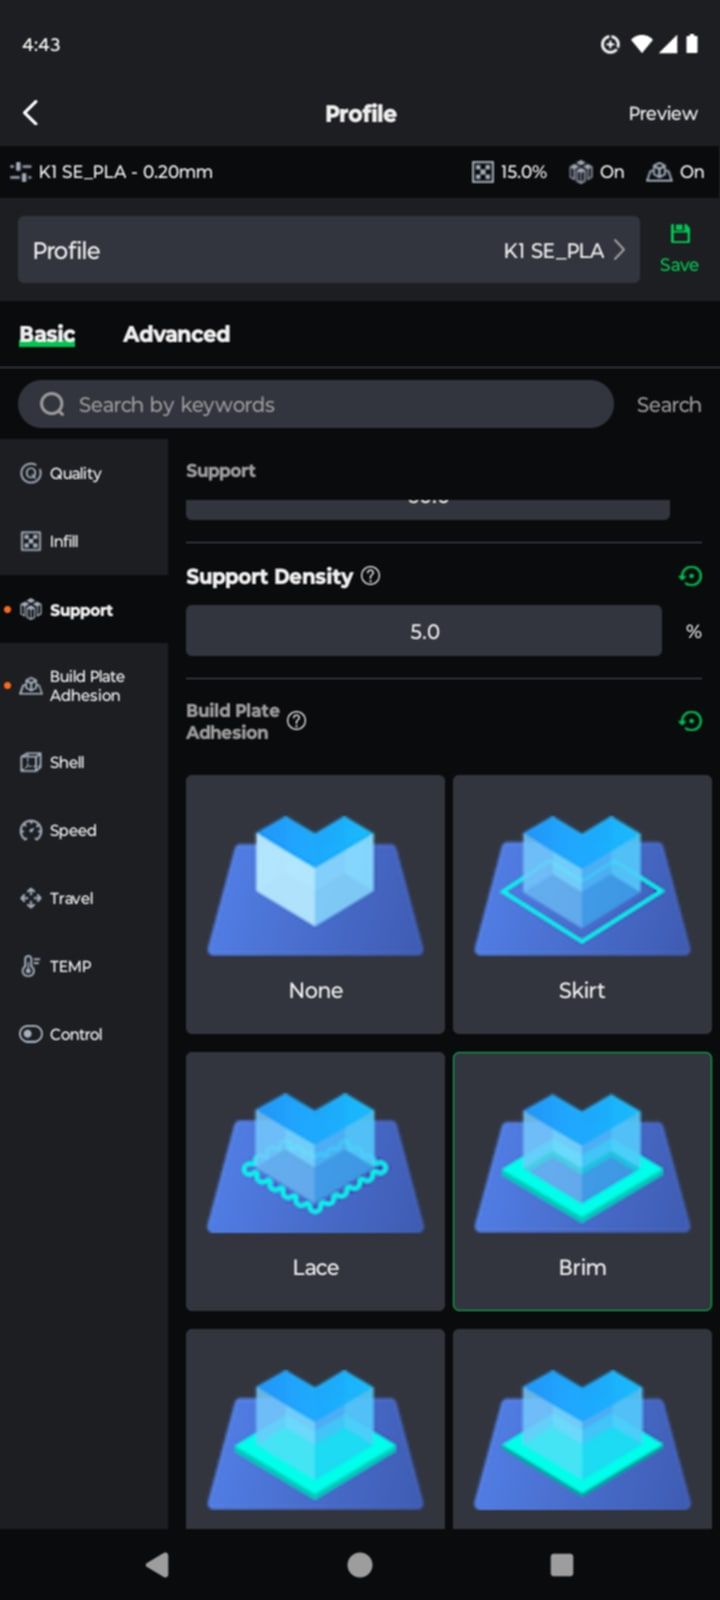
- Once you have the parts you want, you can then rotate them, scale them, move them - all from your phone. You can also add your supports, and your brim, and or set your infill (again all right off your phone)
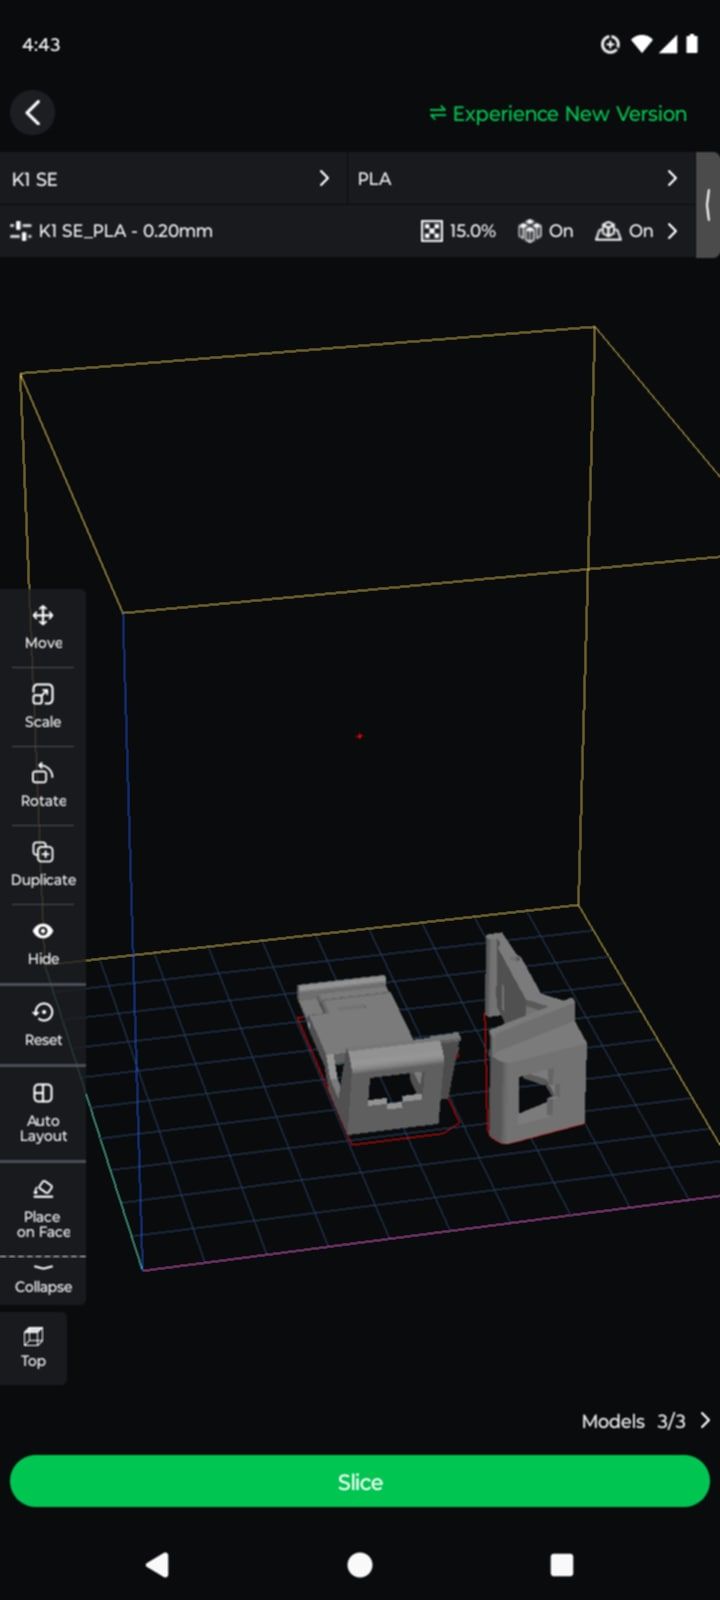
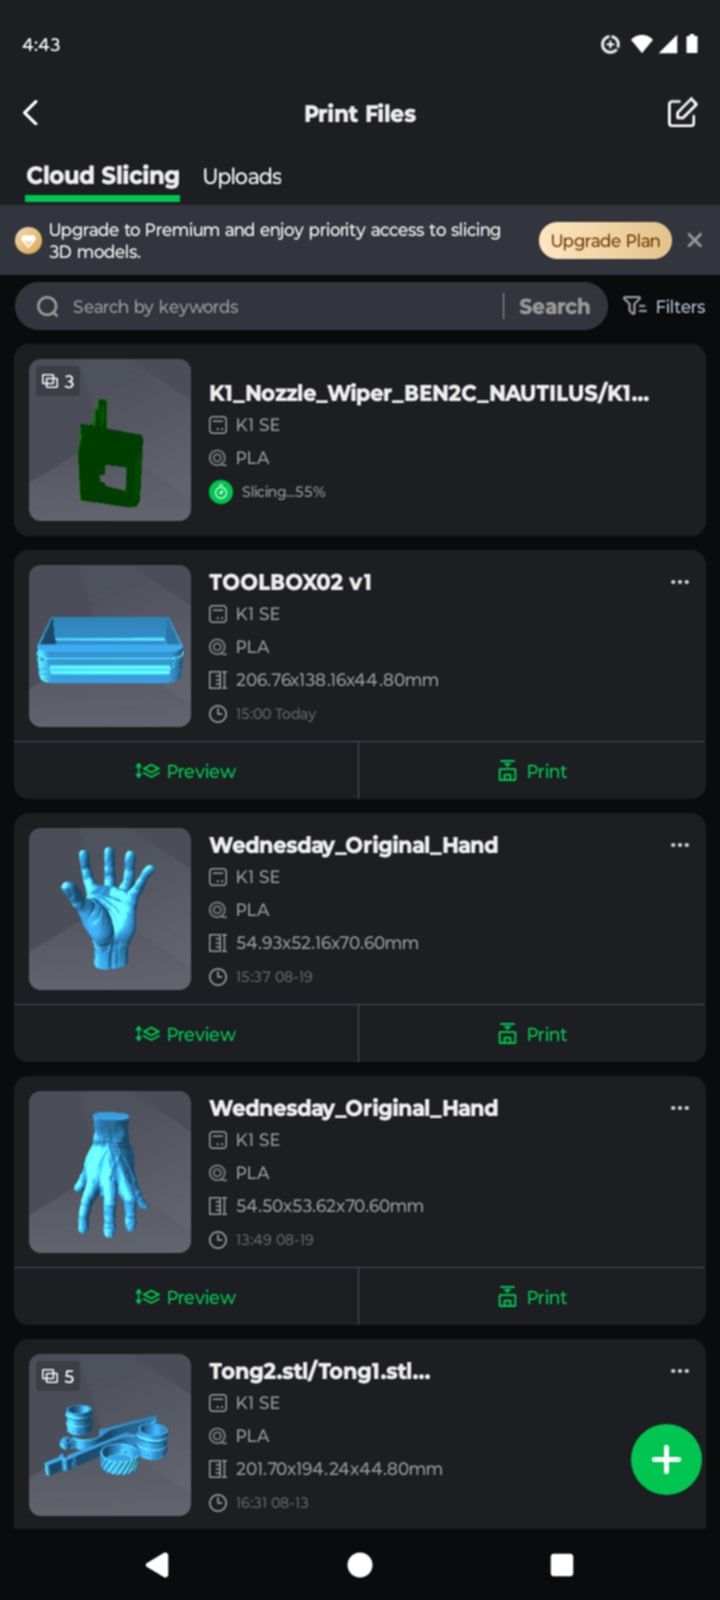
- Once you finally have your model how you prefer it - it does a 'cloud slice' which I found was very quick. You can see other things that have been selected for slicing. Again this is all free (for now).
Noise
- It is definitely recommended that yes these are working machines, I do recommend a noise blanket for them, or a closet + noise blanket. I would not sleep in a room with this running because it would disrupt your rem sleep. Can you put this in your laundry room, or are you ok with it in your kitchen. You'll have to figure that out.
- The cost to get the panels and the 'enclosed' model is significantly higher (like double!) I did not find at this time the extra door kits. So..
0:00
/
Vibration
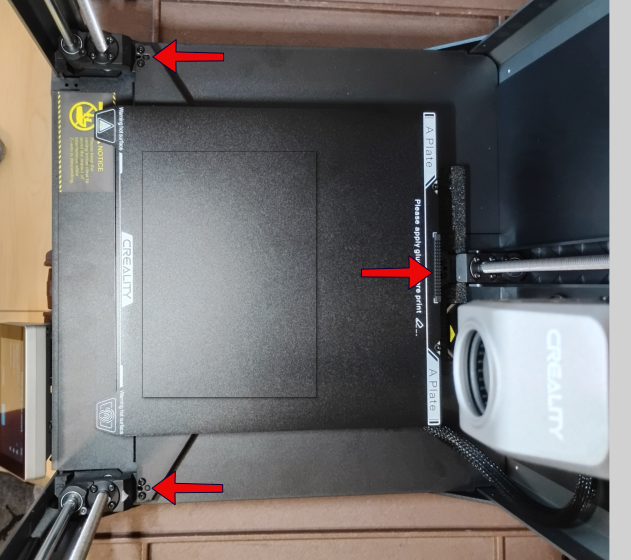
- The top of the printer really wiggles. It's all moving together, but irrespective - that cannot be good for anything over time. My simple and very effective solution since I did not buy the roof cover (which you can weight down) was some leg weights I put onto the brackets. Because the head never traverses down and the bed moves up to it - even though they look like they are blocking the printer - they do not.
Conclusion:
- Compared to what the same Creality Printer of even 5 years ago did, these printers have moved forward oceans in capability and productivity. I do realize that some of the competitor products are also highly competitive in terms of print speed etc.
- It has been my conclusion that one will not be able to keep this printer busy. AKA - you don't need it to print any faster because you'll probably have trouble finding more stuff to print. After the first couple weeks of printing cool stuff I found myself printing less.
- You can run five of these printers off your phone (at the same time.)
- Compared to the long hours of fighting with and configuring the older Creality this was litterally a game changer. It can be psychologically challenging to buy another printer when you have one sitting there (especially us self-reliant handy types like to find value in the things we already have bought.) But I realized I have become like everyone else - a hot new printer doing my work while my older ones sit there as a back up. I am ok with that.
Kids:
- This is a real gift of education for the kids - seriously. If they do get past the phone application and start modelling, it would teach them oceans of real fundamental engineering and part design that can give them an incredible edge as it calls for many many skillsets together to pull it off. It is a very good family investment.
