Automatic Ad Generation Using Stability-AI Try 2
Automatic Ad Generation Using Stability-AI Try 2

We make a second attempt at a less-regulated AI that will most likely not incure issues as you should not need to sign up with any company to use this:
- This article has been tested and modified by a human. So someone real actually went through at made sure it worked!
- Unless you work with these LLM's every day - you probably will be at a complete loss as to what to do with it, thus typically the cycle consists of a. downloading the example code, b. running it to error, c. giving that error to the LLM (get a good one) and then d. repeating the cycle until it works,
- Typically about 5-8 cycles back and forth from the LLM is usually required sometimes with a hint suggestion to 'bump it up' and you will get a working LLM.
- The example code is what worked after already doing these cycles for you.
Comprehensive Guide to Generating Banner Ads Using Stable Diffusion v1-4 on Hugging Face
This guide provides a detailed, step-by-step process for utilizing the Stable Diffusion v1-4 model, hosted on Hugging Face at https://huggingface.co/CompVis/stable-diffusion-v1-4, to generate banner advertisements in various sizes. The model is a latent diffusion-based text-to-image generator capable of producing high-quality visuals from textual prompts. To accommodate the specified hardware configuration—two NVIDIA GeForce RTX 3060 Ti GPUs (each with 8 GB VRAM) and 128 GB system RAM—the guide incorporates model splitting across the GPUs for efficient processing. Additionally, batch generation of 10 images per run is implemented to optimize throughput. Post-generation, examples using ImageMagick are included for overlaying text stamps, such as promotional slogans or calls-to-action, onto the banners.
The Stable Diffusion v1-4 model supports custom resolutions, making it suitable for banner formats. However, for optimal quality, dimensions should be multiples of 8 pixels, as the model's UNet architecture processes images in 64x64 latent space tiles (corresponding to 512x512 pixels after decoding). Extreme aspect ratios (e.g., very wide banners) may require additional inference steps or guidance scales to mitigate artifacts.
Prerequisites and Installation
Before proceeding, ensure the following hardware and software requirements are met:
- Hardware: Two NVIDIA RTX 3060 Ti GPUs with CUDA drivers installed (version 11.8 or higher recommended for compatibility). 128 GB system RAM is sufficient for CPU offloading if VRAM constraints arise during batch processing.
- Software Environment: Python 3.8 or higher, with CUDA-enabled PyTorch (version 2.0+ for efficient multi-GPU support).
- Dependencies: Install the required libraries using pip. These include Hugging Face's Diffusers for model handling, Accelerate for multi-GPU orchestration, and Transformers for text encoding.
Execute the following commands in a terminal:
pip install torch torchvision torchaudio --index-url https://download.pytorch.org/whl/cu118
pip install diffusers accelerate transformers
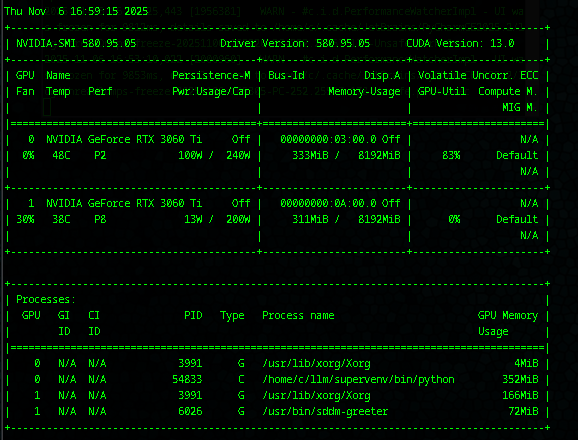
No login is required for this model, as it is publicly accessible without gating. Verify GPU detection by running nvidia-smi in the terminal, which should display both GPUs.
Configuring Multi-GPU Model Splitting
Stable Diffusion v1-4 can be distributed across multiple GPUs using the Accelerate library, which enables device mapping. In this setup:
- The text encoder and VAE (Variational Autoencoder) are placed on GPU 0.
- The UNet (the core diffusion component) is split across GPU 0 and GPU 1 to balance the computational load, as it is the most memory-intensive part.
- CPU offloading is enabled as a fallback, leveraging the 128 GB RAM to handle overflow if VRAM (16 GB total across GPUs) is exceeded during batching.
This configuration minimizes memory usage per GPU, allowing for batch sizes up to 10 at resolutions like 728x90 without out-of-memory errors.
Batch Generation of Banner Ads
The following Python script demonstrates how to generate 10 images in batch for a given banner size and prompt. Repeat the process for different sizes by modifying the height and width parameters. Example banner sizes include:
- Leaderboard: 728x90
- Medium Rectangle: 300x250
- Skyscraper: 160x600
- Wide Skyscraper: 300x600
Save the script as generate_banners.py and run it with python generate_banners.py.
import torch
from diffusers import StableDiffusionPipeline, DPMSolverMultistepScheduler
from accelerate import Accelerator
# Initialize Accelerator for multi-GPU setup
accelerator = Accelerator(device_placement=True, mixed_precision="fp16")
# Load the model without device_map to avoid conflict
pipe = StableDiffusionPipeline.from_pretrained(
"CompVis/stable-diffusion-v1-4",
torch_dtype=torch.float16,
safety_checker=None # Optional: Disable if not needed for ads
)
pipe.scheduler = DPMSolverMultistepScheduler.from_config(pipe.scheduler.config) # Faster sampler
pipe.enable_sequential_cpu_offload() # Offload to CPU (128 GB RAM) for memory efficiency
pipe = accelerator.prepare(pipe) # Let Accelerate handle multi-GPU distribution
# Define prompt and banner parameters
prompt = "A vibrant promotional banner for a tech product sale, futuristic design with neon lights" # Customize as needed
batch_size = 10
num_inference_steps = 50 # Adjust for quality (higher = better, slower)
guidance_scale = 7.5 # Controls adherence to prompt
# Example banner sizes (run sequentially or in a loop)
banner_sizes = [
(728, 90), # Leaderboard
(300, 250), # Medium Rectangle
(160, 600), # Skyscraper
(300, 600) # Wide Skyscraper
]
for width, height in banner_sizes:
# Ensure dimensions are multiples of 8
height = (height // 8) * 8
width = (width // 8) * 8
# Generate batch of 10 images
images = pipe(
[prompt] * batch_size,
height=height,
width=width,
num_inference_steps=num_inference_steps,
guidance_scale=guidance_scale
).images
# Save images
for i, image in enumerate(images):
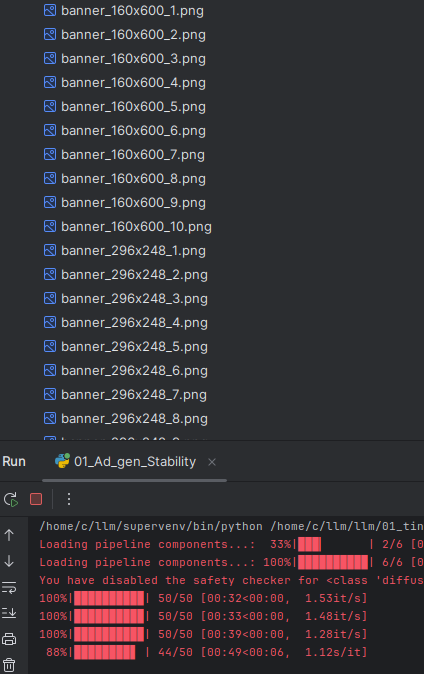
image.save(f"banner_{width}x{height}_{i + 1}.png")
print("Banner generation complete.")Execution Notes:
- Runtime: On two RTX 3060 Ti GPUs, generating 10 images at 728x90 resolution with 50 steps typically takes 2-5 minutes per batch, depending on system load.
- Memory Management: If VRAM issues occur, reduce
batch_sizeto 5 or increase inference steps gradually. The 128 GB RAM ensures smooth CPU offloading. - Customization: Experiment with negative prompts (e.g.,
negative_prompt="blurry, low quality") to refine outputs.
Post-Processing: Stamping Text with ImageMagick
After generation, use ImageMagick—a command-line tool for image manipulation—to overlay text stamps on the banners. This is useful for adding slogans, logos, or watermarks. Install ImageMagick via your package manager (e.g., sudo apt install imagemagick on Ubuntu or brew install imagemagick on macOS).
The following Bash script (stamp_banners.sh) processes all PNG files in a directory, adding top and bottom text stamps with a bold font, white fill, and black outline for visibility. Make the script executable with chmod +x stamp_banners.sh and run it as ./stamp_banners.sh <directory> <top_text> <bottom_text> (e.g., `./stamp_banners.sh . "Flash Sale!" "Buy Now - 50% Off").
#!/bin/bash

# Usage: ./stamp_banners.sh <input_directory> <top_text> <bottom_text>

input_dir="$1"
top_text="$2"
bottom_text="$3"

if [ -z "$input_dir" ] || [ -z "$top_text" ] || [ -z "$bottom_text" ]; then
    echo "Usage: $0 <input_directory> <top_text> <bottom_text>"
    exit 1
fi

for file in "$input_dir"/*.png; do
    if [ -f "$file" ]; then
        output_file="${file%.png}_stamped.png"
        # Get image dimensions for positioning
        width=$(identify -format "%w" "$file")
        height=$(identify -format "%h" "$file")

        # Calculate font size based on banner width (e.g., 5% of width)
        point_size=$((width / 20))

        convert "$file" \
            -font Arial-Bold -pointsize $point_size -fill white -stroke black -strokewidth 2 \
            -gravity North -annotate +0+10 "$top_text" \
            -gravity South -annotate +0+10 "$bottom_text" \
            "$output_file"
        echo "Stamped: $output_file"
    fi
done

echo "Text stamping complete."
Customization Options:
- Adjust
-pointsizefor text scale, or use-fontto specify a custom font (e.g., Impact for meme-style). - For logos, replace annotations with
-drawcommands or composite separate images. - Handle various sizes automatically via dynamic calculations.
This guide ensures efficient, scalable banner production while leveraging your hardware optimally. If further optimizations are required, consult the Diffusers documentation for advanced schedulers or quantization techniques.
Run Notes:
- First time it takes some time to download the model, expect a good 10 minutes

- In this configuration only 1 GPU was activated, even though we asked it if it could! anyways it showed the following nvidia-smi output:
The directory did fill up:
At this point we cleaned the code up:
- Make horizontal AND vertical ads
- Put them in a nice banner directory.
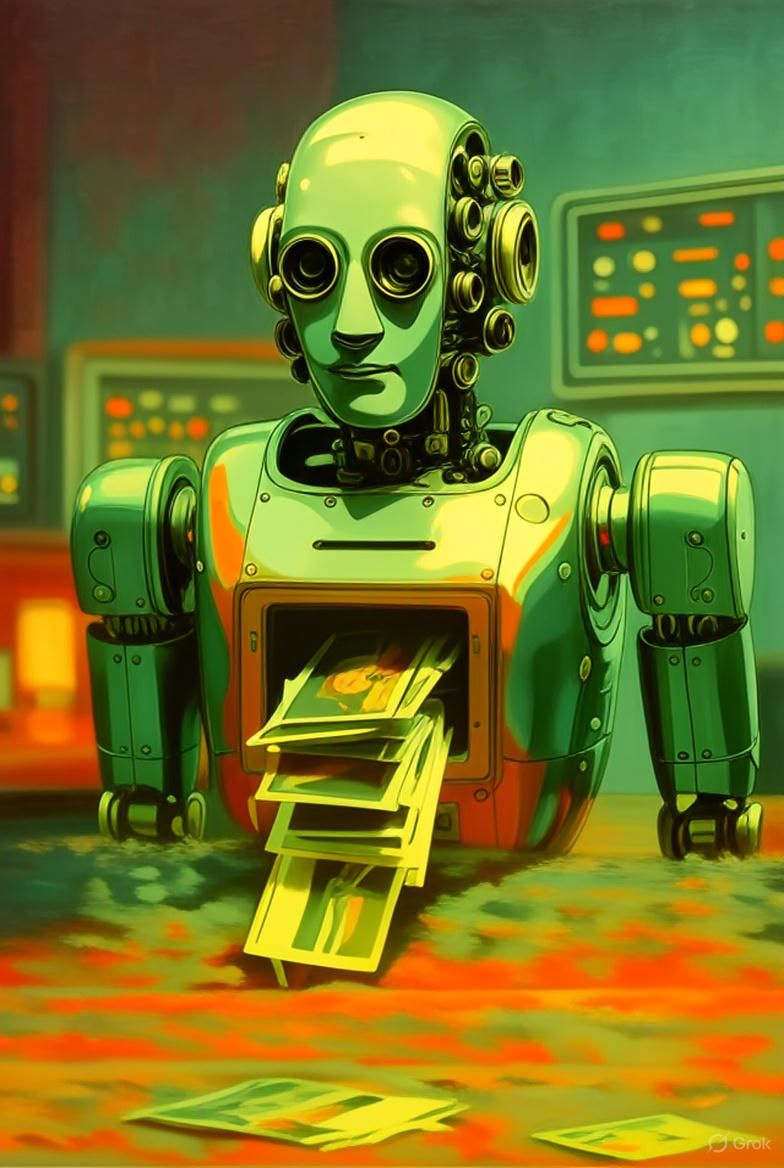
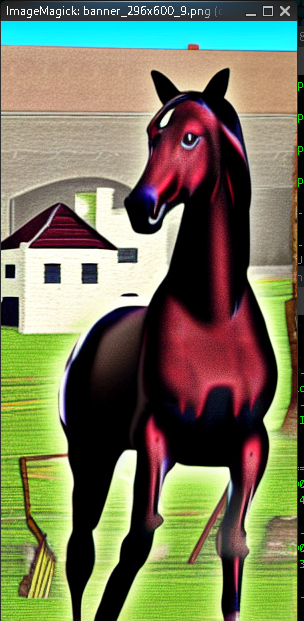
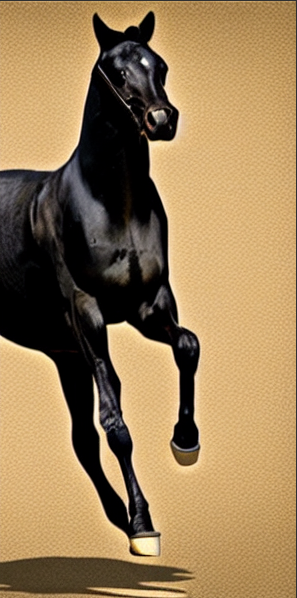
- We went with more traditional photos a black stallion on the right of the image (horizontal)
import torch
from diffusers import StableDiffusionPipeline, DPMSolverMultistepScheduler
from accelerate import Accelerator
import os

# Initialize Accelerator for multi-GPU setup
accelerator = Accelerator(device_placement=True, mixed_precision="fp16")

# Load the model without device_map to avoid conflict
pipe = StableDiffusionPipeline.from_pretrained(
    "CompVis/stable-diffusion-v1-4",
    torch_dtype=torch.float16,
    safety_checker=None  # Optional: Disable if not needed for ads
)
pipe.scheduler = DPMSolverMultistepScheduler.from_config(pipe.scheduler.config)  # Faster sampler
pipe.enable_sequential_cpu_offload()  # Offload to CPU (128 GB RAM) for memory efficiency
pipe = accelerator.prepare(pipe)  # Let Accelerate handle multi-GPU distribution

# Define prompt and banner parameters
prompt = "Make a bold black stallion on the right side of the banner"  # Customize as needed
batch_size = 10
num_inference_steps = 50  # Adjust for quality (higher = better, slower)
guidance_scale = 7.5  # Controls adherence to prompt

if not os.path.exists('banners'):
    os.mkdir('banners')

# Example banner sizes (run sequentially or in a loop)
v_banner_sizes = [
    (728, 90),  # Vertical Leaderboard
    (300, 250),  # Vertical Medium Rectangle
    (160, 600),  # Vertical Skyscraper
    (300, 600),  # Vertical Wide Skyscraper
    (90, 728),  # Horizontal Leaderboard
    (250, 300),  # Horizontal Medium Rectangle
    (600, 160),  # Horizontal Skyscraper
    (600, 300)  # Horizontal Wide SkyScraper
]


for width, height in v_banner_sizes:
    # Ensure dimensions are multiples of 8
    height = (height // 8) * 8
    width = (width // 8) * 8

    # Generate batch of 10 images
    images = pipe(
        [prompt] * batch_size,
        height=height,
        width=width,
        num_inference_steps=num_inference_steps,
        guidance_scale=guidance_scale
    ).images

    # Save images
    for i, image in enumerate(images):
        image.save(f"./banner/banner_{width}x{height}_{i + 1}.png")

print("Banner generation complete.")
Results:
- The more square the image is the more realistic the quality,
- Oblong shaped images just don't play well with this LLM as far as we are concerned.
- It's not really going to be 'fully automated' its going to be more along the lines of - it generates 20 images and you pick out the top 5 type process - which will need a production chain
- Some output examples, you can see the more oblong it gets the more completely bizarre the LLM generates.
- Square:
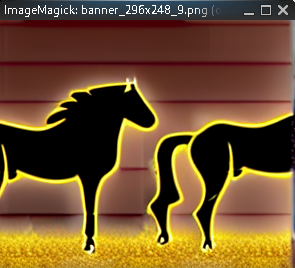
- Oblong (horizontal) ??!

- Oblong (vertical) - Interesting:
Some more outputs:
Summary: This is going to make some very nice images, however getting it to generate ad banners is going to still involve some human work and does not look ready to automated away, and or significant production chain software will need to be created for this.
